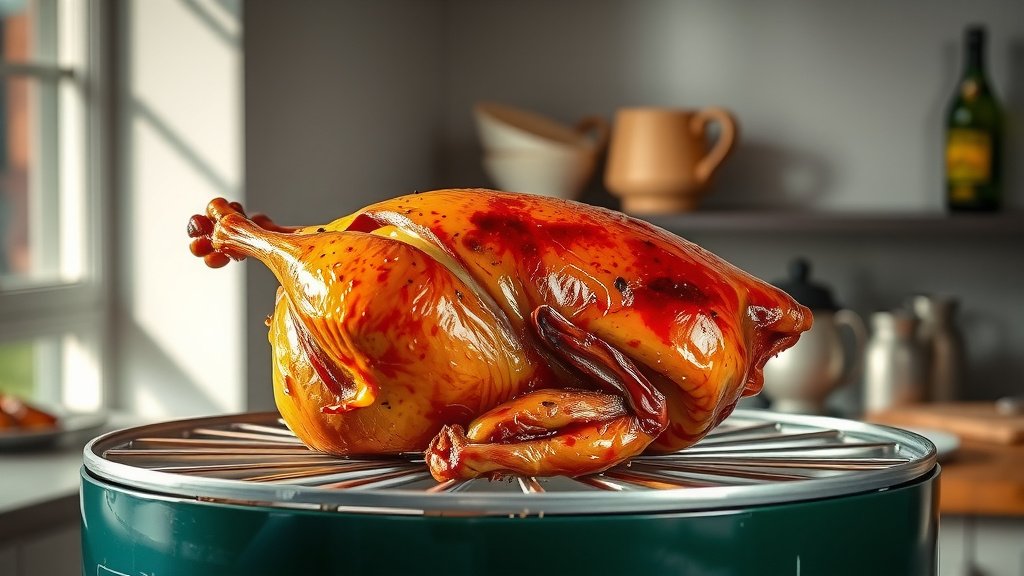
To cook duck on a rotisserie oven, you should prepare the bird by scoring its skin and seasoning generously. Then, truss the duck tightly, secure it on the rotisserie spit, and cook slowly at a moderate temperature until its skin is wonderfully crisp and the meat reaches a safe internal temperature.
The rotisserie method ensures an evenly cooked duck with golden-brown, crispy skin and incredibly moist, succulent meat, making it a fantastic choice for a special meal.
- Prepare your duck by patting it dry and scoring the skin.
- Season the duck generously both inside and out.
- Truss the duck tightly to ensure even cooking and prevent flopping.
- Mount the duck securely on your rotisserie spit.
- Cook at a medium temperature, around 325-350°F (160-175°C), catching the rendered fat below.
- Monitor the internal temperature until it reaches 165°F (74°C) in the thickest part.
- Rest the cooked duck before carving to keep the juices locked in.
How To Cook Duck On A Rotisserie Oven?
Cooking duck on a rotisserie oven involves careful preparation, consistent rotation, and monitoring internal temperature for a delicious, crispy, and moist result. We found that the continuous turning helps the duck self-baste, leading to a perfectly even cook and rendering out fat beautifully.
Why Rotisserie Duck Is a Great Idea
Ever thought about why rotisserie chicken tastes so good? The same magic happens with duck! The slow, even rotation helps the fat render out slowly, creating an incredibly crispy skin while keeping the meat juicy. It’s like a delicious scientific process right in your kitchen.
Choosing Your Duck
When picking a duck, look for a whole Pekin duck, usually 5-7 pounds. These are widely available and have a good meat-to-fat ratio for rotisserie cooking. A fresh duck will always give you the best flavor and texture.
Gathering Your Rotisserie Gear
Before you start, make sure you have all your tools ready. You’ll need your rotisserie kit, a sturdy meat thermometer, and a reliable drip pan. Having everything at hand makes the cooking process smoother, helping you stay organized.
- Rotisserie spit and forks
- Drip pan (aluminum foil pan works great)
- Meat thermometer (instant-read is best)
- Twine for trussing
- Sharp knife for scoring
- Paper towels for drying
Prepping Your Duck for Rotisserie
Proper preparation is the secret to a great rotisserie duck. Start by removing any giblets from the cavity. Then, pat the duck thoroughly dry with paper towels. A dry surface helps the skin get super crispy.
Scoring the Skin: A Must-Do Step
This is crucial for rendering fat and achieving crispy skin. Use a sharp knife to score the duck skin in a crosshatch pattern, but be careful not to cut into the meat. This allows the fat to escape during cooking, making the skin light and crisp (many experts say this step is vital for duck).
Seasoning Your Duck to Perfection
Now for the flavor! Generously season the duck inside and out. Salt and black pepper are essential, but you can also add garlic powder, onion powder, or herbs like thyme and rosemary. Don’t be shy with the seasoning; duck can take a lot of flavor.
Trussing Your Duck: Keeping It Tidy
Trussing is vital for rotisserie cooking. It keeps the wings and legs tucked in close to the body, preventing them from flopping around and cooking unevenly. This ensures the duck rotates smoothly on the spit and cooks uniformly, as research often connects good trussing with better heat distribution (USDA).
Mounting the Duck on the Spit
Carefully push the rotisserie spit through the duck’s cavity, making sure it’s centered. Secure the duck firmly with the rotisserie forks, tightening them well. The duck must be balanced and stable on the spit, or it might wobble and cook inconsistently.
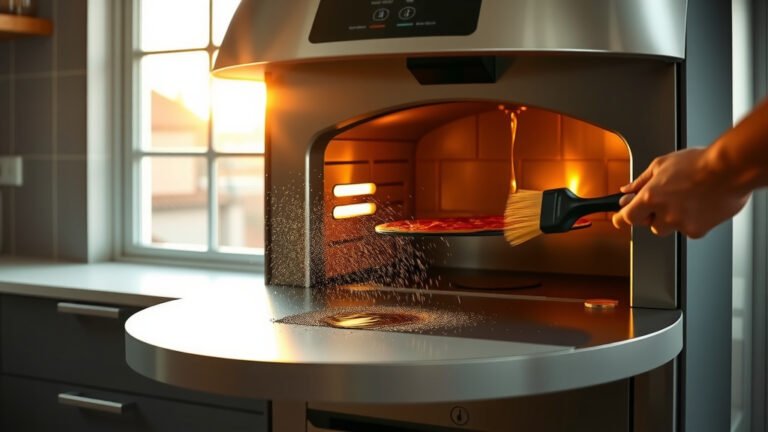
Setting Up Your Rotisserie Oven
Place a drip pan directly beneath where the duck will rotate. This pan will catch all the rendered duck fat, which you can save for delicious roast potatoes later! Preheat your oven or grill with the rotisserie to a moderate temperature.
| Duck Weight | Temperature | Approximate Cooking Time |
|---|---|---|
| 4-5 lbs (1.8-2.3 kg) | 325-350°F (160-175°C) | 1.5 – 2 hours |
| 5-7 lbs (2.3-3.2 kg) | 325-350°F (160-175°C) | 2 – 2.5 hours |
The Rotisserie Cooking Process
Once your oven or grill is preheated, start the rotisserie motor. Cook at a medium heat, around 325-350°F (160-175°C). This allows the fat to render slowly and the skin to crisp up without burning. The duck will turn slowly, basting itself in its own juices and fat.
Monitoring Doneness: Temperature Is Key
Use your meat thermometer to check the internal temperature in the thickest part of the thigh, avoiding the bone. The duck is done when it reaches 165°F (74°C). Don’t rush this step; a perfectly cooked duck is worth the wait.
Achieving Ultra-Crispy Skin
If your skin isn’t as crispy as you’d like in the last 15-20 minutes, you can sometimes crank up the heat slightly to 400°F (200°C) for a short burst. Keep a close eye on it to prevent burning. Remember, a good score and moderate cooking help the most.
Resting Your Cooked Duck
Once the duck reaches the target temperature, remove it from the rotisserie and place it on a cutting board. Tent it loosely with foil and let it rest for at least 15-20 minutes. This resting period allows the juices to redistribute, ensuring a tender and moist result (Mayo Clinic often recommends resting meats after cooking).
Carving Your Masterpiece
After resting, carve your duck like a pro. Start by removing the legs and thighs, then slice the breast meat. Serve immediately and enjoy the fruits of your rotisserie labor. It’s truly a rewarding experience to serve a perfectly cooked duck.
Quick Rotisserie Duck Checklist
- Giblets removed?
- Duck patted dry?
- Skin scored?
- Seasoned thoroughly?
- Trussed securely?
- Mounted and balanced on spit?
- Drip pan in place?
- Meat thermometer ready?
Conclusion
Cooking duck on a rotisserie oven might seem like a grand adventure, but it’s quite straightforward with the right preparation and attention. You’ve learned to score, season, truss, and cook your duck to perfection. The result? A beautiful bird with golden, crispy skin and incredibly juicy meat. Give it a try; your taste buds will certainly thank you!
What kind of duck is best for rotisserie cooking?
Pekin duck is generally considered the best choice for rotisserie cooking. It typically ranges from 5 to 7 pounds, offering a good amount of meat and fat that renders beautifully, leading to crispy skin and moist flesh.
How do I prevent the duck from drying out on the rotisserie?
To prevent drying, cook at a moderate temperature (around 325-350°F), ensure proper trussing for even cooking, and most importantly, remove the duck promptly once the internal temperature reaches 165°F. Resting the duck after cooking is also key to retaining moisture.
Can I reuse the rendered duck fat?
Absolutely! The fat that renders into your drip pan is liquid gold. Once cooled, strain it to remove any solids and store it in an airtight container in the refrigerator. It’s fantastic for roasting potatoes, vegetables, or even making confit.
My duck skin isn’t getting crispy, what went wrong?
Lack of crispiness usually points to insufficient fat rendering or moisture on the skin. Ensure you thoroughly dry and score the duck skin before cooking. Also, make sure your cooking temperature is not too low, which prevents the fat from rendering out effectively.
What internal temperature should rotisserie duck reach?
Your rotisserie duck should reach an internal temperature of 165°F (74°C) in the thickest part of the thigh, away from the bone. Using an instant-read meat thermometer is the most reliable way to check for doneness.