
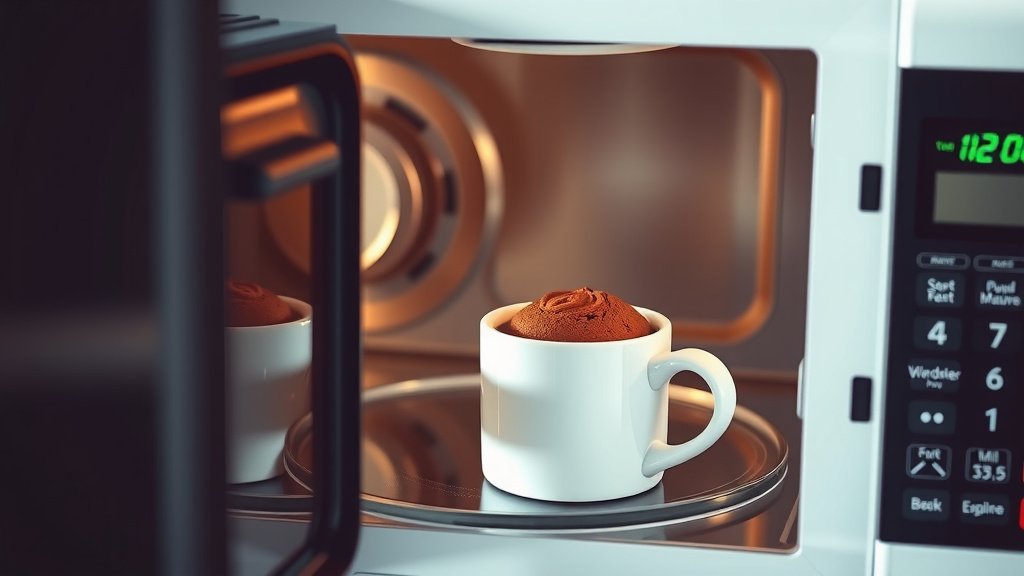
To make a mug cake in a microwave oven, you’ll combine simple dry and wet ingredients directly in a microwave-safe mug, stir them together, and then cook it for 60-90 seconds until risen and set.
This quick method allows you to enjoy a single-serving dessert in just minutes, perfect for when a sweet craving strikes without the fuss of baking a full cake.
TL;DR: Craving cake quickly? Here’s your express pass:
- Grab your favorite microwave-safe mug.
- Mix flour, sugar, cocoa (if chocolate), baking powder, and salt.
- Stir in milk, oil, and vanilla extract until just combined.
- Microwave for 60-90 seconds; don’t overcook.
- Enjoy your warm, personal cake!
How To Make Mug Cake In Microwave Oven?
Making a mug cake in a microwave oven is surprisingly easy. You just mix basic cake ingredients directly in a mug and zap it for about a minute.
It’s the speedy dessert solution for those spontaneous sweet cravings.
Why Choose a Mug Cake?
Have you ever wanted a slice of cake but didn’t want to bake a whole one? Many people feel this way, and mug cakes are the perfect answer. They offer instant gratification.
These individual portions mean no leftovers to tempt you, and clean-up is a breeze. It’s like having a personal baker on standby!
Gather Your Essential Mug Cake Ingredients
Before you begin, let’s look at what you’ll need. You likely have most of these items in your pantry already.
Many recipes we found recommend a blend of dry and wet components for a balanced cake (Food Network).
Dry Ingredients List
- All-purpose flour: The base of your cake.
- Granulated sugar: For sweetness, adjust to your taste.
- Baking powder: This is your leavening agent, making the cake rise.
- Salt: Just a pinch enhances all the flavors.
- Cocoa powder (optional): If you’re dreaming of chocolate.
Wet Ingredients List
- Milk (any kind): Adds moisture and richness.
- Vegetable oil (or melted butter): For tenderness and a moist crumb.
- Vanilla extract: A classic flavor enhancer.
- Eggs (optional, sometimes a quarter egg): Some recipes use this for structure.
Tools for Your Microwave Mug Cake Adventure
You don’t need fancy equipment for this baking project. In fact, that’s part of its charm!
You’ll primarily use items you already have in your kitchen drawers.
What You’ll Need
- A microwave-safe mug: Essential! Make sure it’s suitable for microwave use.
- A small spoon or fork: For mixing your ingredients.
- Measuring spoons and cups: Precision helps, especially for baking powder.
Your Step-by-Step Mug Cake Recipe
Ready to create some magic? This is where the fun begins. Follow these simple steps for a delicious treat.
Remember, baking is a bit like chemistry; following the order helps (Cooking Light).
Step 1: Mix Dry Ingredients
In your chosen microwave-safe mug, combine all the dry ingredients. This usually includes flour, sugar, baking powder, and salt. If you’re making a chocolate cake, add your cocoa powder now.
Whisk these together with a fork until they are well combined and evenly distributed. This prevents pockets of unmixed powder.
Step 2: Add Wet Ingredients and Stir
Next, pour in your wet ingredients: milk, oil, and vanilla extract. If your recipe calls for egg, add it now.
Stir everything gently until just combined. Be careful not to overmix! Overmixing can lead to a tough, rubbery cake, which nobody wants.
Step 3: Microwave Magic Time
Place your mug in the microwave. Cook on high for 60 to 90 seconds. Microwave wattages vary widely, so cooking times will differ.
We found that a high-wattage microwave might need less time, while a lower wattage one could need a bit more. Start with 60 seconds and add 10-15 second bursts if needed.
Expert Tips for Mug Cake Perfection
While mug cakes are forgiving, a few tricks can elevate your experience. These small adjustments can make a big difference.
Consider these points for a consistently great result.
Pick the Right Mug Size
Don’t just grab any mug! A mug that holds 10-12 ounces (about 300-350ml) is often ideal.
Too small, and your cake might overflow; too large, and it might spread out and cook unevenly.
Watch Your Microwave Wattage
This is a big one. Microwaves range from 600 watts to over 1200 watts. This impacts cooking time significantly.
A lower wattage microwave means longer cooking times, while higher wattage needs less time. Adjust accordingly!
Avoid the Overmix Trap
We’ve said it before, but it’s worth repeating: stir until just combined. Lumps are okay!
Too much stirring develops gluten, making your cake dense and chewy instead of light and fluffy.
Don’t Overcook Your Cake
Overcooking is the number one cause of a dry mug cake. You want the cake to be set but still moist.
Many experts say to look for a cake that’s risen and looks barely wet in the center (Serious Eats).
Give It a Moment to Cool
Fresh out of the microwave, your mug cake will be piping hot. Give it a minute or two to cool down.
This cooling time also helps the cake firm up a little and makes it easier to eat.
Delicious Flavor Variations to Explore
The beauty of mug cakes is their versatility. Once you master the basic recipe, the flavor possibilities are endless!
Think of your mug cake as a blank canvas for your culinary creativity.
Chocolate Indulgence
Add a tablespoon of chocolate chips to your batter before cooking. For an extra treat, press a square of chocolate into the center.
It will melt beautifully into a gooey chocolate core.
Vanilla Bean Delight
Boost your vanilla cake with a pinch of nutmeg or cinnamon. You could also stir in some sprinkles for a fun, celebratory look.
A few drops of almond extract can also add a delightful twist.
Fruity Freshness
Mix in a tablespoon of fresh blueberries or raspberries. A small amount of lemon zest can also brighten a vanilla or yellow mug cake.
Just be careful not to add too much liquid from the fruit.
Spiced Warmth
For a cozy flavor, add a dash of cinnamon, ginger, or pumpkin pie spice to your vanilla base. A few chopped walnuts or pecans would also be lovely.
This is perfect for an autumn treat.
Common Mug Cake Challenges Solved
Sometimes, things don’t go exactly as planned. Don’t worry, we’ve all been there! Here are solutions to common mug cake woes.
Understanding these issues helps you become a mug cake master.
Why is my mug cake dry or rubbery?
Most often, a dry or rubbery cake is a sign of overcooking. Try reducing the microwave time by 10-15 seconds next time.
It could also be from overmixing the batter, developing too much gluten.
My cake overflowed in the microwave!
This usually means your mug was too small, or you added too much batter. Leave about an inch of space from the top of the mug to allow for rising.
Ensure you’re using a properly sized mug (10-12 oz is good).
The center is still raw.
This suggests uneven cooking or insufficient time. Check your microwave’s power setting.
Also, make sure your batter is evenly mixed; sometimes unmixed dry spots can cook differently.
Table: Mug Cake vs. Traditional Cake
Let’s quickly compare what makes mug cakes distinct from their larger, oven-baked cousins.
| Feature | Mug Cake | Traditional Cake |
|---|---|---|
| Preparation Time | 5 minutes | 30-60 minutes (or more) |
| Cook Time | 60-90 seconds | 20-40 minutes (oven) |
| Yield | Single serving | Multiple servings |
| Equipment Needed | Mug, fork, microwave | Bowls, mixer, oven, pans |
| Clean-up | Minimal (one mug, one fork) | Significant (multiple dishes) |
| Occasion | Quick craving, individual treat | Parties, celebrations, planned dessert |
Your Quick Mug Cake Prep Checklist
Before you start, run through this simple checklist to ensure you have everything ready for a smooth process.
A little preparation goes a long way in the kitchen!
- Microwave-safe mug selected?
- All dry ingredients measured?
- All wet ingredients measured?
- Fork or spoon ready for mixing?
- Microwave clear and ready to use?
- Any desired mix-ins (chocolate chips, sprinkles) on hand?
Conclusion
Making a mug cake in your microwave oven is a truly delightful and convenient way to satisfy a sweet craving. It’s quick, requires minimal clean-up, and can be customized in endless ways.
By following these simple steps and tips, you’ll be enjoying a warm, delicious, homemade treat in mere minutes. Go ahead, give it a try – your taste buds will thank you!
Can I make a mug cake without baking powder?
While possible, it’s generally not recommended for a fluffy cake. Baking powder is what gives the mug cake its lift and light texture. Without it, your cake might be dense and less appealing.
What kind of mug is best for microwave cakes?
The best mug is a ceramic or glass mug labeled “microwave-safe.” Avoid mugs with metallic rims or designs, as these can spark in the microwave. A larger mug (10-12 oz) helps prevent overflow.
Can I store leftover mug cake?
Mug cakes are best enjoyed immediately after cooking. While you can technically cover and refrigerate leftovers, they tend to dry out quickly and lose their pleasant texture. It’s truly designed as a single-serving, fresh treat.
How do I know when my mug cake is fully cooked?
Your mug cake is usually done when it has risen, looks set around the edges, and the top appears mostly dry. If you gently poke the center, it should spring back slightly. A slight moistness in the very center is often okay and indicates a good, tender texture.
Can I use gluten-free flour for mug cakes?
Yes, you can often substitute gluten-free all-purpose flour blends in mug cake recipes. However, you might need to adjust the liquid slightly, as gluten-free flours can absorb liquids differently. Expect a slightly denser texture compared to cakes made with wheat flour.
