To cook duck in a single wall oven, you typically start with a high temperature, like 400°F (200°C), to render fat and crisp the skin, then reduce the heat to about 350°F (175°C) to finish cooking through.
Ensure your duck is thawed, scored, and seasoned well before placing it on a rack in a roasting pan to allow fat to drip away efficiently in your single wall oven.
Here’s a quick overview of how to cook duck in your oven:
- Thaw your duck completely in the refrigerator; this can take a day or two for a whole duck.
- Score the duck skin in a crosshatch pattern without cutting into the meat.
- Season generously with salt, pepper, and your favorite herbs or spices.
- Start roasting at a high temperature (400°F/200°C) for 15-20 minutes to crisp the skin.
- Lower the oven temperature to 350°F (175°C) and continue cooking until the internal temperature reaches 165°F (74°C).
- Rest the duck for at least 15-20 minutes after cooking for juicy results.
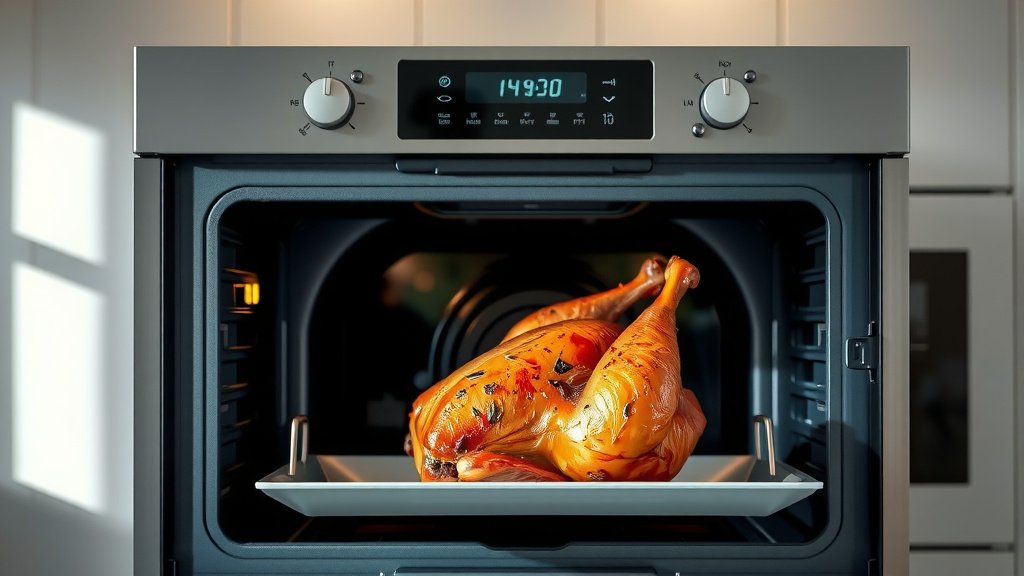
How To Cook Duck In A Single Wall Oven?
Cooking duck in a single wall oven involves carefully managing temperature to achieve crispy skin and tender, moist meat. You begin with a blast of high heat to render the fat, then settle into a moderate temperature to cook it thoroughly.
Preparing Your Duck for Roasting
Before any heat hits your duck, proper preparation is key. First, ensure your duck is fully thawed. Many culinary experts say a slow thaw in the refrigerator is best for food safety (USDA Food Safety).
Pat the duck very dry with paper towels. This step is a small but mighty secret for super crispy skin later on. Excess moisture prevents browning, you see.
Scoring the Duck Skin
Next comes the scoring. With a sharp knife, gently score the duck skin in a crosshatch pattern. Try not to cut into the meat itself. We found this allows the fat to render out more easily, leading to that irresistible crispy texture.
Many chefs agree that scoring helps achieve beautiful, even browning. Think of it like creating tiny escape routes for the duck fat as it melts.
Seasoning Your Duck Perfectly
Salt and pepper are your best friends here. Be generous! You can also add garlic powder, onion powder, or a hint of five-spice powder for extra flavor. Rub your seasonings all over the duck, inside and out.
Some people like to stuff the cavity with aromatics like half an onion, an orange, or fresh thyme. This can infuse the meat with subtle flavors as it cooks.
Setting Up Your Single Wall Oven
Your single wall oven might feel compact, but it’s perfect for roasting duck. Place an oven rack in the middle position. This ensures even heat distribution around your bird, whether it’s a whole duck or just breasts.
Always preheat your oven fully. A cold oven will not give you the same results, especially for that initial skin crisping stage. Give it at least 20 minutes to reach the target temperature.
Choosing the Right Roasting Pan
Select a sturdy roasting pan that’s large enough for your duck. You’ll want one with sides, of course, to catch all that rendered fat. Many home cooks use a V-rack or a simple metal rack inside the roasting pan.
Using a rack keeps the duck elevated. This allows air to circulate around the duck and lets the fat drip into the pan below. If the duck sits directly in its fat, the skin won’t crisp up properly.
The Roasting Process: High Heat First
Now, for the exciting part! Place your prepared duck, breast-side up, on the rack in your preheated 400°F (200°C) oven. This initial high heat stage is essential for starting the fat rendering process.
Roast at this temperature for about 15-20 minutes. You’ll notice the skin starting to bubble and turn golden. This quick burst of heat does wonders for the duck skin.
Lowering the Temperature for Through Cooking
After the initial high-heat period, reduce your oven temperature to 350°F (175°C). This gentler heat will cook the duck through without burning the skin. The goal is tender meat and continued fat rendering.
The total cooking time will depend on the size of your duck. A 5-pound duck might take around 2-2.5 hours. Always refer to an internal thermometer, which we’ll discuss next.
Checking for Doneness Safely
To ensure your duck is cooked perfectly and safely, use a meat thermometer. Insert it into the thickest part of the thigh, avoiding the bone. Many food safety guidelines suggest an internal temperature of 165°F (74°C) for poultry (USDA).
Some prefer duck a little less done, closer to 145°F (63°C), but for maximum safety, especially with whole birds, 165°F is recommended. You want a clear juice to run out when you poke it.
The Importance of Resting Your Duck
Once your duck reaches the desired internal temperature, remove it from the oven. Tent it loosely with foil and let it rest for at least 15-20 minutes before carving. This step is not optional, trust us!
Resting allows the juices to redistribute throughout the meat. If you cut into it too soon, those precious juices will run out, leaving you with drier meat. Patience truly pays off here.
Troubleshooting Common Duck Roasting Issues
What if your skin isn’t crispy? Or the duck feels dry? We’ve all been there! Make sure you scored the skin properly and dried it thoroughly beforehand. Also, ensure your oven wasn’t overcrowded.
If your duck seems dry, perhaps it cooked too long or at too high a temperature throughout. A meat thermometer helps avoid this. Many experts suggest brining larger birds for extra moisture.
Dealing with Rendered Duck Fat
You’ll likely have a good amount of rendered duck fat in your roasting pan. Don’t discard it! This golden liquid is a culinary treasure. Carefully pour it into a heatproof container through a fine-mesh sieve.
Once cooled, store it in the refrigerator. We found that duck fat keeps well for months and is fantastic for roasting potatoes, vegetables, or even making confit. It adds incredible flavor.
A Quick Checklist for Perfect Duck
- Thaw duck completely.
- Pat skin bone-dry.
- Score skin, not meat.
- Season generously.
- Preheat oven fully.
- Use a roasting rack.
- Monitor internal temperature.
- Rest duck before carving.
Duck Roasting Times & Temperatures Guide
Here’s a general guide for cooking duck in your single wall oven. Remember these are estimates, and oven calibration can vary. Always use a meat thermometer!
| Duck Type/Size | Initial Temp/Time (approx.) | Finish Temp/Time (approx.) | Target Internal Temp |
|---|---|---|---|
| Whole Duck (5-6 lbs) | 400°F (200°C) for 15-20 min | 350°F (175°C) for 1.5-2 hours | 165°F (74°C) |
| Duck Breast (single) | 375°F (190°C) for 15-20 min | N/A (sear first, then oven) | 145°F (63°C) for medium-rare |
| Duck Legs (thighs) | 400°F (200°C) for 20 min | 375°F (190°C) for 45-60 min | 175-180°F (79-82°C) for tenderness |
Conclusion
Cooking duck in a single wall oven is absolutely achievable and can yield delicious results. By following these steps—from proper preparation and scoring to managing your oven temperatures and resting the bird—you’re set for success. You will create a dish that’s impressive yet surprisingly straightforward. Enjoy your crispy-skinned, succulent duck!
Frequently Asked Questions
How long does it take to cook a whole duck in a single wall oven?
A typical 5-6 pound whole duck can take around 2 to 2.5 hours to cook in a single wall oven, starting at a higher temperature and then reducing it. Always aim for an internal temperature of 165°F (74°C) in the thigh.
Can I cook duck from frozen in my oven?
No, it’s not recommended to cook duck from frozen. For the best and safest results, always thaw your duck completely in the refrigerator before cooking. Cooking from frozen can lead to uneven cooking and food safety risks.
What should I do with the fat rendered from cooking duck?
The rendered duck fat is highly prized! Strain it through a fine-mesh sieve into a clean, heatproof container. Once cooled, store it in the refrigerator. It’s excellent for roasting vegetables, potatoes, or even making savory pastries.
Why is my duck skin not getting crispy in the oven?
Several factors might prevent crispy duck skin. Ensure you patted the duck very dry before cooking and scored the skin deeply without cutting the meat. Also, make sure the duck is elevated on a rack in your roasting pan so the fat can drip away, preventing it from boiling in its own juices.
Do I need to flip the duck while it’s cooking in the oven?
Generally, you don’t need to flip a whole duck while it’s roasting. Placing it breast-side up on a rack allows the heat to circulate and the fat to render properly. Flipping can sometimes tear the skin or make it harder to achieve even browning on the breast.