To clean a rotisserie oven effectively, first let it cool completely, then remove all removable parts like the spit and drip tray for soaking and washing.
Then, wipe down the interior with a warm, soapy cloth and a degreaser for stubborn grease, rinsing thoroughly to remove all cleaning product residue.
Here’s the quick rundown for a sparkling clean rotisserie oven:
- Always let your oven cool down before you start cleaning. Safety first!
- Remove all inner parts and let them soak in warm, soapy water.
- Wipe the inside of the oven using a degreaser and a soft cloth.
- Rinse thoroughly to remove all cleaning solutions.
- Dry everything completely before reassembling or using again.
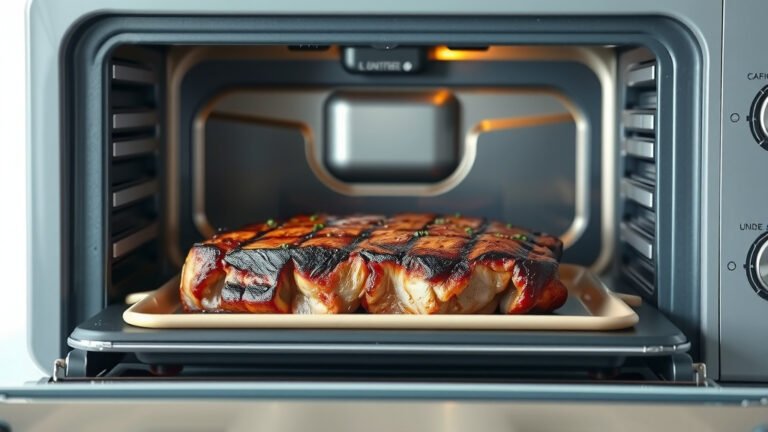
How To Clean A Rotisserie Oven?
Cleaning your rotisserie oven involves safely dismantling components, removing baked-on grease with a degreaser, and meticulous rinsing to maintain hygiene and performance.
Why Regular Cleaning Matters for Your Rotisserie Oven
Do you love crispy, juicy rotisserie chicken? We certainly do! A clean oven is key to consistent results. Think of it like this: would you cook in a dirty pan? Probably not!
Many experts say that regular cleaning prevents grease buildup. This buildup can make your oven less efficient. It can also cause unwanted smells or even smoke during cooking.
Maintaining a clean oven also extends its lifespan. You’ve invested in this kitchen tool, so let’s help it last. It’s all about protecting your appliance and your delicious meals.
What You’ll Need for a Sparkly Clean
Before you dive in, gather your supplies. Having everything ready saves time and makes the job smoother. You don’t want to be halfway through scrubbing and realize you’re missing something.
Here’s a quick checklist:
- Rubber gloves (to protect your hands)
- Warm water
- Dish soap or a mild detergent
- Microfiber cloths or soft sponges
- A good quality degreaser (oven-safe)
- Baking soda (optional, for natural cleaning)
- White vinegar (optional, for rinsing)
- Scrub brush (non-abrasive)
- Old newspaper or paper towels (for spills)
Step-by-Step Cleaning Guide for Your Rotisserie Oven
Ready to get started? We’ll walk you through each step. It’s not as daunting as it might seem. Just take it one part at a time, like untangling holiday lights.
Step 1: Safety First – Unplug and Cool Down
This is the most important step. Always unplug your rotisserie oven from the power outlet. Why? Electricity and water do not mix safely. It’s a simple rule for kitchen safety.
Next, let the oven cool completely. Hot surfaces can cause burns. Research shows that waiting about an hour after use is generally safe (National Fire Protection Association). Patience here is a virtue!
Step 2: Remove Removable Parts
Once cooled, carefully remove all the parts you can. This usually includes the rotisserie spit, forks, drip tray, and any racks. Each oven is a bit different, so check your manual.
These parts often hold the most grease. Taking them out makes the rest of the cleaning much easier. It’s like taking off your shoes before entering the house.
Step 3: Soak and Scrub Accessories
Fill your sink or a large basin with warm water and a good squirt of dish soap. Place all the removed parts into this soapy water. Let them soak for at least 15-20 minutes.
Soaking helps to loosen baked-on grease. After soaking, use your scrub brush or sponge to gently remove food residue. For really stuck-on bits, a paste of baking soda and water can work wonders.
- Submerge all detached components in warm, soapy water.
- Allow parts to soak for 15 to 20 minutes to soften grease.
- Scrub gently with a non-abrasive brush or sponge.
- For stubborn areas, apply a baking soda paste.
- Rinse each part thoroughly under running water.
Step 4: Tackle the Interior – Degrease and Wipe
Now, for the main oven cavity. Spray an oven-safe degreaser onto the interior surfaces. Be sure to avoid the heating elements. We found that letting the degreaser sit for a few minutes helps it work better.
Using a damp microfiber cloth or sponge, wipe down the inside walls, ceiling, and floor. You might need to repeat this step for very greasy spots. Imagine wiping down a greasy stovetop – same idea!
Step 5: Don’t Forget the Exterior
The outside of your oven also deserves some attention. Wipe down the control panel and door with a damp cloth. A little window cleaner can make the glass door sparkle, too.
Avoid getting water into any electrical vents. It’s a quick wipe-down, not a deep scrub. A clean exterior gives your whole kitchen a lift.
Step 6: The All-Important Rinse
This step is often overlooked. You must remove all cleaning product residue. Any leftover soap or degreaser can cause fumes when you cook next time. That’s certainly not what you want.
Use a clean, damp cloth to wipe down all interior surfaces multiple times. Rinse the cloth often. Keep wiping until you are sure no cleaner remains. Your nose will tell you if you missed a spot.
Step 7: Dry Everything Thoroughly
Finally, dry all parts and the interior completely. You can use a clean, dry towel. Letting it air dry with the door ajar works well too. Make sure there’s no moisture lingering.
Why dry? Moisture can lead to rust over time. It can also cause issues if the oven is turned on with water inside. A little extra drying time now saves trouble later.
Tough Grease? Here’s What to Do
Sometimes, grease becomes incredibly stubborn. It happens! Don’t fret. There are a few tricks you can try when faced with a really sticky situation.
Natural Cleaning Solutions
Many homeowners prefer natural options. A paste of baking soda and a little water can be spread on very greasy areas. Let it sit for 15-30 minutes, then scrub gently.
For extra power, spray white vinegar over the baking soda. It will fizz! This reaction helps to lift the grease. This method is generally safe for most oven surfaces (Environmental Working Group).
Commercial Degreasers
For truly tough, baked-on grease, a heavy-duty commercial oven degreaser might be necessary. Always read the product instructions carefully. They often require good ventilation.
Be cautious with these stronger cleaners. They can be harsh. Always wear gloves and follow safety guidelines. Remember, a little goes a long way with these powerful solutions.
Cleaning Schedule: How Often Is Enough?
How often should you clean your rotisserie oven? It really depends on how much you use it. A good rule of thumb is to clean it after every few uses for light grime. For heavier use, more often.
Here’s a quick guide based on usage:
| Oven Usage | Cleaning Frequency | Notes |
|---|---|---|
| Once a month or less | Every 2-3 uses | Light wipe-down and parts soak. |
| Once a week | After every use | Quick clean to prevent buildup. |
| Several times a week | After every use (deep clean weekly) | Frequent light cleaning, weekly deep clean. |
Listening to your oven is also a good indicator. If you see smoke, smell grease, or notice residue, it’s time for a cleaning. You want your food to taste like food, not old grease.
Common Mistakes to Avoid While Cleaning
We’ve all made cleaning blunders. To help you steer clear, here are a few common pitfalls:
- Cleaning a hot oven: This is dangerous! Always wait for it to cool completely.
- Using abrasive scrubbers: These can scratch your oven’s surfaces. Stick to soft sponges or cloths.
- Not rinsing thoroughly: Leftover cleaner can cause fumes or affect food taste. Rinse, rinse, rinse!
- Getting water into electrical parts: Be very careful around wires and heating elements.
- Delaying cleaning: The longer grease sits, the harder it is to remove. Clean sooner rather than later.
Conclusion
Cleaning your rotisserie oven might not be the most exciting task, but it’s essential. A clean oven means safer operation, better-tasting food, and a longer life for your appliance. By following these practical steps, you can keep your rotisserie oven in top condition.
Remember, patience and the right tools are your best friends. Take care of your oven, and it will keep delivering delicious, perfectly cooked meals for years to come. Happy cooking and happy cleaning!
What kind of cleaner is best for rotisserie ovens?
A mild dish soap for general cleaning and an oven-safe degreaser for tougher grease spots work very well. Natural options like baking soda and white vinegar are also effective for many issues.
Can I put rotisserie oven parts in the dishwasher?
Some removable parts, like drip trays and racks, might be dishwasher safe. Always check your specific oven’s user manual first. Delicate items like the spit assembly are often best washed by hand.
How do I remove burnt-on food from the heating elements?
It’s generally recommended not to clean heating elements with liquids or harsh scrubbers. If food is burnt on, you can often gently brush off loose debris once the oven is completely cool and unplugged. Consult your manual for specific care instructions, as vigorous cleaning can damage elements.
Is it safe to use steel wool inside a rotisserie oven?
No, it is not recommended to use steel wool or other abrasive scrubbers. These can scratch the oven’s non-stick coatings or stainless steel surfaces, making future cleaning harder and potentially damaging the finish. Always opt for soft cloths or non-abrasive brushes.
What if my rotisserie oven still smells after cleaning?
If your oven still has an odor after cleaning, it might be due to residual cleaning products or very deep-seated grease you missed. Try rinsing again thoroughly. You can also place a bowl of white vinegar or a cut lemon inside, heat the oven on a low setting for a short time (with the oven door ajar or off), and then let it cool before wiping it down again. Always ensure proper ventilation when doing this.