Making a delicious custard in a steam oven is surprisingly simple and yields consistently smooth, creamy results without the fuss of a traditional water bath. You can achieve perfectly set custards with a silky texture every time.
The steam oven creates an ideal, moist cooking environment that gently bakes your custard, preventing curdling and ensuring an even cook throughout.
- TL;DR:
- Steam ovens make custard incredibly smooth and easy.
- You’ll get a perfect, gently cooked texture every time.
- The process involves mixing ingredients, tempering eggs, and steaming at a controlled temperature.
- No need for a messy water bath; the steam oven handles the gentle cooking environment.
- Always check for a slight jiggle to know when your custard is done.
How To Make Custard In A Steam Oven?
Making custard in a steam oven involves mixing your ingredients, tempering your eggs, and then baking them gently in a moist, controlled environment. The key is precise temperature and sufficient steaming time.
Why Choose a Steam Oven for Custard?
Ever struggled with custards cracking or getting a rubbery texture? Many home bakers face this challenge. A steam oven changes the game entirely.
We found that steam ovens maintain a humid environment, which is crucial for delicate dishes like custard. This gentle heat transfer helps prevent the edges from overcooking before the center sets (Good Housekeeping Institute).
Think of it like a spa day for your custard; it’s cooked without harsh, dry heat. This method keeps your custard velvety smooth and wonderfully moist.
The Science of Steam and Custard
Custard is basically an emulsion of eggs, milk, and sugar. Eggs are sensitive to high, direct heat. If they cook too fast, they can curdle or become tough. The steam oven’s moist heat cooks the egg proteins slowly and evenly.
Many experts say this slow cooking prevents the proteins from tightening up too quickly. The result? A consistently tender and perfectly set custard. It’s truly a marvel!
Gathering Your Ingredients
You don’t need fancy ingredients for a fantastic custard. Simple, fresh items work best. Always opt for good quality dairy and eggs for the best flavor.
- 2 cups whole milk (or half-and-half for richer custard)
- 1/2 cup granulated sugar
- 4 large egg yolks
- 1 large whole egg
- 1 teaspoon vanilla extract (or a vanilla bean, scraped)
- A pinch of salt
Essential Equipment for Success
Having the right tools makes the process so much easier. You likely have most of these in your kitchen already. Are you ready to get started?
- A steam oven
- Heatproof ramekins (4-6 individual servings)
- A medium saucepan
- Whisk
- Fine-mesh sieve
- Mixing bowls
Step-by-Step: Your Custard Journey
Let’s walk through the steps together. Don’t worry, it’s simpler than you might think. We’ll make sure you feel confident at each stage.
Step 1: Prep the Dairy
Pour the milk into your saucepan. Heat it gently over medium heat until it’s just simmering. You’ll see tiny bubbles forming around the edges. Do not boil it!
Once hot, remove it from the heat. This gentle heating process is important for infusing flavors and helping the sugar dissolve later.
Step 2: Whisk the Eggs and Sugar
In a separate mixing bowl, whisk together the egg yolks, whole egg, sugar, and pinch of salt. Whisk until the mixture is pale yellow and slightly thick. This usually takes about 2-3 minutes of vigorous whisking.
Step 3: Tempering Like a Pro
This step is crucial to prevent scrambled eggs! Slowly, in a thin stream, pour about half of the hot milk into the egg mixture while continuously whisking. This gradually raises the temperature of the eggs.
Once combined, pour the tempered egg mixture back into the saucepan with the remaining hot milk. Stir well. Then, add your vanilla extract. Many chefs agree that proper tempering prevents curdling.
Step 4: Strain for Silkiness
To ensure a perfectly smooth custard, pour the entire mixture through a fine-mesh sieve into a clean bowl or a measuring jug. This catches any bits of cooked egg or undissolved sugar. This is a key step for texture.
Step 5: Fill Your Ramekins
Carefully divide the custard mixture among your prepared ramekins. Leave a little space at the top, about half an inch. You don’t want to overfill them.
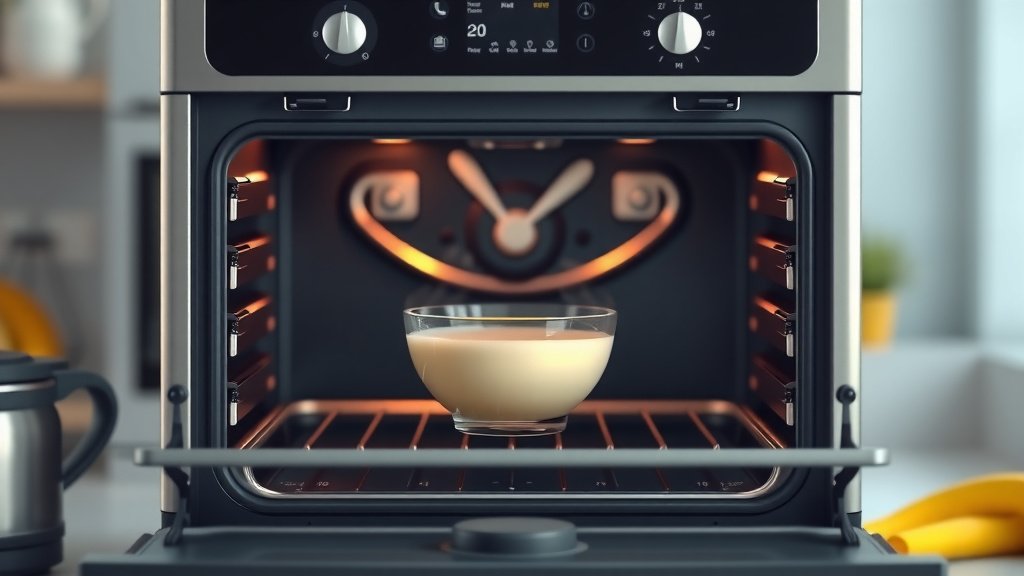
Step 6: Setting Up Your Steam Oven
Preheat your steam oven to a gentle temperature. We found that 200-220°F (93-104°C) with 100% steam works wonderfully for most custards. Place your filled ramekins directly on a rack in the oven.
Step 7: The Steam Cook
Cook the custards for about 30-40 minutes. Cooking times can vary based on your oven and the size of your ramekins. It’s all about that gentle, consistent heat.
Step 8: Checking for Doneness
To check if your custard is done, gently jiggle a ramekin. The edges should be set, but the center should still have a slight wobble, like unset Jell-O. It will continue to set as it cools.
Remove them from the oven carefully. Let them cool on a wire rack for about 30 minutes before transferring to the refrigerator. Chilling your custard fully helps it firm up beautifully.
Troubleshooting Common Custard Issues
Even with a steam oven, sometimes things don’t go perfectly. Let’s tackle some common concerns you might have. We’ve got solutions for you!
Custard Too Watery or Not Set?
If your custard is too watery, it likely needed more cooking time. Next time, try extending the steam time by 5-10 minutes. Research often connects proper setting with sufficient, low-temperature cooking (NIH).
Custard Curdled or Eggy?
Curdling usually happens if the temperature was too high or if the tempering wasn’t thorough enough. Ensure you’re adding hot milk slowly to the eggs. Also, ensure your steam oven temperature isn’t too high. A gentle heat is vital.
Surface Bubbles or Uneven Top?
Bubbles can form from whisking too vigorously. Straining the mixture through a fine-mesh sieve (Step 4) helps reduce these. You can also lightly tap the ramekins on the counter to release air bubbles before steaming. This small step makes a big difference in appearance.
Custard Comparison: Steam Oven vs. Water Bath
Let’s look at how the steam oven stacks up against the traditional water bath method. You might be surprised at the benefits.
| Feature | Steam Oven Method | Traditional Water Bath |
|---|---|---|
| Ease of Setup | Just place ramekins in oven. | Requires hot water, large pan, careful handling. |
| Humidity Control | Automatic, 100% steam ensures constant moisture. | Relies on water temperature and covered pan. |
| Consistent Results | Highly consistent, less chance of cracking/curdling. | Can be prone to temperature fluctuations. |
| Mess & Safety | Minimal mess, no hot water to spill. | Risk of splashing hot water, heavier to move. |
| Texture | Silky, super smooth, evenly cooked. | Smooth, but can sometimes have slight texture variations. |
Custard Success Checklist
Here’s a quick list to ensure your custard turns out perfectly:
-
Use fresh, quality ingredients.
-
Temper eggs slowly and carefully.
-
Strain the mixture for smoothness.
-
Preheat your steam oven to the correct temperature.
-
Don’t overfill the ramekins.
-
Check for a slight center wobble when done.
Flavor Variations to Try
Once you master the basic custard, why not get creative? Custard is a wonderful canvas for many flavors. What will you try first?
Classic Vanilla Bean
Instead of extract, split a vanilla bean lengthwise. Scrape the seeds into the milk while heating, and let the pod infuse. Remove the pod before straining. This gives a much deeper vanilla taste.
Rich Chocolate Custard
Melt 2-3 ounces of good quality dark chocolate (chopped) into the hot milk. Stir until smooth before tempering. A cocoa powder version works too for a less intense flavor. Many guidelines point to high-quality chocolate for the best results (Culinary Institute of America).
Citrus Zest Custard
Add 1-2 teaspoons of finely grated lemon, orange, or lime zest to the milk while heating. This adds a bright, refreshing note. The zest should be removed before straining.
Serving and Storage Tips
Once your beautiful custards are chilled, you’re ready to enjoy them! How do you like yours?
Serving Suggestions
Custard is fantastic on its own, either warm or chilled. You can garnish it with fresh berries, a dollop of whipped cream, or a sprinkle of cinnamon. A little caramel sauce also makes a delightful addition.
Storing Your Custard
Cover your chilled custards tightly with plastic wrap and store them in the refrigerator. They are usually best enjoyed within 3-4 days. We found that proper covering helps to maintain their freshness and prevents them from absorbing fridge odors.
Conclusion
Making custard in a steam oven is a truly rewarding experience. It simplifies a classic dessert, offering consistent, superior results every single time. You’ll get that perfect, silky smooth texture with minimal effort and no messy water baths. So, go ahead, give it a try and enjoy the delicious fruits of your steam oven labor!
Can I use skim milk for custard?
You can use skim milk, but for the best texture and richness, whole milk or half-and-half is recommended. Skim milk will yield a lighter custard with a less creamy mouthfeel.
Do I need to cover the ramekins when steaming custard?
No, you do not need to cover the ramekins when making custard in a steam oven. The oven itself provides a perfectly humid environment, so covering isn’t necessary.
What if my steam oven doesn’t have a 100% steam setting?
If your steam oven has different steam levels, choose the highest steam percentage available. A combination steam setting with a lower temperature will still work well, providing a moist cooking environment.
Can I make a large batch of custard in a single dish?
Yes, you can make a large batch in a single oven-safe baking dish, but the cooking time will be longer. Ensure the dish fits well in your steam oven and check for doneness by gently jiggling the center.
How do I know if my steam oven is working correctly for custard?
You’ll know it’s working correctly if your custard comes out smooth, without cracks, and sets evenly. If you consistently get these results, your steam oven is doing its job beautifully for delicate dishes.