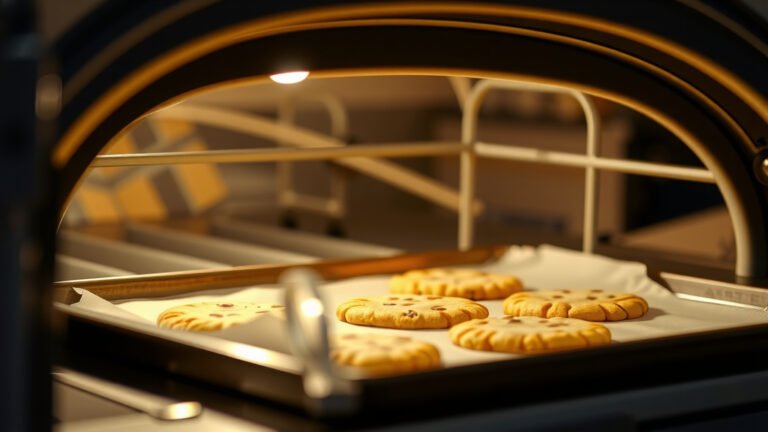
Using the proof setting in a single wall oven creates the ideal warm, humid environment to help yeast dough rise consistently and perfectly every time.
You activate the proof mode, place your covered dough inside, and let your oven work its magic to achieve a beautiful rise.
Here’s the quick scoop on using your oven’s proof setting:
- The proof setting provides a low, steady temperature (around 80-95°F) for yeast dough to rise perfectly.
- Always cover your dough with plastic wrap or a damp cloth to prevent drying out during proofing.
- You might need to add a shallow pan of hot water to the oven for extra humidity if your dough dries out easily.
- Check your dough regularly; proofing times can vary based on yeast type and kitchen temperature.
- A gently poked dough that springs back slowly is usually ready for baking.
How To Use Proof Setting In Single Wall Oven?
To use the proof setting, you simply place your prepared dough in the oven, select the “Proof” mode on your oven’s control panel, and allow it to rise.
This setting offers a consistent, low heat that’s perfect for activating yeast and developing your dough’s texture.
What Exactly Is an Oven Proof Setting?
Have you ever struggled to get your bread dough to rise just right? The proof setting is your oven’s secret weapon for perfect baking.
It’s a specialized function designed to maintain a low, consistent temperature, usually between 80-95°F (27-35°C), which is ideal for yeast activity.
Think of it as a cozy, warm blanket for your dough, encouraging the yeast to ferment and create those lovely air pockets.
Why Does Your Oven Even Have This Feature?
Many modern single wall ovens include a proof setting because bakers often face inconsistent kitchen temperatures. A chilly kitchen can slow yeast activity, leading to dense bread.
Conversely, a spot that’s too warm might over-proof the dough, making it collapse. Your oven offers a controlled environment, taking the guesswork out of rising.
We found that many professional bakers appreciate this setting for its ability to deliver consistent results, regardless of the season (Culinary Institute of America guidelines).
Prepping Your Dough Before Proofing
Before your dough enters its warm sanctuary, a little prep goes a long way. First, make sure your dough is in a bowl that provides enough space for it to double in size.
Lightly grease the bowl to prevent sticking, then turn the dough over once to coat it in the oil.
Always cover your dough. You can use plastic wrap, a clean kitchen towel, or even a damp cloth. This prevents a dry crust from forming, which can hinder the rise.
Step-by-Step Guide: Using Your Oven’s Proof Setting
Ready to give your dough the VIP treatment? It’s simpler than you might think.
Placing Your Dough Safely
Once your dough is in its bowl and covered, place it directly onto the oven rack. Make sure there’s enough headroom for it to rise without touching the top of the oven.
You want to position it in the center for even exposure to the gentle heat. Some experts even suggest placing a shallow pan of hot water on the bottom rack for added humidity.
Activating the Proof Mode
Close your oven door. Now, look for the “Proof” button on your oven’s control panel. It might be labeled “Proof,” “Bread Proof,” or something similar.
Press the button to activate the setting. Your oven will then gently heat to the optimal proofing temperature and maintain it.
Monitoring the Magic
Proofing times vary based on your recipe, yeast type, and even the flour you’re using. Many recipes call for 30-60 minutes for the first rise, sometimes longer for the second.
Keep an eye on your dough. It’s not about the clock, but how the dough looks and feels. You’ll want it to roughly double in size.
Achieving Ideal Temperature and Humidity
The proof setting is designed to hit that sweet spot of temperature for yeast activity. However, some doughs, especially those with lower hydration, might benefit from extra humidity.
Research suggests that a humid environment helps keep the dough’s surface pliable, allowing for a better, more even rise (Journal of Food Science).
If your oven doesn’t automatically add humidity, simply place a small, oven-safe bowl of hot water on the oven floor or lower rack when you start the proof setting.
Different Doughs, Different Proofs
Not all doughs are created equal, and their proofing needs can vary slightly. A rich brioche dough, for instance, might take longer to rise than a lean baguette dough.
Here’s a quick overview of how different doughs might proof:
| Dough Type | Typical Proof Time | Humidity Tip |
|---|---|---|
| Standard Bread Dough | 45-90 minutes | Good with standard proof setting |
| Pizza Dough | 30-60 minutes | Can benefit from added humidity |
| Enriched Dough (Brioche, Challah) | 90-180 minutes | Often needs longer, consistent heat |
| Sourdough Starter | 2-4 hours | Higher humidity is a plus |
How to Tell If Your Dough Is Ready
So, your dough has been sitting in its cozy oven. How do you know it’s ready for the next step?
The most common indicator is that the dough has roughly doubled in size. It should look puffy and feel airy.
Another classic test is the “poke test”: gently press two fingers about half an inch into the dough. If the indent slowly springs back halfway, your dough is generally ready. If it springs back immediately, it needs more time. If it collapses, it might be over-proofed.
Common Proofing Pitfalls to Steer Clear Of
Even with a proof setting, a few missteps can happen. One common issue is **over-proofing**. This occurs when the dough rises too much, and the yeast eventually runs out of food.
The dough can then collapse in the oven, resulting in a dense, crumbly texture. Conversely, **under-proofing** means the dough hasn’t risen enough, leading to a heavy, brick-like bread.
Always aim for that sweet spot. Remember, the goal is “doubled in size” and “springs back halfway” for the poke test.
Troubleshooting When Proofing Goes Wrong
What if your dough just isn’t rising, even in the proof setting? First, check your yeast. Is it fresh and active? Expired yeast is a common culprit.
Also, ensure your water temperature (if adding to the dough) wasn’t too hot, which can kill yeast. If the oven seems off, check its calibration; sometimes, the internal thermostat might be slightly inaccurate.
Many experts recommend a separate oven thermometer to verify the proof setting’s actual temperature (Baking Industry Association).
A Quick Checklist for Flawless Proofing
To make sure your next proofing session is a success, here’s a handy checklist:
- Dough is in a generously sized, lightly oiled bowl.
- Dough is properly covered to prevent drying.
- Proof setting is activated on your oven.
- A pan of hot water is added for humidity (if needed).
- Dough is monitored for doubling in size.
- Poke test is performed to confirm readiness.
Conclusion
Using the proof setting in your single wall oven is a straightforward and incredibly effective way to ensure your homemade bread and other yeast-based delights rise consistently and beautifully.
It takes the uncertainty out of finding a warm spot in your kitchen, providing a reliable environment for yeast to do its best work. By following these simple steps, you’ll be well on your way to baking perfectly proofed, delicious creations every time. Happy baking!
Frequently Asked Questions About Oven Proofing
Can I leave the dough in the oven with the proof setting on overnight?
No, leaving dough in the proof setting overnight is generally not recommended. The proof setting maintains an optimal warm temperature, which would likely cause your dough to over-proof significantly and eventually collapse, making it unsuitable for baking.
What if my oven doesn’t have a specific “Proof” setting?
If your oven lacks a dedicated proof setting, you can still create a warm environment. Turn your oven on to its lowest setting (often around 170-200°F or 75-95°C) for just 1-2 minutes, then turn it off. Place your covered dough inside with the oven light on, which generates a little extra warmth. You can also place a bowl of hot water inside for humidity.
Should I remove the dough from the oven once it’s proofed?
Yes, once your dough has proofed to the desired state (usually doubled in size and passes the poke test), you should remove it from the oven. This allows you to preheat the oven to the higher temperature required for baking, while also preventing the dough from continuing to over-proof.
Does the proof setting use a lot of electricity?
The proof setting typically uses very little electricity compared to baking. It only requires a small amount of energy to maintain a low, consistent temperature, similar to keeping a light bulb on for an extended period. It’s quite energy-efficient for the task it performs.
Can I proof different types of dough at the same time in the oven?
Yes, you can proof different types of dough simultaneously in your oven, as long as there is enough space and they all require similar proofing conditions (temperature and humidity). However, be mindful that different doughs might have varying proofing times, so you’ll need to monitor each one individually for readiness.