Yes, you absolutely can dry herbs in a toaster oven, especially for small batches. It’s a convenient method when you want to preserve your garden’s bounty without a dedicated dehydrator.
To dry herbs in a toaster oven, you need to use a very low temperature and keep a close eye on them to prevent burning or overcooking.
- Drying herbs in a toaster oven is possible and efficient for small quantities.
- The key is to use the lowest possible temperature setting, ideally below 180°F (82°C).
- Prepare your herbs by washing and patting them completely dry.
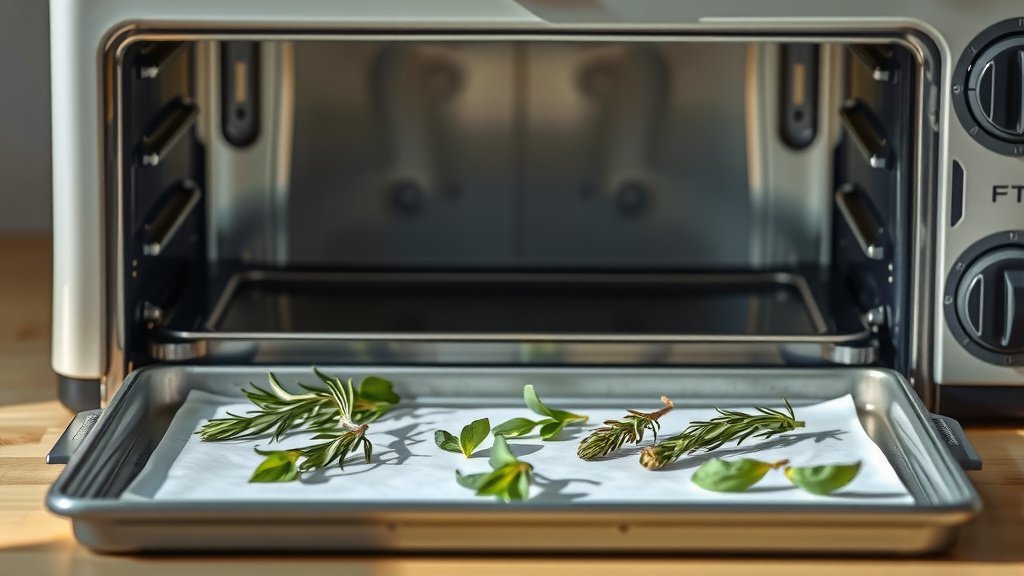
- Spread them in a single layer on a parchment-lined baking sheet or rack.
- Monitor closely, flipping occasionally, until they are crumbly and brittle.
- Proper storage in airtight containers ensures freshness.
Can You Dry Herbs In A Toaster Oven?
You might be surprised, but drying herbs in a toaster oven is a very real and practical solution. It offers a quick way to preserve your fresh herbs, allowing you to enjoy their flavors all year long.
Why Consider a Toaster Oven for Drying Herbs?
Think about it: not everyone has a large kitchen or a dedicated food dehydrator. A toaster oven is often already there, sitting on your counter. It’s a small, controllable environment, making it perfect for smaller batches of herbs from your garden or farmer’s market haul.
What Kinds of Herbs Work Best?
Hardier herbs tend to do best in a toaster oven. We found that herbs like rosemary, thyme, oregano, and sage respond well to this drying method. More delicate herbs, such as basil or mint, can also be dried but require even more watchful care to avoid burning due to their thin leaves.
The Basic Steps for Drying Herbs
Ready to turn your fresh herbs into dried treasures? It’s not complicated, but it does require your attention. Here’s the general flow you’ll follow for successful herb drying in your toaster oven.
Getting Your Herbs Ready
First things first, you’ll want to prepare your herbs. Gently wash them under cool running water. Then, and this is important, pat them **completely dry** with paper towels. Any leftover moisture can lead to steaming instead of drying, or even mold.
Remove any thick stems or damaged leaves. You want just the good, flavorful parts ready for drying. If your herbs are on the larger side, you might consider **removing individual leaves** to help them dry more evenly.
Setting Up Your Toaster Oven for Drying
Your toaster oven needs to be set up just right. This isn’t like baking cookies; we’re aiming for a very gentle, low-heat process. Think of it more like a **slow, consistent warm breeze**.
Ideal Temperature Settings
This is arguably the most crucial step. You need to use the lowest temperature setting your toaster oven offers, typically between 150°F and 180°F (65°C to 82°C). Many experts say that going higher than this can cook your herbs instead of drying them, which destroys their essential oils and flavor (USDA). Some ovens even have a “warm” setting, which might be perfect.
Consider leaving the toaster oven door slightly ajar. This helps **release moisture and promotes air circulation**, preventing your herbs from steaming. A wooden spoon can prop the door open just a tiny bit.
Monitoring the Drying Process
Drying herbs isn’t a “set it and forget it” task. You’ll need to check on them frequently, perhaps every 15-20 minutes. Gently **flip the herbs** to ensure even drying on all sides. This constant attention helps prevent scorching.
Common Mistakes to Avoid
We’ve all been there, making small errors that impact the outcome. When drying herbs, a couple of common pitfalls can easily be avoided with a little awareness:
- Too High Heat: This will cook your herbs, turning them brown and losing their aromatic oils. Always go for the lowest setting.
- Overcrowding the Tray: Piling too many herbs on one tray prevents proper air circulation and leads to uneven drying.
- Insufficient Drying: If herbs still feel pliable or soft, they aren’t fully dry. Storing them like this can lead to mold.
- Lack of Monitoring: Leaving them unattended is a recipe for disaster; they can go from perfectly dry to burnt very quickly.
- Not Cleaning Thoroughly: Any dirt or moisture left on the herbs will compromise the quality of your dried batch.
How Long Does It Take?
The drying time for herbs in a toaster oven can vary quite a bit. It depends on several factors, including the type of herb, its thickness, and the humidity in your kitchen. Typically, you can expect the process to take anywhere from 1 to 4 hours.
Signs Your Herbs Are Perfectly Dry
How do you know when they’re ready? A perfectly dried herb will be **brittle and crumbly**. When you try to crush a leaf between your fingers, it should snap easily and turn into powder. If it bends or feels soft, it needs more time.
Storing Your Dried Herbs
Once your herbs are thoroughly dry, proper storage is key to maintaining their potency. Let them **cool completely** to room temperature before storing. Warm herbs can create condensation in containers, leading to moisture issues.
Transfer your dried herbs to **airtight containers**, such as glass jars with tight-fitting lids. Store these containers in a cool, dark place, away from direct sunlight or heat sources. This will help them retain their flavor and aroma for many months.
Toaster Oven vs. Other Drying Methods
While the toaster oven is a handy tool, it’s not the only way to dry herbs. Let’s look at how it stacks up against a couple of other popular methods. Each has its own **pros and cons**, depending on your needs.
| Drying Method | Pros | Cons | Best For |
|---|---|---|---|
| Toaster Oven | Fast for small batches, good temperature control, compact. | Requires constant monitoring, can burn easily, limited capacity. | Small batches, quick drying, hardier herbs. |
| Air Drying | No special equipment, preserves flavor well, simple. | Slow (weeks), requires dry, warm environment, susceptible to dust. | Large batches, patient individuals, gentle drying. |
| Dehydrator | Even drying, large capacity, precise temperature control, hands-off. | Dedicated appliance, takes up space, initial cost. | Large batches, consistent results, wide variety of foods. |
Air Drying
Air drying is the simplest method, requiring only string and a dry, warm place. It’s **gentle and effective** for many herbs, but it takes patience, often several weeks. You just tie small bunches and hang them upside down.
Dehydrator
A food dehydrator is designed specifically for this task. It offers **precise temperature control** and consistent airflow, making it very efficient. Many experts consider it the gold standard for drying herbs in larger quantities (Nourishing Traditions).
Safety Tips for Drying Herbs in a Toaster Oven
When using any appliance, safety is paramount. Since you’re using low heat for an extended period, it’s good to keep a few things in mind:
- Always stay in the kitchen and **never leave the toaster oven unattended** while drying herbs.
- Ensure your toaster oven is clean inside before you start, free of crumbs or grease that could smoke or burn.
- Use **parchment paper** to line the tray, as direct contact with a hot metal tray could scorch the herbs more quickly.
- Make sure there’s enough space around the toaster oven for proper ventilation.
- If you notice any smoke or a burning smell, **immediately turn off** the toaster oven and investigate.
Conclusion
Drying herbs in a toaster oven is a completely viable and satisfying way to preserve your garden’s bounty. It’s an accessible method that lets you enjoy the vibrant flavors of fresh herbs long after their season has passed. By keeping the temperature low, monitoring closely, and storing them properly, you’ll have a ready supply of your own dried herbs. So go ahead, give it a try – your future meals will thank you!
Can I dry all types of herbs in a toaster oven?
While most hardy herbs like rosemary, thyme, and oregano dry well, very delicate herbs such as basil or mint require extra caution. They can scorch easily due to their thin leaves, so monitor them even more closely and consider very short drying times.
How do I prevent my herbs from burning in the toaster oven?
To prevent burning, always use the absolute lowest temperature setting your toaster oven offers, usually between 150-180°F (65-82°C). Leaving the door slightly ajar helps release moisture, and flipping the herbs frequently ensures even drying without scorching. Never step away from the oven.
Can I use aluminum foil instead of parchment paper for drying herbs?
It’s generally better to use parchment paper. Aluminum foil can conduct heat more intensely, potentially causing your herbs to cook or burn faster, especially if they are in direct contact with the foil. Parchment paper provides a slightly better buffer against direct heat.
How long do dried herbs from a toaster oven last?
When dried properly and stored in airtight containers in a cool, dark place, your toaster oven-dried herbs can last for 6 to 12 months. Their potency and flavor will gradually diminish over time, but they remain perfectly safe to use for an extended period.
Does drying herbs in a toaster oven affect their flavor?
If done correctly at a low temperature, drying herbs in a toaster oven should preserve most of their flavor and aroma. The key is to dry them slowly without cooking. High heat can degrade the essential oils, leading to a less flavorful end product. Properly dried herbs will still be quite aromatic.