
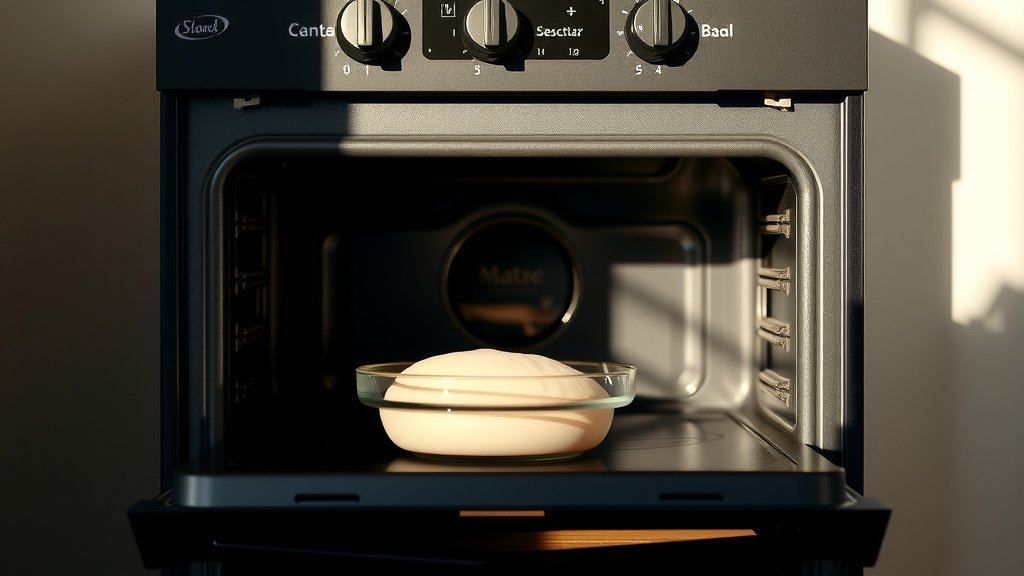
You can use a gas oven for fermenting dough, but only if it’s turned off and you manage its internal temperature very carefully. The key is to avoid any active heat sources like a pilot light.
Many bakers use an unheated gas oven as a draft-free space, often adding a bowl of hot water to create a warm, humid environment perfect for your dough.
- It’s possible to use a gas oven for dough fermentation, but never with the heat on.
- Pilot lights can generate enough heat to overproof or even kill your yeast.
- The best approach is using the oven as a sheltered space with an external heat source, like hot water.
- Consistent, mild warmth (around 75-85°F or 24-29°C) is ideal for yeast activity.
- Always monitor the dough closely to prevent it from rising too much or too quickly.
Can You Use A Gas Oven For Fermenting Dough?
Yes, you can use a gas oven for fermenting dough, but it requires caution and specific techniques. The main idea is to use it as a draft-free chamber, not as a heated appliance.
Understanding Oven Heat for Dough
Dough needs a warm, consistent, and draft-free environment to rise properly. Yeast thrives in temperatures generally between 75°F and 85°F (24°C-29°C), causing the dough to double in size.
Too much heat can kill the yeast, stopping the fermentation process entirely. Too little heat will slow it down significantly, leading to a longer, sometimes less active rise.
Maintaining this ideal temperature range is where many home bakers face challenges. Your kitchen counter might be too cool, or too drafty, making the oven seem like a good choice.
Why Gas Ovens Can Be Tricky for Dough
Using a gas oven for dough proofing comes with unique considerations. Unlike electric ovens which are completely off when unplugged, gas ovens often have a continuous, albeit small, heat source.
This subtle heat can quickly become a problem for your delicate dough. Yeast is a living organism, and it’s quite sensitive to temperature fluctuations.
Many baking experts agree that **uncontrolled heat is the enemy** of good dough proofing (King Arthur Baking).
The Pilot Light Problem
Many older gas ovens have a pilot light that stays lit all the time. This tiny flame generates a consistent, low level of heat within the oven cavity. It might seem insignificant, but this can actually be too warm for dough.
Research shows that even a small, steady heat source can raise the oven interior above the ideal proofing temperature. This constant warmth can easily lead to **over-proofing your dough**.
Over-proofed dough often collapses, resulting in a dense, poor texture after baking. You want a gentle rise, not a sprint to the finish line.
Residual Heat Concerns
If you’ve recently used your gas oven for baking, residual heat is another concern. Even after turning it off, the oven retains warmth for some time. Placing dough in a still-warm oven can be risky.
The internal temperature might be too high initially, killing the yeast before it even starts. Always let your oven cool completely if it has been on, or better yet, avoid using it after cooking.
A quick check with a simple oven thermometer can help you verify the temperature. It is **always wise to check** before placing your dough inside.
Ideal Conditions for Dough Fermentation
For dough to ferment beautifully, it needs warmth, humidity, and a calm, still environment. Think of it like a cozy spa day for your yeast.
Temperatures between 75°F and 85°F (24°C-29°C) are considered optimal. Humidity helps prevent the dough from forming a dry skin, which can restrict its rise.
A draft-free space is crucial because cold air currents can significantly slow down fermentation. A little calm and consistency go a long way.
Smart Ways to Use Your Gas Oven (Safely)
So, how can you make your gas oven a helpful ally for proofing? It’s all about tricking it into being a cozy, unheated space.
The goal is to provide **gentle warmth and humidity** without turning on the oven itself. This method creates a perfect microclimate for your dough to thrive.
Many home bakers successfully use this technique, finding their gas oven provides a consistent and enclosed environment.
The “Oven Off, Light On” Method
For ovens without a pilot light, or if you know your pilot light generates very little heat, simply turning on the oven light can sometimes create enough warmth. The small bulb emits a small amount of heat.
Place your covered bowl of dough inside the *completely cold, turned-off* oven. Then, simply switch on the oven light. Monitor the temperature inside with an oven thermometer to ensure it doesn’t get too hot.
This method offers a **subtle, consistent warmth** that often hits that sweet spot for yeast activity.
Adding a Warm Water Bath
This is a very popular and effective method. Place your covered bowl of dough into your completely cold gas oven. Then, put a bowl of very hot (steaming, not boiling) water on a rack below or beside your dough.
The steam from the hot water will create a warm, humid environment. You can replace the hot water as it cools to maintain the temperature. Many bakers attest to the **effectiveness of this technique**.
Some experts even suggest heating the oven to its lowest setting for just 1-2 minutes, then turning it OFF completely before adding the dough and hot water (Cook’s Illustrated).
When Not to Use Your Gas Oven
There are definitely times when your gas oven is not your friend for proofing dough. Knowing these situations can save your bake.
Never use your gas oven if it’s still warm from cooking. Always let it cool completely. Also, if your pilot light makes the oven noticeably warm, it’s safer to avoid it.
When in doubt, a reliable oven thermometer is your best friend. It provides **factual temperature information** you can trust.
Alternative Proofing Methods
What if your gas oven isn’t cooperating, or you prefer other methods? There are many excellent alternatives to get your dough rising beautifully.
The goal remains the same: a warm, humid, draft-free space. You might be surprised by the creative solutions available in your own kitchen.
Here’s a quick look at some popular and effective options:
| Method | Pros | Cons |
|---|---|---|
| Kitchen Counter | Simple, no special equipment. | Temperature can vary, drafts possible. |
| Microwave (Off) | Creates a small, sealed, draft-free space. | Limited space, needs hot water. |
| Proofing Box | Precise temperature/humidity control. | Requires dedicated equipment. |
| Dehydrator (Low Setting) | Can set low, consistent heat. | May dry out dough if not covered well. |
Your Kitchen Counter
For a low-tech approach, simply cover your dough bowl with plastic wrap or a clean towel and leave it on your kitchen counter. If your kitchen is warm enough (around 70-75°F), this works perfectly.
It’s the most basic method and often yields **excellent results for many bakers**. Just be mindful of cold drafts near windows or doors.
Microwave Magic
Your microwave, when turned off, acts as a fantastic, draft-free proofing box. Heat a cup of water in the microwave until steaming. Remove the water, then place your covered dough bowl inside.
The residual warmth and humidity from the water creates an ideal environment. It’s a quick and **easy solution for smaller batches** of dough.
Proofing Boxes and Dehydrators
If you bake frequently, a dedicated proofing box offers precise temperature and humidity control. Many experts consider these a **game-changer for consistent results**.
Some dehydrators also have low-temperature settings (around 85°F or 29°C) that work well for proofing. Just be sure to cover your dough to prevent it from drying out.
Key Tips for Perfect Dough Proofing
No matter where you proof your dough, following these simple guidelines will help ensure success:
- Cover your dough: Use plastic wrap or a damp towel to prevent a dry skin.
- Monitor temperature: Use an oven thermometer to ensure optimal conditions.
- Watch the dough, not the clock: Proofing times are estimates; look for visual cues.
- Perform the “poke test”: Gently poke the dough; if it slowly springs back, it’s ready.
- Avoid drafts: Keep your dough in a calm, still environment.
- Don’t over-proof: Dough that rises too much can collapse during baking.
Conclusion
Using a gas oven for fermenting dough is entirely possible, but it comes with a strong caveat: **never turn the heat on**. The real trick is to use it as a sealed, draft-free chamber and introduce warmth and humidity indirectly.
Methods like the “oven off, light on” or adding a bowl of hot water are your best bets. Always be mindful of pilot lights and residual heat, as too much warmth can quickly ruin your dough.
With a little care and attention to temperature, your gas oven can absolutely become a reliable spot for achieving beautifully risen dough. Happy baking!
What is the ideal temperature range for dough fermentation?
The ideal temperature range for most dough fermentation is between 75°F and 85°F (24°C-29°C). This warmth activates the yeast, allowing it to produce gases that cause the dough to rise effectively.
Can a pilot light in a gas oven harm my dough?
Yes, a pilot light in a gas oven can harm your dough. Even though it’s a small flame, it can raise the internal oven temperature enough to over-proof the dough or even kill the yeast, hindering its rise.
How do I check if my gas oven is too warm for proofing?
The best way to check if your gas oven is too warm for proofing is to use an oven thermometer. Place it inside the oven for 10-15 minutes and read the temperature before placing your dough inside.
Is humidity important for dough proofing?
Yes, humidity is very important for dough proofing. It helps keep the surface of the dough moist, preventing a dry skin from forming. A dry skin can restrict the dough from rising fully and smoothly.
What are some signs of over-proofed dough?
Signs of over-proofed dough include a very bubbly, fragile texture, a yeasty or alcoholic smell, and the dough collapsing when gently poked. It may also feel very soft and difficult to handle.
