
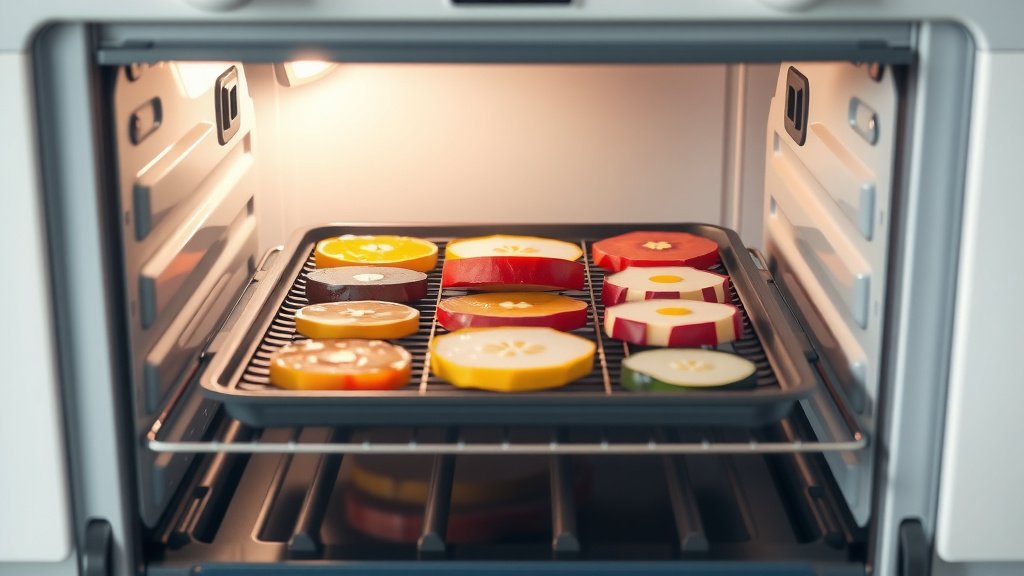
You can dehydrate food in a gas oven by setting it to its lowest temperature, often around 150-200°F (65-93°C), and propping the door open slightly to allow moisture to escape.
This slow, low-heat process gently removes water from foods like fruits, vegetables, and jerky, preserving them for longer storage without special equipment.
Looking for the quick guide? Here’s what you need to know about dehydrating food in your gas oven:
- Set your oven to its absolute lowest temperature, usually 150-200°F.
- Prop the oven door open slightly to let humidity escape, which is key for drying.
- Prepare food by slicing it thinly and uniformly for even drying.
- Rotate your trays periodically for consistent dehydration results.
- Store your dried goods in airtight containers once they are fully cool and brittle.
How To Dehydrate Food In A Gas Oven?
Dehydrating food in a gas oven is a great way to preserve your favorite produce, turning it into long-lasting, tasty snacks.
You use low heat and good air circulation to slowly remove moisture, keeping nutrients and flavor locked in.
Why Dehydrate Food At Home?
Why bother drying food yourself? Well, it’s super satisfying and cost-effective. You can save money on store-bought snacks and extend the life of your garden bounty.
Many people find that homemade dried foods taste much better than commercial options, offering a fresher, more natural flavor.
Preparing Your Gas Oven for Dehydration
Before you even slice a fruit, you need to get your oven ready. Think of it like setting the stage for a perfect performance.
Proper oven setup ensures your food dries evenly and safely, preventing issues like scorching or spoilage.
Finding the Right Temperature
The golden rule for dehydrating is low and slow. Your gas oven’s lowest setting is ideal, typically ranging from 150°F to 200°F (65°C to 93°C).
You want to evaporate moisture, not cook the food. If your oven runs a bit hot, consider using an oven thermometer to verify the actual temperature (USDA).
Ensuring Proper Ventilation
This step is non-negotiable for gas ovens. You MUST prop the oven door open a few inches. Why?
Gas ovens release moisture when they burn, and that moisture needs a way to escape. Leaving the door ajar allows the moist air to leave and dry air to circulate.
Getting Your Food Ready
The success of your dehydration project largely depends on how you prepare your food. Don’t rush this part!
Careful preparation leads to consistently dried food that’s both safe and delicious to eat.
Choosing the Best Foods
Almost any fruit or vegetable can be dehydrated, but some are easier for beginners. Think apples, bananas, berries, or sweet potatoes.
For savory snacks, consider making jerky from lean meats or drying herbs from your garden. Start simple for best results.
Slicing for Success
Uniformity is key here. Every piece should be the same thickness so they all dry at the same rate. Uneven pieces mean some will burn while others remain damp.
Aim for slices about 1/8 to 1/4 inch thick. A mandoline slicer can be a real time-saver for achieving consistent cuts.
Here’s a quick checklist for perfect slicing:
- Use a sharp knife or mandoline.
- Cut all pieces to a similar thickness.
- Remove any cores, seeds, or tough skins.
- Lay pieces flat, not overlapping, on baking racks.
- Trim away any bruised or damaged spots.
Pretreatment Options
Some foods benefit from a quick pretreatment to prevent browning or to help retain color. Fruits like apples and pears often turn brown without it.
You can briefly dip fruit slices in lemon juice diluted with water, or a specialized antioxidant solution (National Center for Home Food Preservation).
The Dehydrating Process Step-by-Step
Now that your oven and food are ready, it’s time for the main event. Patience is your best friend during this phase.
This process takes time, so settle in and let your oven do its slow, steady work.
Arranging Your Food
Place your prepared food on oven-safe cooling racks or baking sheets lined with parchment paper. Make sure there’s no overlap.
Good airflow around each piece is essential for efficient drying. If you stack racks, ensure there’s space for air to move.
Monitoring and Rotating
Check your food periodically. You’ll need to rotate the trays every few hours for even drying, especially if your oven has hot spots.
We found that flipping individual pieces can also help prevent them from sticking and promote uniform moisture loss. This also helps with consistent texture.
Here’s a general guide for some common foods, but remember that oven models vary:
| Food Type | Approximate Drying Time | Desired Consistency |
|---|---|---|
| Apple Slices | 6-12 hours | Leathery, pliable |
| Banana Slices | 6-10 hours | Crisp, brittle |
| Tomato Slices | 8-14 hours | Leathery, chewy |
| Beef Jerky | 4-10 hours | Leathery, flexible, no moisture |
Knowing When It’s Done
How do you know when your food is fully dehydrated? It should feel dry and leathery for most fruits and vegetables, or brittle for things like banana chips.
There should be no soft spots or visible moisture. If you bend a piece, it should crack or snap, not feel squishy.
Common Challenges and Quick Fixes
Sometimes, things don’t go exactly as planned. Don’t worry, even experienced dehydrators face occasional hurdles.
One common issue is food not drying evenly. This usually means you need to rotate your trays more often or adjust your slicing technique.
Storing Your Dehydrated Goodies
Once your food is completely dry and cooled, proper storage is paramount. If you skip this, all your hard work could be undone.
Store your dehydrated foods in airtight containers, like glass jars or vacuum-sealed bags. Keep them in a cool, dark pantry.
Gas Oven vs. Electric Oven for Dehydrating
While both oven types can dehydrate, there are a few differences worth noting. Gas ovens need careful ventilation due to moisture output.
Many experts say electric ovens often maintain a more consistent low temperature, which can be an advantage for beginners.
Consider these points:
- Gas ovens require the door propped open for moisture release.
- Electric ovens generally produce less ambient moisture.
- Gas oven temperatures can sometimes fluctuate more.
- Both ovens can successfully dehydrate food with proper technique.
Conclusion
Dehydrating food in your gas oven is a rewarding and practical skill. It’s a wonderful way to extend the shelf life of produce, reduce food waste, and create healthy snacks.
By following these steps – setting a low temperature, ensuring ventilation, and preparing your food correctly – you’re well on your way to becoming a dehydration pro. Enjoy your homemade, shelf-stable treats!
Can I dehydrate meat for jerky in a gas oven?
Yes, you can dehydrate lean cuts of meat to make jerky in a gas oven. Ensure you slice the meat very thinly and uniformly, remove all visible fat, and pre-treat it with a marinade that includes salt and curing agents if desired for food safety. Maintain a consistent low temperature and allow plenty of ventilation by propping the oven door open.
What are the signs that my dehydrated food isn’t safe?
Signs of unsafe dehydrated food include any visible mold growth, a soft or moist texture that suggests incomplete drying, or an off-odor. If your food feels sticky, squishy, or develops any strange colors after storage, it’s best to discard it to prevent foodborne illness.
How long do dehydrated foods last when stored properly?
When dehydrated completely and stored in airtight containers in a cool, dark place, most fruits and vegetables can last for 1 to 2 years. Jerky and other meats generally have a shorter shelf life, typically around 6 months to 1 year, due to potential fat rancidity over time.
Do I need a special thermometer to dehydrate in my oven?
While not strictly mandatory, using an oven thermometer is highly recommended. Many home ovens, especially older models, can have inaccuracies in their temperature gauges. A separate thermometer gives you a precise reading, helping you maintain the critical low temperature needed for effective and safe dehydration.
Can I dehydrate different types of food at the same time?
You can dehydrate different types of food simultaneously, provided they require similar drying temperatures and times. However, be mindful of strong odors; for example, onions might impart their scent to nearby apple slices. It’s generally best to separate strong-smelling foods from milder ones.
