
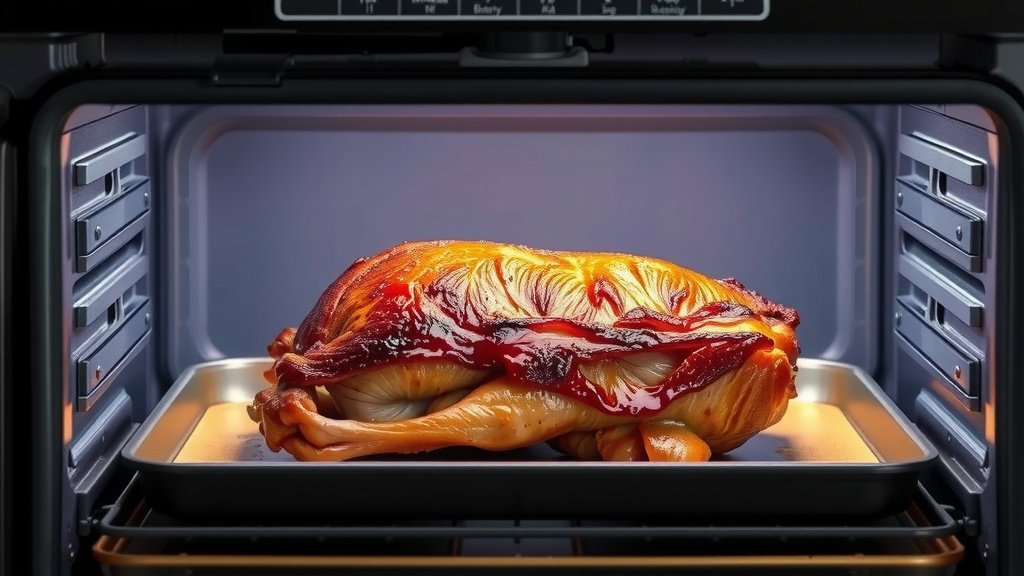
To slow roast pork belly in an electric oven, begin by scoring the skin deeply and salting it generously, then dry it thoroughly overnight in the fridge. Start with a high temperature of around 400°F (200°C) for 20-30 minutes to crisp the skin, then reduce the heat to a low 275-300°F (135-150°C) for 2-3 hours until the meat is fork-tender.
You’ll know your slow-roasted pork belly is ready when the internal temperature reaches 185°F (85°C) and the crackling is beautifully crunchy, allowing for a perfect balance of tender meat and crisp skin from your electric oven.
- Properly prepare your pork belly by scoring, salting, and drying for the best crispy skin.
- Start with a short burst of high heat in your electric oven, then lower it for a long, slow roast.
- The key to tender meat and crackling is patience, letting the low heat work its magic over several hours.
- Always check the internal temperature to ensure your pork belly is fully cooked and safe to eat.
- Allowing the roasted pork belly to rest after cooking helps keep the meat juicy and flavorful.
How To Slow Roast Pork Belly In Electric Oven?
Slow roasting pork belly in an electric oven is about creating that wonderful contrast: incredibly tender meat beneath a crispy, irresistible crackling. It’s a rewarding process that transforms a simple cut into a memorable meal, using careful temperature control and a little patience from you.
Why Slow Roasting Pork Belly Works So Well
Slow roasting is a cooking method where you use lower temperatures for a longer time. For pork belly, this technique slowly breaks down the tough connective tissues in the meat. This breakdown makes the pork belly incredibly tender and juicy.
Many experts say that the gradual heat allows fats to render out slowly, basting the meat as it cooks (America’s Test Kitchen). This rendering also helps achieve that desirable crispy skin later on. It’s a culinary dance between time and temperature.
Getting Your Pork Belly Ready: The Essential Prep
The secret to amazing pork belly often starts long before it even touches the oven. Proper preparation is truly the foundation for success here. Think of it like setting the stage for a grand performance; every step counts.
Scoring the Skin
Before anything else, you need to score the pork belly skin. Use a very sharp knife or a clean Stanley knife for this. Make shallow cuts, about 1/4 inch deep, in parallel lines, not cutting into the meat itself.
We found that scoring helps the fat render more efficiently. It also allows your seasoning to reach the skin better, leading to a much crispier crackling. Don’t rush this step, as uneven scores can cause uneven crackle.
The Salt Rub and Drying Phase
Generously rub the scored skin with plenty of coarse sea salt. Some people even add a little oil or vinegar before the salt for extra crisping power, though salt alone often does the trick. You want to really get that salt into the score marks.
After salting, the most important step for crispy skin is drying. Place the pork belly, skin-side up, uncovered in your refrigerator overnight, or for at least 8-12 hours. Research often connects this drying process directly to superior crackling (Cook’s Illustrated). This removes moisture from the skin, which is the main barrier to crispness.
Your Electric Oven Setup for Perfect Pork Belly
Your electric oven is a fantastic tool for this kind of slow cooking. It provides consistent heat, which is what we need for that slow-and-steady approach. Let’s make sure it’s set up correctly for its big moment.
Oven Temperature Stages
Slow roasting pork belly usually involves two distinct temperature stages. You start high, then go low. This two-stage approach is what gives you both the crispy skin and the tender meat.
Many chefs recommend starting at a higher temperature to “shock” the skin into crisping up quickly. After that initial blast, you drop the temperature significantly to gently cook the meat through. This careful control ensures every part cooks beautifully.
The Roasting Process: Step-by-Step
Now, let’s get that wonderfully prepared pork belly into your electric oven. Don’t worry, it’s simpler than you might think once you have the plan down.
Initial High Heat Blast
Preheat your electric oven to 400°F (200°C). Place your dried and seasoned pork belly, skin-side up, on a wire rack set over a roasting pan. This rack allows air to circulate around the skin. Roast for 20-30 minutes at this high temperature.
During this stage, you’re looking for the skin to start bubbling and blistering. This is the beginning of your crackling. Keep a close eye on it to prevent burning, as ovens can vary. You want a nice golden start.
The Long Slow Roast
After the initial high heat, reduce your oven temperature to 275-300°F (135-150°C). Continue roasting for 2-3 hours. The exact time will depend on the thickness of your pork belly and your oven.
This is where the magic really happens for the meat. The low heat slowly melts the fat and tenderizes the muscle fibers. You’ll notice a comforting aroma filling your kitchen as it cooks. It truly becomes fork-tender during this time.
Checking for Doneness
To know your pork belly is done, use a meat thermometer. Insert it into the thickest part of the meat, avoiding the bone if present. The internal temperature should read at least 185°F (85°C) (USDA guidelines). The crackling should also be crisp and golden.
If the crackling isn’t as crisp as you’d like, you can increase the oven temperature to 425°F (220°C) for another 10-15 minutes at the very end. Be careful not to burn it; watch it like a hawk during this final push. Sometimes, you need that extra bit of crisping.
Resting Your Pork Belly
Once roasted, remove the pork belly from the oven and transfer it to a cutting board. Tent it loosely with foil and let it rest for at least 15-20 minutes before carving. This step is as important as the cooking itself.
Many experts agree that resting allows the meat’s juices to redistribute throughout the cut. This results in a much juicier and more flavorful piece of pork belly. Skipping this means a dry, less satisfying experience. Don’t let your hard work go to waste, let it simply rest and settle.
Troubleshooting Common Pork Belly Issues
Sometimes, things don’t go exactly as planned. Don’t worry, even experienced cooks run into snags. Here’s a quick guide to help you out if your pork belly isn’t quite perfect.
| Problem | Likely Cause | Solution |
|---|---|---|
| Skin isn’t crispy | Too much moisture, not enough salt, or not high enough initial heat. | Ensure skin is very dry (refrigerate longer). Increase initial oven temp slightly or finish with a high-heat blast. |
| Meat is tough | Not cooked long enough at low temperature, or temperature was too high. | Cook for a longer period at the low temperature. Ensure oven thermostat is accurate. |
| Pork belly is dry | Overcooked, or too much fat rendered too quickly. | Monitor internal temperature more closely. Ensure it rests adequately after cooking. |
| Uneven crackling | Uneven scoring or oven hot spots. | Score more carefully. Rotate the pan halfway through cooking or finish under the broiler (watch carefully!). |
Essential Tools for Roasting Success
- Sharp Knife: Crucial for precise skin scoring.
- Roasting Pan with Wire Rack: Allows fat to drip away and air to circulate for crispy skin.
- Meat Thermometer: Your best friend for accurate internal temperature readings.
- Coarse Sea Salt: Essential for drawing out moisture and seasoning.
- Aluminum Foil: For tenting the pork belly during its all-important resting period.
Quick Checklist for Crispy Pork Belly
- Score the skin carefully.
- Salt the skin generously.
- Dry in the fridge overnight.
- Start with a high oven temperature.
- Reduce to a low, slow roast.
- Check internal temperature for doneness.
- Rest the pork belly before slicing.
Conclusion
Slow roasting pork belly in your electric oven truly is a rewarding kitchen adventure. With a little careful preparation, a two-stage temperature approach, and some patience, you can consistently achieve that amazing balance of succulent, tender meat and wonderfully crispy crackling. Remember, the key steps are thoroughly drying the skin, getting that initial high-heat blast, and then letting your oven do its slow, gentle work. Enjoy creating this delicious dish and sharing it with loved ones!
Can I add aromatics to the roasting pan with the pork belly?
Absolutely, adding aromatics like sliced onions, carrots, celery, garlic cloves, or herbs (rosemary, thyme) to the bottom of your roasting pan can add another layer of flavor to the drippings. These can be used to make a delicious gravy or sauce later. Just be sure not to crowd the pan or let them touch the pork belly skin directly, as this can hinder crackling.
How do I prevent the pork belly from drying out during the long roast?
The best way to prevent your pork belly from drying out is to maintain the correct low temperature (275-300°F or 135-150°C) and avoid overcooking. Using a reliable meat thermometer to ensure it reaches the target internal temperature of 185°F (85°C) and then removing it from the oven promptly is key. Also, remember that resting the meat allows juices to redistribute, keeping it moist.
What if my electric oven runs hotter or colder than it should?
Many electric ovens can have temperature discrepancies. We found that using an inexpensive oven thermometer placed inside your oven can help you monitor its true temperature. Adjust your oven dial accordingly if you notice it running consistently hot or cold compared to the set temperature. This will help you maintain the ideal slow-roasting conditions.
Can I achieve crispy crackling without drying the skin overnight?
While overnight drying is highly recommended for the best crackling, you can still achieve some crispiness without it. If short on time, try patting the skin extremely dry with paper towels, then using a hairdryer on a cool setting for 10-15 minutes. This helps remove surface moisture quickly, though it may not be as effective as an overnight refrigeration period.
How should I store leftover slow-roasted pork belly?
Store any leftover slow-roasted pork belly in an airtight container in the refrigerator for up to 3-4 days (USDA guidelines). To reheat, you can slice it and gently warm it in a pan, or place it on a baking sheet in a preheated oven at a moderate temperature (around 300°F or 150°C) until heated through. If the crackling has softened, you can try a quick blast under a hot broiler to crisp it up again.
