

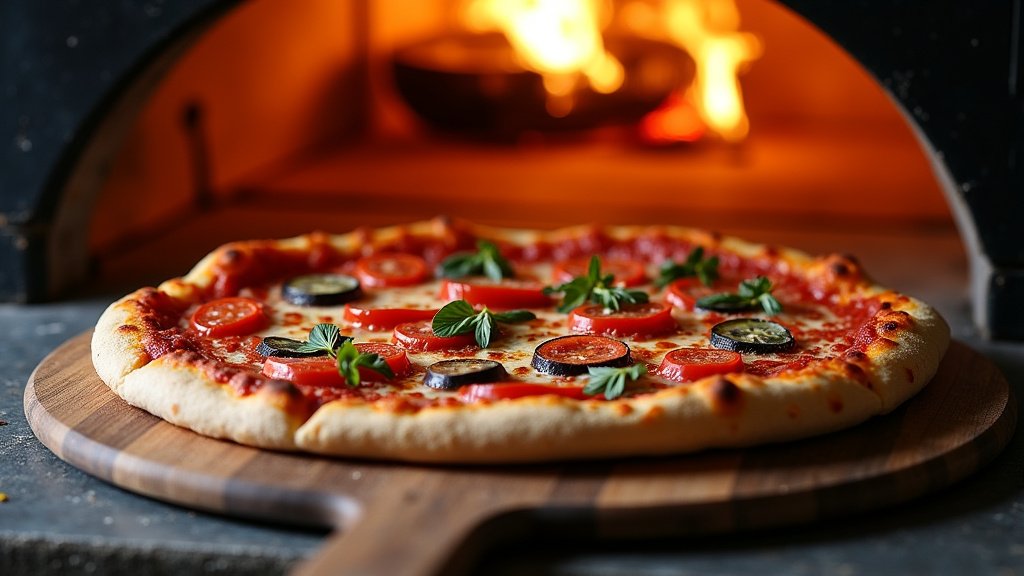
Cooking a pizza in a wood-fired oven involves getting your oven super hot, launching your pizza quickly, and rotating it for an even cook. You will achieve that delicious, crispy crust and perfectly melted toppings that make wood-fired pizza so special. It’s an art, but totally achievable for anyone.
Many home cooks find that mastering their wood fire is the first step. You need a good fire and hot embers to cook pizza perfectly. We’ve learned that consistent heat makes all the difference for a truly great pie.
- Preheat your oven correctly.
- Launch your pizza like a pro.
- Rotate for an even crust.
- Achieve that perfect char.
Ready to make some amazing pizza? Let’s walk through exactly how to cook a pizza in a wood-fired pizza oven, step by step.
Mastering Wood-Fired Pizza Oven Cooking
Cooking pizza in a wood-fired oven is a fantastic experience. It delivers a taste and texture you just can’t get from a conventional oven. Let’s get you started on making incredible pizzas.
Setting Up Your Wood-Fired Oven for Pizza
The first step to amazing wood-fired pizza is proper oven setup. You need the right wood and a good fire. This creates the intense heat necessary for a quick, perfect cook.
Choosing the Right Wood
Not all wood is created equal for pizza making. You want hardwoods that burn hot and clean. We’ve found that proper wood selection makes a big difference.
- Oak: A classic choice, oak burns hot and long. It provides consistent heat.
- Maple: This wood also burns hot and imparts a subtle, pleasant aroma.
- Ash: Similar to oak, ash offers good heat and a clean burn.
- Fruit woods (apple, cherry): These can add a lovely, mild flavor to your pizza. They burn a bit faster.
Avoid softwoods like pine or fir. They burn too quickly and produce excessive smoke. This can leave a sooty taste on your pizza, which nobody wants.
Building and Maintaining Your Fire
A good fire is the heart of your wood-fired oven. You need a roaring blaze that creates a large bed of hot embers. This heat radiates from the top, sides, and bottom of your oven.
Start with some kindling and small pieces of hardwood. Gradually add larger pieces as the fire grows. You’re aiming for a strong flame that stretches towards the oven dome.
Keep feeding the fire with small logs. The goal is to build up a substantial bed of glowing coals. This is where most of your cooking heat comes from.
Preheating Your Oven to Pizza Perfection
Preheating is perhaps the most critical step. A properly preheated oven ensures a crispy crust and perfectly cooked toppings. You can’t rush this part.
Reaching Optimal Temperature
Most wood-fired pizza ovens need to reach 750-900°F (400-480°C). This high heat cooks a pizza in 60-90 seconds. Many chefs say this fast cook is key to great pizza (Food Network Kitchen).
How do you know when it’s hot enough? Look for a clean oven dome. When the soot on the oven dome has burned off and turned white, it’s usually ready. This indicates high heat saturation.
You can also use an infrared thermometer. Point it at the oven floor and walls. You want consistent, high readings across all surfaces. Don’t just measure one spot.
Spreading the Heat Evenly
Once your oven is screaming hot, push your main fire to one side. This creates a clear cooking zone. You need space to launch and rotate your pizza without hitting flames.
Allow the heat to stabilize for another 15-20 minutes. This lets the oven floor absorb all that intense heat. A hot floor ensures a super crispy bottom crust.
Before launching, give the oven floor a quick sweep with a brass-bristle brush. This clears away any ash or debris. You want a clean surface for your pizza.
Crafting and Launching Your Pizza
Now comes the fun part: making your pizza and getting it into the oven. This requires a little practice, but you’ll get the hang of it quickly.
Preparing Your Pizza
Work quickly when assembling your pizza. Have all your ingredients ready and close at hand. The longer your dough sits with toppings, the stickier it can get.
Use a thin layer of semolina flour or regular flour on your pizza peel. This acts like tiny ball bearings. It helps your pizza slide off smoothly. Don’t overdo it, though.
Keep your toppings light. Too many toppings weigh down the dough. They also release moisture, which can make your pizza soggy. Less is often more with wood-fired pizza.
The Art of the Launch
Launching your pizza is perhaps the most nerve-wracking step. But with good technique, you’ll be launching like a pro in no time. Confidence is key here.
Hold the peel firmly with both hands. Position the pizza at the back of the oven, away from the flames. Give the peel a quick, confident jerk forward and then back. This motion slides the pizza off. Practice with an empty peel first.
Don’t hesitate or try to gently push it. That often results in a stuck pizza. One swift, decisive motion works best.
Cooking and Rotating for the Perfect Pie
Your pizza is in! Now, the oven’s intense heat will cook it incredibly fast. You need to stay attentive and rotate it correctly.
The Quick Cook Cycle
In a properly hot oven, your pizza will cook in 60-90 seconds. The crust will puff up and char beautifully. The cheese will melt and bubble.
Keep an eye on the side closest to the flame. That side will cook much faster. You’ll see the crust begin to brown and rise almost immediately.
Mastering the Pizza Turn
Rotation is essential for an even cook. About 20-30 seconds after launching, grab your turning peel. Slide it gently under the pizza.
Lift the pizza slightly and rotate it about a quarter turn. Place it back down. Repeat this process every 15-20 seconds. This ensures all sides get equal exposure to the heat.
You’re looking for a uniform golden-brown crust. You also want a nice char on the edges (what some call “leopard spots”). This char adds incredible flavor.
| Step | Description | Key Action |
|---|---|---|
| Preheat Oven | Bring oven to 750-900°F (400-480°C). White dome indicates readiness. | Build hot, clean-burning fire. |
| Prepare Pizza | Assemble toppings quickly on a floured peel. Keep toppings light. | Use semolina on peel. |
| Launch Pizza | Slide pizza confidently into the oven, away from flames. | Quick, decisive jerk of the peel. |
| Rotate Pizza | Turn pizza every 15-20 seconds for even cooking and char. | Use a turning peel. |
| Remove Pizza | When crust is golden and toppings are bubbly, remove. | Use your main pizza peel. |
Troubleshooting Common Wood-Fired Pizza Issues
Even with the best intentions, you might run into a few snags. Don’t worry, these are common and easily fixed. We’ve all been there.
Pizza Sticking to the Peel
This is a common issue for beginners. It usually means you didn’t use enough flour or semolina on the peel. Or, you took too long to launch the pizza.
Quick fix: Lift an edge of the pizza and sprinkle more semolina underneath. Give the peel a gentle shake to see if it moves freely. Work quickly!
Underbaked Crust or Burnt Top
If your crust is soft but the toppings are burning, your oven floor might not be hot enough. Or, your flames are too intense too close to the pizza.
Quick fix: Let the oven preheat longer. Push the fire further to the side, creating more distance from the pizza. Some sources suggest a slightly cooler dome temperature (Pizza Oven Pros).
Pizza Burning on One Side
This happens when you don’t rotate your pizza enough. The side closest to the fire will cook much faster.
Quick fix: Be diligent with your rotations. Set a mental timer. Every 15-20 seconds, give that pizza a turn. This even cooking prevents hot spots.
Your Wood-Fired Pizza Checklist
Before you even light that fire, make sure you have everything ready. This will make your pizza-making experience smooth and enjoyable.
- Hardwood Fuel: Is your wood seasoned and ready to burn?
- Infrared Thermometer: Do you have a reliable way to check oven temperatures?
- Pizza Peels (Launch & Turning): Are both your peels clean and ready for action?
- Semolina Flour: Plenty available for dusting your peel and dough?
- Pizza Dough & Toppings: All prepped and organized for quick assembly?
- Oven Brush: Is it nearby for cleaning the oven floor?
Having these items on hand will save you time and stress. You’ll feel more in control of the process. You’re ready to create amazing wood-fired pizzas.
Conclusion
You now have the knowledge to transform simple ingredients into an extraordinary wood-fired pizza. Remember, it’s all about controlling your fire, getting that oven screaming hot, and mastering the quick launch and rotation. Don’t be afraid to experiment and find what works best for your specific oven and preferences.
Each pizza you make will build your confidence and skill. So, gather your ingredients, fire up that oven, and get ready to enjoy some truly amazing, homemade wood-fired pizza. Your next delicious pie is just a few steps away!
Frequently Asked Questions
What’s the best way to clean my wood-fired pizza oven after cooking?
After your oven has cooled down completely, use a brass-bristle brush to sweep out any ash and charred debris from the cooking floor
