
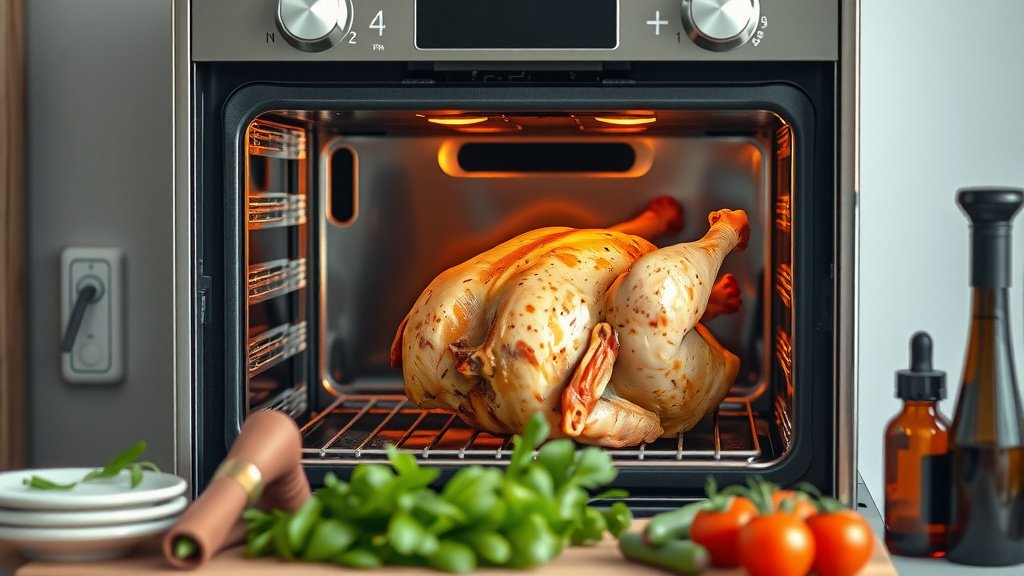
To cook a whole chicken in a dual fuel oven, preheat your electric oven to 400°F (200°C), then roast for about 60-90 minutes, or until the internal temperature reaches 165°F (74°C) in the thickest part of the thigh.
The electric oven component of your dual fuel range provides dry, consistent heat, which is ideal for achieving crispy skin and a juicy interior for your whole chicken.
For those short on time, here’s the quick scoop on roasting a whole chicken in your dual fuel oven:
- Prep your chicken: pat it dry and season well.
- Use a meat thermometer: doneness is key for food safety.
- Roast at 400°F (200°C) for crispy skin, then potentially lower for even cooking.
- Rest your chicken: this keeps it juicy after cooking.
- The electric oven offers better temperature stability for roasting.
How To Cook Whole Chicken In Dual Fuel Oven?
Cooking a whole chicken in a dual fuel oven means you’ll use the electric oven compartment, which is superb for roasting because it offers consistent, dry heat. This environment helps you achieve that coveted crispy skin and moist, tender meat.
Understanding Your Dual Fuel Oven
You’ve got the best of both worlds with a dual fuel oven, right? Gas cooktops offer instant, precise heat for stovetop tasks. But for baking and roasting, the electric oven truly shines. We found that electric ovens maintain a more stable and even temperature (Consumer Reports).
Why Electric is Best for Roasting
Electric ovens distribute heat very evenly. This means no hot spots to worry about, leading to a more consistently cooked chicken. This stable heat is your secret weapon for a beautifully browned, perfectly done bird. You won’t have to rotate the chicken as often.
Prepping Your Whole Chicken: The Foundation of Flavor
Before any heat hits your bird, a little prep goes a long way. Think of it as setting the stage for a culinary masterpiece. Don’t skip these simple steps.
Patting It Dry
This might seem small, but it’s huge for crispy skin. Use paper towels to pat the chicken thoroughly dry, inside and out. Moisture is the enemy of crispiness. Many experts say a dry surface browns better (USDA).
Seasoning Generously
Don’t be shy with your seasoning! Salt, pepper, garlic powder, paprika, or your favorite poultry rub. Get it everywhere, under the skin, and inside the cavity. This is where your flavor really builds.
Stuffing or Aromatics?
You can stuff the cavity with aromatics like lemon halves, onion wedges, garlic cloves, or fresh herbs. This infuses the chicken with extra flavor as it cooks. We found it makes a subtle but delicious difference. Just remember to remove them before serving.
The Right Temperature and Timing
Getting your oven temperature right is like finding the sweet spot. It ensures the chicken cooks through without drying out. Dual fuel ovens, with their electric precision, make this a breeze.
High Heat First, Then Lower (Optional)
Many recipes suggest starting at a higher temperature, around 425-450°F (220-230°C), for the first 15-20 minutes. This gives you a fantastic crispy skin. Then, you can lower the temperature to 375-400°F (190-200°C) to finish cooking. This method locks in juices.
Using Convection Mode (If Available)
Does your electric oven have convection? If so, you’re in luck! Convection circulates hot air, cooking the chicken faster and more evenly. If you use convection, reduce your suggested temperature by 25°F (15°C) and check for doneness earlier. It’s a real time-saver!
Approximate Cooking Times for Whole Chicken
The cooking time depends on the chicken’s size and whether you use convection. Here’s a general guide. Always rely on a meat thermometer for accuracy.
| Chicken Weight | Conventional Oven (375-400°F) | Convection Oven (350-375°F) |
|---|---|---|
| 3-4 lbs (1.4-1.8 kg) | 60-75 minutes | 45-60 minutes |
| 4-5 lbs (1.8-2.3 kg) | 75-90 minutes | 60-75 minutes |
| 5-6 lbs (2.3-2.7 kg) | 90-105 minutes | 75-90 minutes |
Ensuring Doneness: Your Meat Thermometer is Your Friend
Forget guessing. A reliable meat thermometer is the single most important tool for cooking chicken safely and perfectly. You want to hit that sweet spot without overcooking. Many guidelines point to 165°F (74°C) as the safe internal temperature (USDA).
Where to Probe for Temperature
Insert the thermometer into the thickest part of the thigh, making sure it doesn’t touch the bone. The juices should run clear. If they’re still pink, keep cooking.
The Golden Rule: Rest Your Chicken
Once your chicken is cooked to perfection, the hardest part is waiting. But trust us, resting is non-negotiable. It makes all the difference for a juicy bird.
Why Resting Matters
After cooking, the chicken’s juices are excited and concentrated at the surface. Resting allows them to redistribute throughout the meat. Cover it loosely with foil for 10-15 minutes. You’ll have a much juicier chicken, we promise.
Troubleshooting Common Issues
Even with the best ovens, sometimes things don’t go exactly as planned. Don’t worry, we’ve got your back. These are easy fixes.
- Skin not crispy? Try brushing with a little oil before roasting. Ensure the chicken is very dry initially. A blast of high heat at the end can also help.
- Chicken drying out? You might be overcooking it. Trust your thermometer, not just the clock. Brining the chicken beforehand can also help keep it moist.
- Uneven cooking? While electric ovens are great, rotating your roasting pan halfway through can sometimes help even more.
Your Whole Chicken Checklist for Success
Ready to tackle that bird? Here’s a quick recap to keep you on track:
- Choose the right size chicken for your needs.
- Pat the chicken completely dry.
- Season generously, inside and out.
- Preheat your electric oven properly.
- Use a roasting rack for even cooking.
- Monitor with a reliable meat thermometer.
- Rest the chicken for 10-15 minutes.
Conclusion
Cooking a whole chicken in your dual fuel oven really lets the electric oven shine. You get precise temperature control, leading to a consistently cooked bird with delicious, crispy skin and succulent, juicy meat. By following these straightforward steps—from proper prep to using a meat thermometer and resting—you’ll create a meal that truly impresses. It’s all about making smart use of your oven’s strengths, and your dual fuel unit is perfectly equipped for the task. Enjoy your perfectly roasted chicken!
How do I prevent my whole chicken from drying out in the oven?
To prevent your whole chicken from drying out, ensure you don’t overcook it by relying on a meat thermometer to confirm doneness at 165°F (74°C) in the thickest part of the thigh. Brining the chicken before roasting can also significantly help retain moisture, as can basting occasionally during cooking.
Should I roast a whole chicken with or without a lid in my dual fuel oven?
For a whole chicken, it’s generally best to roast it uncovered for most, if not all, of the cooking time. This allows the skin to get wonderfully crispy and brown. If you notice the skin is browning too quickly, you can loosely tent it with foil, but avoid a tight lid that traps steam.
What is the ideal rack position for roasting a whole chicken?
For optimal cooking and even browning, place your roasting pan on the middle oven rack. This position ensures that the chicken is centered between the top and bottom heating elements, allowing for consistent heat distribution around the entire bird.
Can I cook a stuffed whole chicken in a dual fuel oven, and are there any special considerations?
Yes, you can cook a stuffed whole chicken. However, be aware that the stuffing must also reach a safe internal temperature of 165°F (74°C). This often means the chicken itself may overcook slightly by the time the stuffing is done. Many experts recommend cooking stuffing separately for both safety and better texture.
How do I get super crispy skin on my roasted chicken?
For super crispy skin, first, pat the chicken extremely dry before seasoning. You can even refrigerate it uncovered for a few hours. Roast it at a higher temperature, like 400°F (200°C), at least initially. Additionally, ensure you use a roasting rack so air can circulate all around the bird, helping the skin crisp up evenly.
