How to Display Rolling Pins
How to display rolling pins well means keeping your most-used pin within reach, grouping the rest by size, and using a rack that protects the surface. You can make the display look neat without hiding tools you need during baking.
On this page (8 sections)
- How to display rolling pins where you bake most
- What display keeps rolling pins safe and easy to grab?
- How do you arrange rolling pins by size and use?
- Which rolling pins deserve an open display?
- How do you display rolling pins in a small kitchen?
- How do you display rolling pins with rings and mats?
- How do you keep displayed rolling pins clean?
- How do you decide which rolling pin to keep out?
How to display rolling pins well means keeping your most-used pin within reach, grouping the rest by size, and using a rack that protects the surface. The goal is a display that looks tidy and still lets you start rolling dough without a search.
A good display also keeps pins from rolling off a counter or crashing into other tools. Think about height, weight, and how often you bake.
That plan matters more than matching every pin to the same style.
How to display rolling pins where you bake most
Place the display near your prep counter, not near the stove. Rolling pins get dusty, and heat and steam can dry out wood over time.
A wall beside your work surface puts the tools where your hands already go. You reach, roll, and return the pin in one motion.
That setup works for daily pie crust, pizza dough, and cookies.
Check the distance from your main counter. If you must walk across the room, you will likely leave the pin on the counter anyway.
A display should support the habit you want.
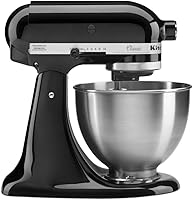
Our broader stand mixer guide shows the same rule for large tools. Keep the tool next to the surface where you use it, and store backup tools a little farther away.
What display keeps rolling pins safe and easy to grab?
A rack with separate slots or hooks keeps pins safe and easy to grab. Each pin stays upright, and you can see the length and handle at a glance.
Avoid a deep drawer if you bake often. Pins can wedge under other tools, and lifting them at an angle can knock items around.
A drawer works better for a spare pin or a specialty tool.
Check slot width before you buy. A 17 inch pin with rings needs more room than a plain pin.
Measure the longest pin and the widest ring set, then add clearance for your fingers.
A best rolling pin display rack can help you compare slot counts, wall mounts, and countertop stands. Look for a design that holds the full length without forcing the pin to lean.
How do you arrange rolling pins by size and use?
Group pins by size first and use second. Your everyday pin goes in the front slot, and specialty pins move toward the back.
Short pins suit small batches, cookies, and crafts. Longer pins suit pizza dough, pie crust, and large sheets of pasta.
Seeing that order helps you pick the right tool fast.
If you own an embossed pin, place it where you can see the pattern. Our guide to a best embossed rolling pin covers how pattern tools differ from plain rollers in daily use.
Label the front slot in your mind with one question. Which pin would you grab for tonight's dough?
That pin earns the easiest spot.
Which rolling pins deserve an open display?
Your daily driver and one specialty pin deserve an open display. The rest can live in a drawer, cabinet, or closed storage.
A stainless steel pin with thickness rings suits frequent bakers who roll different doughs. The rings set a repeatable depth, so you can switch from pie crust to cookies without guessing.
The best rolling pin with thickness rings guide explains why fixed depths help with pizza, pastry, and pasta. That control is useful, but it also makes the pin wider on a rack.
Look at the best rolling pin for baking picks if your current pin feels short or light. A better weight and length can make the display worth keeping open.
QUELLANCE makes this pin from 430 stainless steel. It includes removable rings at 1/16, 1/8, 1/4, and 3/8 inch.
The pin weighs 1.2 pounds and measures 17 by 2.5 inches. That size suits pizza, pie, fondant, pasta, and cookies.
Use it if you bake varied doughs and want a set depth. Skip it if you prefer a plain pin and find rings fiddly to store.
How do you display rolling pins in a small kitchen?
Use vertical space and cabinet sides in a small kitchen. A wall rack, door rack, or narrow stand keeps pins off the counter.
Place the rack where you will not bump it with a tray or mixer bowl. Corners near the prep zone work well.
A spot above a toaster oven can work too, if heat stays away from the tools.
Our Best Toaster Oven With Digital Display guide is a reminder to check clearance around heat sources. Keep pins out of the hot air path and away from steam.
Measure the wall before you mount anything. You need the full pin length plus room to pull it out.
A rack that forces an angle will fight you every time.
A silicone mat can roll and store beside the rack. The Sapid mat measures 24 by 36 inches, so it needs a flat spot or a tall cabinet shelf, not a small drawer.
SAPID makes this mat from fiberglass and food grade silicone. It has a 0.7 mm thickness and a non-slip surface.
The mat stands up to a range from -30 to 480 degrees F. It includes measurements in inches and centimeters.
Use it if you roll large doughs and want flour contained. Skip it if your counter cannot fit a 24 by 36 inch surface.
How do you display rolling pins with rings and mats?
Store rings on the pin only when the rack allows it. Rings add width, and a tight slot can scratch the pin or make removal hard.
If the rack is narrow, keep rings in a small container next to the pin. Label the depths or sort them by size.
That system keeps the display slim and the setup quick.
The Vinoil set shows why this matters. Its pin is 17 inches long and comes with four detachable rings in the same four depths as the QUELLANCE set.
Vinoil makes this pin from food grade 304 stainless steel. The set includes a measuring pastry mat.
The pin weighs 1.1 pounds. Vinoil says the steel surface will not be sticky like wood or crack like wood, and will not rust.
Use it if you want a matched pin and mat. Skip it if you already own a mat that fits your counter.
Our best rolling pin silicone picks can help you compare silicone surfaces. A mat helps with sticking and cleanup, but it takes storage room.
How do you keep displayed rolling pins clean?
Dust displayed pins weekly with a dry cloth. Open display means more dust, especially near flour bins.
Wash pins after use according to their material. Stainless steel can be wiped and cleaned with care.
Wood needs gentle washing and full drying before it returns to the rack.
Check rings for dough stuck in seams. Remove them, wash them, and dry them before you slide them back on.
That step prevents trapped moisture.
Keep the display away from grease splatter. A spot near a stove collects film fast, and that film makes the pin feel sticky.
A prep counter spot stays cleaner.
A classic wood pin, such as a best jk adams rolling pin, needs the same dusting routine. Wood shows dust and flour more than steel, so a quick wipe keeps it ready.
How do you decide which rolling pin to keep out?
Keep out the pin you use at least once a week. If a pin stays unused for a month, move it to a drawer.
Rotate the display by season. A sturdy pin for pie crust may lead in fall, while a lighter pin for cookies may lead in summer.
That change keeps the rack useful.
Ask what dough you roll most. Pizza, pie, pasta, and cookies each favor a different depth.
Rings help you switch, but only if you will actually change them.
Let the mat decide part of the plan. A large mat needs counter room, while a smaller mat can roll up beside a rack.
If the mat has no home, the display will fail.
How to display rolling pins comes down to reach, size, and habits. Keep one pin front and center, group the rest by length, and store rings and mats where they fit.
Pick a stainless steel pin with rings if you bake many dough types. Pick a large silicone mat if your counter can hold it.
Pick a simple rack if it holds your longest pin with room to spare.
Frequently asked questions
What is the best way to display rolling pins?
A wall rack, countertop stand, or open shelf near your work area works best. Keep the pin you use most in front, group similar sizes together, and leave enough room to lift each pin out without knocking others over.
How do you store rolling pins with thickness rings?
Store the rings on the pin only if the rack holds the wider shape without stress. Otherwise, keep rings in a small labeled container beside the pin so you can fit the depth you need for pie crust, cookies, or pizza dough.
Should rolling pins be displayed near a stove or oven?
No, keep them away from direct heat and steam. A spot near your prep counter and away from burners helps protect wood, silicone, and stainless steel, and it keeps flour dust from settling on warm surfaces.
How do you display rolling pins in a small kitchen?
Use vertical wall space, a door-mounted rack, or the side of a cabinet. A narrow rack that holds pins upright frees counter space while keeping tools visible and easy to grab during baking.