
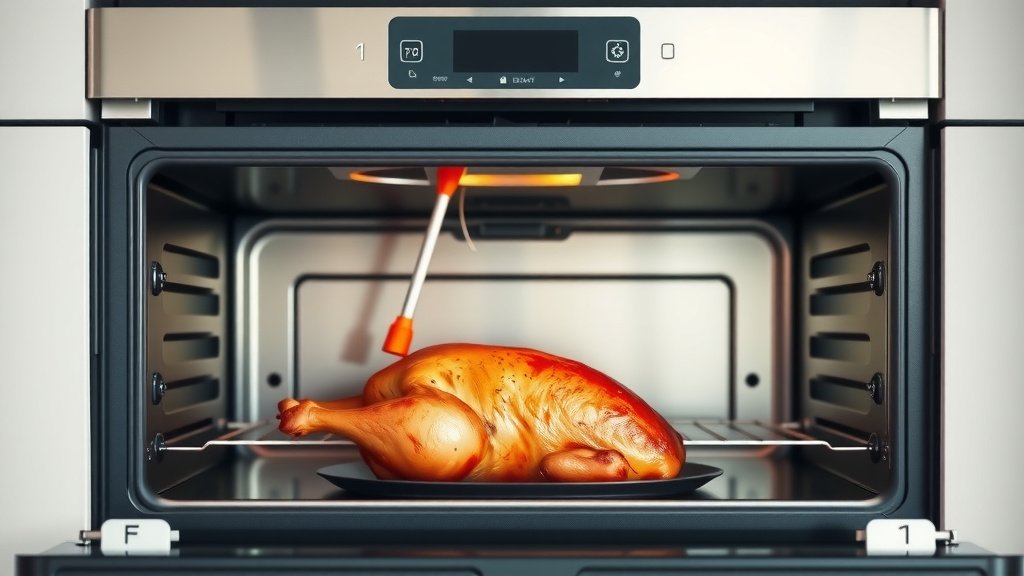
To use a probe thermometer in an electric oven, insert the metal probe into the thickest part of your food, avoiding bone, and route the heat-resistant cable to the external display unit. This setup allows you to continuously monitor the food’s internal temperature without opening the oven door.
The thermometer will then alert you once your food reaches its preset target temperature, ensuring it is cooked perfectly and safely every time.
- Insert the probe into the densest part of your food, keeping away from bones or fat pockets.
- Connect the probe’s wire to the base unit outside your electric oven, making sure the wire path is clear.
- Set your desired internal temperature on the base unit according to your recipe or food safety guidelines.
- Place the food with the inserted probe into the preheated oven.
- Wait for the alarm to sound, signaling that your food has reached its ideal doneness.
Ever wondered how professional chefs get their meats cooked so perfectly, every single time? It is not magic; it is about precision and science. When you are cooking with an electric oven, especially larger roasts or poultry, guessing the internal temperature can be a recipe for disaster. We have all been there, cutting into a beautiful roast only to find it is still a bit raw inside, or worse, completely dried out. Nobody wants that!
This is where a probe thermometer becomes your best friend in the kitchen. It is an indispensable tool that takes all the guesswork out of cooking. Think of it as your personal temperature guardian, watching over your food so you do not have to. Are you ready to master this simple yet powerful kitchen gadget?
How To Use Probe Thermometer In Electric Oven?
Using a probe thermometer in your electric oven is straightforward: just insert the probe into your food, set the desired temperature, and let it monitor until the alarm sounds. This ensures your meal is cooked to the ideal internal temperature for safety and taste.
Why Bother with a Probe Thermometer?
You might ask yourself, “Do I really need another gadget?” The answer is a resounding yes, especially for certain dishes. A probe thermometer ensures your food is cooked safely and tastes incredible. It is the secret to consistently delicious results, avoiding both undercooked risks and overcooked dryness.
Many experts, including the USDA, stress the importance of cooking food to specific internal temperatures to destroy harmful bacteria. A probe thermometer provides this crucial feedback. This means you can serve your family and friends with absolute confidence, knowing every bite is perfect.
Choosing the Right Spot for Your Probe
Where you put the probe makes all the difference in getting an accurate reading. The goal is to measure the coldest part of the food. This is typically the thickest section, away from any bones, fat, or gristle. Bones can conduct heat quickly, giving you a misleadingly high temperature reading, while fat can insulate and give a lower one.
Think about it like finding the deepest part of a swimming pool; you want to know the true depth, not just a shallow edge. This careful placement ensures the entire dish is cooked evenly and safely.
Meat Specifics
For meat like roasts, whole chickens, or turkeys, aim for the very center of the thickest muscle. For a turkey, this would be the thickest part of the thigh, avoiding the bone. For a pork shoulder, find the biggest meaty section. We found that inserting it from the side can help prevent the probe from falling out during cooking.
Non-Meat Dishes
Yes, you can use a probe thermometer for more than just meat! Think about custards, bread, or even casseroles where an exact internal temperature is important. For these, insert the probe into the center of the dish, ensuring it is fully submerged and not touching the baking dish itself. This helps avoid false readings from the hot metal pan.
Getting Your Probe Ready
Before you even think about sticking that probe into your food, a little preparation goes a long way. This ensures accuracy and makes your cooking experience smoother. It is a quick setup that saves a lot of trouble later on.
- Clean the Probe: Always wipe down the metal probe with warm, soapy water or an antibacterial wipe before and after use.
- Check Batteries: If your thermometer is battery-operated, make sure there is enough juice.
- Read Instructions: Familiarize yourself with your specific model’s controls.
- Calibrate (If Needed): Some professional-grade probes need occasional calibration. Check your manual.
Inserting the Probe Correctly
This step is probably the most crucial for accurate readings. With poultry, insert the probe into the thickest part of the thigh, near the joint, but not touching the bone. For a whole roast, push the probe into the center of the largest muscle mass. The tip of the probe, where the sensor is, needs to be fully embedded in the food.
Imagine you are trying to find the very core of something; that is where your probe needs to be. Many experts suggest inserting it at an angle, especially for flatter cuts, to get a better read on the true center.
Setting Your Desired Temperature
Your probe thermometer will have a display unit where you can set your target temperature. Consult your recipe or reliable sources like the USDA for recommended safe cooking temperatures. For example, poultry should reach 165°F (74°C) (USDA). Set this temperature, and the thermometer will do the rest.
This pre-setting is what makes probe thermometers so convenient. You essentially tell it what goal to reach, and it tirelessly works toward that objective. No more guessing, no more constantly opening the oven door.
| Food Item | Recommended Internal Temperature |
|---|---|
| Whole Poultry | 165°F (74°C) |
| Ground Meats | 160°F (71°C) |
| Beef, Pork, Lamb (Roasts, Steaks, Chops) – Medium-Rare | 145°F (63°C) |
| Fish | 145°F (63°C) |
| Egg Dishes | 160°F (71°C) |
Placing Food and Probe in the Oven
Once the probe is in the food and the temperature is set, carefully place your dish into the preheated electric oven. Make sure the probe’s wire is clear of the oven door and any heating elements. You want the wire to run smoothly out of the oven, allowing the external display unit to sit on your countertop or attach magnetically to the oven.
Never pinch the wire with the oven door or let it touch a hot element directly. This can damage the wire or, worse, create a fire hazard. Treat the wire gently, it is the lifeline between your food and your accurate readings.
Monitoring and Waiting
With everything set up, your job becomes incredibly easy. Simply watch the external display unit. It will show the food’s current internal temperature, steadily climbing towards your target. This is the beauty of a probe thermometer; it gives you real-time updates without ever disturbing the oven’s temperature.
Resist the urge to constantly open the oven door! Each time you do, you drop the oven temperature, lengthening cooking time and potentially affecting your food’s texture. Let the probe do its silent work.
When It Beeps: What Next?
Ah, the sweet sound of success! When your probe thermometer finally beeps, it means your food has reached its desired internal temperature. Carefully remove your dish from the oven. Remember, the probe will be hot, so use oven mitts!
Many experts, including those at Cornell University, recommend allowing cooked meats to rest for several minutes after removal from the oven. This resting period allows the juices to redistribute, resulting in a more tender and flavorful product. The internal temperature may even rise a few degrees during this time, known as “carryover cooking.”
Cleaning and Storing Your Probe
Just like any kitchen tool, proper cleaning and storage will extend the life of your probe thermometer. After use and cooling, clean the metal probe with warm, soapy water. Avoid submerging the base unit in water unless your model is specifically designed for it.
Store your thermometer in a clean, dry place, perhaps in a drawer or hung on a hook. Keeping it easily accessible means you will use it more often, leading to more perfectly cooked meals. A little care goes a long way!
Common Probe Problems Solved
Sometimes, things do not go perfectly, but do not worry, most probe issues are easy to fix. If your probe gives inconsistent readings, check if it is touching bone or fat. If the display is blank, try new batteries. If the wire seems damaged, it might be time for a replacement. Many manufacturers offer replacement probes, so you might not need a whole new unit.
We found that simple troubleshooting often resolves most problems. Always refer to your product manual first; it is designed to help you with your specific model.
Conclusion
Using a probe thermometer in your electric oven truly is a game-changer for home cooks. It takes the guesswork out of achieving perfectly cooked meals, whether you are roasting a holiday turkey or baking a delicate custard. By following these simple steps – correct insertion, proper temperature setting, and safe monitoring – you are well on your way to becoming a kitchen pro. So, go ahead, embrace the power of precision and enjoy consistently delicious results!
Can I leave the probe thermometer in the oven the entire cooking time?
Yes, most probe thermometers are designed to be left in the food throughout the entire cooking process in an electric oven. Just ensure the probe’s wire is heat-safe and not pinched by the oven door or touching direct heating elements.
What is the ideal placement for a meat probe in a whole chicken?
For a whole chicken, the ideal placement for the meat probe is in the thickest part of the thigh, making sure it avoids touching any bone. This spot will give you the most accurate reading for overall doneness.
Why is my probe thermometer reading inconsistent temperatures?
Inconsistent temperature readings often occur if the probe is touching bone, gristle, or a large pocket of fat. Always aim to insert the probe into the densest muscle part of the food, away from these elements, for the most accurate results.
Do all electric ovens have built-in probe thermometer jacks?
No, not all electric ovens have built-in probe thermometer jacks. Many home cooks use external, standalone probe thermometers that sit outside the oven with a heat-resistant wire leading into the food. Check your oven’s manual to see if it includes this feature.
How do I calibrate my probe thermometer for accuracy?
To check calibration, research suggests placing the probe in a glass of ice water (should read 32°F / 0°C) or boiling water (should read 212°F / 100°C at sea level). If it is off by more than a few degrees, some professional-grade models allow adjustment; otherwise, it might be time for a new one (National Sanitation Foundation).
