
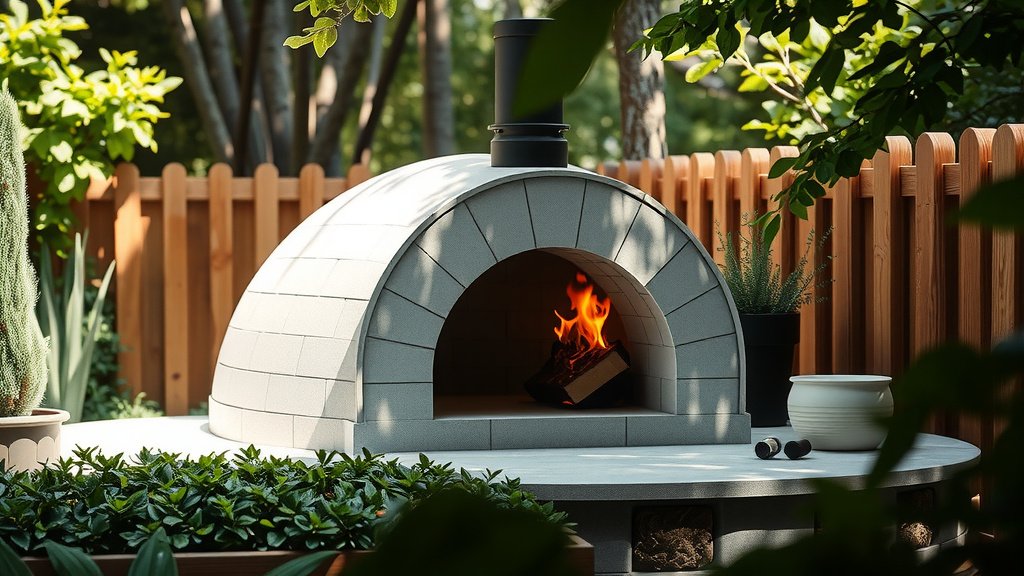
Building a pizza oven at home involves creating a sturdy foundation, an insulated base, a refractory cooking floor, and a dome for optimal heat retention and distribution, often finished with an arch and chimney for ventilation.
To successfully build a pizza oven, you’ll need materials like refractory bricks, concrete, insulation boards, and careful attention to curing processes to prepare it for cooking delicious pizzas.
- Building your own pizza oven offers incredible homemade pizza, saving money over time, and a rewarding DIY project.
- You need to choose between a wood-fired or gas oven, considering cost, effort, and desired flavor.
- Essential materials include refractory bricks, insulation, and cement, while tools are basic construction items.
- The construction process involves laying a strong foundation, building an insulated base, forming the dome, and finally curing the oven with small fires.
- Remember safety during construction and use, and follow proper maintenance for your long-lasting pizza oven.
How To Build A Pizza Oven At Home?
Building your own pizza oven at home might seem like a big project, but it’s quite achievable. You can create a fantastic cooking space with careful planning and the right steps, perfect for crispy crusts and melted cheese.
Why Build Your Own Pizza Oven?
Ever dreamed of that authentic pizzeria taste right in your backyard? A homemade pizza oven makes it real. It’s not just about pizza; think artisan bread, roasted vegetables, or even slow-cooked meats.
Beyond the food, building your own oven can be a deeply satisfying project. It can save you money versus buying a pre-made unit, and the experience adds a unique touch to your outdoor living space.
Key Decisions Before You Start
Before you lift a single brick, consider a few important choices. Where will your oven live? Is it near your patio or a quiet corner of the garden? You’ll need a level, stable area, free from overhead obstructions.
Another big choice is the fuel type. Do you prefer the rustic charm of wood or the convenience of gas? Each has its perks, and your decision will shape your construction plan.
Wood-Fired vs. Gas Pizza Ovens
Both types of ovens deliver great pizza, but they offer different experiences. Wood-fired ovens are traditional, giving that smoky flavor many love. Gas ovens offer quick heating and precise temperature control.
We found that wood-fired ovens require more effort to maintain temperature. Gas models, conversely, generally need less tending during cooking (Many experts agree).
| Feature | Wood-Fired Oven | Gas Pizza Oven |
|---|---|---|
| Flavor Profile | Smoky, rustic taste | Clean, consistent bake |
| Heating Time | Longer to reach temp | Faster, more controlled |
| Fuel Cost | Can be lower if wood is free | Consistent gas utility cost |
| Maintenance | Ash removal, wood storage | Less cleaning, fuel lines |
| Aesthetics | Traditional, active fire | Sleeker, modern look |
Essential Materials for Your DIY Oven
So, what do you need to bring this dream to life? You’ll be working with some heavy-duty stuff. Think of it like building a tiny, very hot house for your pizzas.
A good list usually includes fire-rated refractory bricks for the dome and floor. You’ll also need concrete for the foundation, insulating boards, and heat-resistant mortar.
Gathering Your Tools
You probably have many of these tools already. Nothing too exotic here. We found that most home builders use standard construction tools for this project.
Make sure you have a shovel, trowel, spirit level, measuring tape, and safety gear. A wheelbarrow for mixing concrete will be a true friend, saving your back!
Understanding the Basic Structure
A pizza oven is more than just a pile of bricks. It has several distinct layers, each serving a crucial purpose. Think of it as a cleverly designed thermal system.
First, a solid foundation supports everything. Then comes an insulated base, followed by the cooking floor. Above that, the dome holds the heat, and a chimney helps with smoke. Each layer matters for performance.
Step-by-Step Construction Guide
Ready to get your hands dirty? This is where your vision starts to take shape. Remember, patience is key, and taking your time will yield the best results.
We’ve broken down the process into clear, manageable steps. You’ll be surprised how quickly your pizza oven begins to look like a real oven!
Step 1: Laying a Solid Foundation
Every great structure starts with a strong base. For your pizza oven, this means a concrete slab that won’t shift. Research suggests a depth of at least 4-6 inches for stability (local building codes may vary).
Ensure your foundation is perfectly level. This prevents future structural problems and makes the rest of the build much easier. A good foundation is key to longevity.
Step 2: Building the Oven Base
Once your foundation cures, you’ll construct the stand for your oven. This can be built from concrete blocks or bricks. The goal is a sturdy, level platform at a comfortable cooking height.
Inside this base, you’ll add insulation. Many experts recommend calcium silicate boards or perlite mixed with concrete. This insulation stops heat from escaping downwards, keeping it in your oven.
Step 3: Creating the Oven Floor
The cooking surface is vital. It needs to hold and radiate heat effectively. This is where your refractory bricks come in, laid flat and tightly together on top of the insulated base.
Lay these bricks with a very thin layer of high-temperature mortar. A completely flat, smooth surface is essential for sliding pizzas in and out effortlessly.
Step 4: Shaping the Dome
This is arguably the most iconic part of your pizza oven. The dome is what holds and reflects the intense heat needed for perfect pizza. You can freehand it or use a temporary form.
You’ll lay refractory bricks in a series of diminishing rings, creating that classic arch. It takes precision, but watching the dome form is incredibly rewarding.
Step 5: Adding Insulation
Once the dome is built, it needs a thick blanket of insulation. This traps the heat inside, making your oven more efficient and reaching higher temperatures. Without good insulation, your oven will lose heat fast.
We found materials like ceramic fiber blankets or vermiculite mixed with cement work well. This layer helps your oven stay hot for hours, even after the fire dies down.
Step 6: Constructing the Arch and Chimney
The oven opening needs a strong arch to support the dome above it. This is typically built using fire bricks. Then, you’ll add the chimney, which directs smoke up and away from your cooking area.
Ensure your chimney has a good draw. This means it effectively pulls smoke out, preventing it from billowing into your face as you cook. A well-designed chimney is a big plus.
Step 7: Curing Your New Pizza Oven
Your oven isn’t ready for a full-blast pizza party just yet! Curing is a critical step. It slowly drives out any moisture from the mortar and bricks, preventing cracks later on.
You’ll do this by building several small, low-temperature fires over a few days or weeks. Gradually increase the fire size. This process makes your oven much more durable and ready for high heat.
Here’s a simple checklist for your curing process:
- Start with a very small fire for 2-3 hours.
- Repeat the small fire daily for 3-5 days.
- Increase fire size slightly for the next 2-3 days.
- Build a medium fire, allowing heat to soak in.
- Your oven should be dry and ready for a full pizza fire!
Safety Tips for Construction and Use
Working with heavy materials and fire demands respect and caution. Always wear appropriate safety gear during construction, including gloves, eye protection, and sturdy footwear.
When using your oven, never leave a fire unattended. Keep children and pets at a safe distance. Always have a water source nearby, just in case. Your safety is paramount.
Maintenance for Long-Lasting Pizzas
Once built, your pizza oven needs a little love to keep it in top shape. Regularly sweep out ash and food debris from the cooking chamber. Inspect for any cracks in the mortar or dome and repair them promptly.
Cover your oven when not in use, especially in harsh weather. This protects it from rain and frost, extending its life for many years of delicious pizzas.
Conclusion
Building a pizza oven at home is a rewarding journey, offering both the satisfaction of a DIY project and the joy of authentic, wood-fired flavors. It takes time and effort, but the result is a unique addition to your home that will bring countless delicious meals and gatherings.
With careful planning, the right materials, and a commitment to safety, you can create a beautiful and functional pizza oven. Imagine the aroma of fresh pizza wafting through your backyard – it’s a dream well within your reach.
How long does it take to build a homemade pizza oven?
The time to build a homemade pizza oven varies widely based on your skill level and the complexity of the design. Typically, it can take anywhere from a few weekends to several weeks of dedicated work. Much of this time accounts for mortar and concrete curing between stages.
What is the best material for a pizza oven floor?
The best material for a pizza oven floor is undoubtedly refractory brick. These bricks are specifically designed to withstand extremely high temperatures and absorb and radiate heat evenly, ensuring your pizza crust cooks perfectly from the bottom.
Can I convert a traditional oven into a pizza oven?
You cannot truly convert a traditional kitchen oven into a high-performance pizza oven. Traditional ovens don’t reach the extreme temperatures needed (typically 700-900°F or 370-480°C) for authentic pizza. They also lack the dome shape and thermal mass for proper heat distribution.
How hot does a homemade pizza oven get?
A well-built homemade pizza oven can easily reach temperatures between 700°F and 900°F (370°C and 480°C), sometimes even higher. This intense heat is crucial for cooking pizzas quickly in just 60-90 seconds, resulting in a crispy crust and perfectly melted toppings.
Is building a pizza oven at home expensive?
The cost of building a pizza oven at home can range from a few hundred dollars to several thousand, depending on the materials you choose and the size/complexity of the oven. Using reclaimed bricks or simple designs can keep costs lower, while high-end refractory materials and elaborate finishes will increase the price.
