
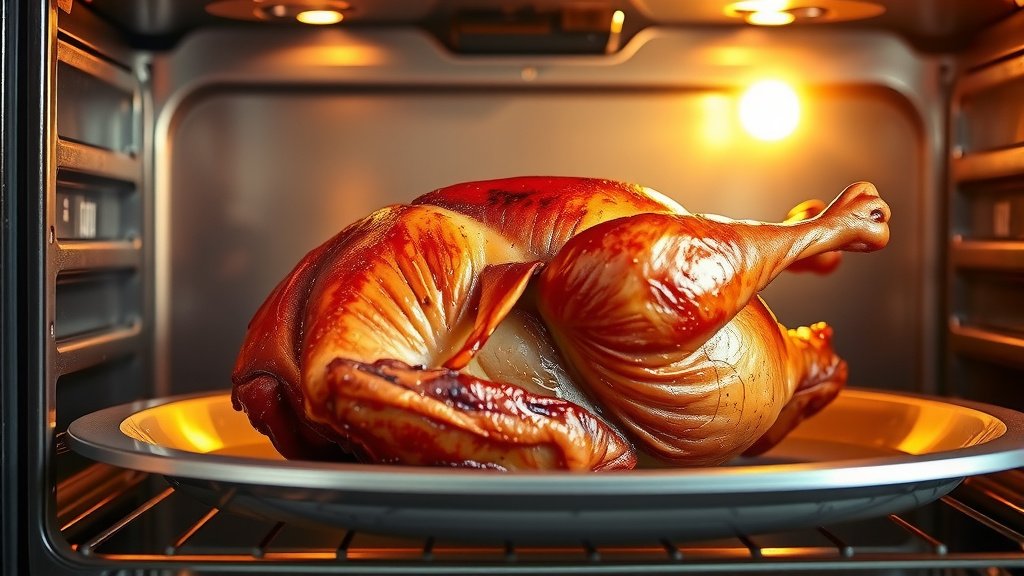
To cook a whole duck in an electric oven, you’ll typically roast it at a medium-high temperature, around 350-375°F (175-190°C), for 2.5 to 3 hours, to achieve crispy skin and succulent meat.
The core process involves preparing the duck by scoring the skin, seasoning generously, and then roasting it on a rack to allow the fat to render properly and ensure even cooking.
Here’s a quick overview of what you’ll discover for a perfectly roasted duck:
- Prepping your duck ensures maximum crispiness.
- The right oven temperature is crucial for tender meat.
- Rendering fat slowly makes for the best flavor.
- A little rest after roasting can make all the difference.
- Electric ovens offer consistent heat for reliable results.
How To Cook A Whole Duck In Electric Oven?
Cooking a whole duck in your electric oven is simpler than you might think, transforming a special occasion meal into an achievable weeknight delight. The consistent heat of an electric oven is a real friend here.
We’ll guide you through each step, from preparing your duck to carving that beautiful, crispy masterpiece. Are you ready to impress your family and friends?
Prepping Your Duck for Roasting
Before your duck even sees the oven, a little preparation goes a long way. Think of it as setting the stage for a culinary show. This initial effort helps ensure maximum crispiness.
First, remove the duck from its packaging and take out any giblets from the cavity. Give it a good rinse inside and out with cold water. Pat it bone-dry with paper towels, a critical step for crispy skin.
Scoring and Pricking the Skin
This is where the magic begins for rendering fat. Using a sharp knife, score the duck skin in a crosshatch pattern. Be careful not to cut into the meat itself.
Then, use a fork to prick the skin all over, especially in thicker, fatty areas like the breast and back. These tiny holes allow the fat to escape during cooking, creating that incredible crispy texture we all crave (Cook’s Illustrated).
Seasoning Your Whole Duck
Salt and pepper are your basic friends here. Don’t be shy; duck can handle a generous amount of seasoning. Rub it all over the duck, inside and out.
For extra flavor, consider stuffing the cavity with aromatics. A quartered onion, a few garlic cloves, and a sprig of rosemary or thyme work wonderfully. This adds a subtle, fragrant note to the duck.
Setting Up Your Electric Oven for Success
Electric ovens offer very stable heat, which is perfect for roasting a duck. Preheat your oven well in advance to ensure it’s at the target temperature. A consistent temperature prevents sudden drops and ensures even cooking.
You will need a sturdy roasting pan with a rack. The rack is essential because it lifts the duck, allowing the rendered fat to drip away. This prevents the duck from stewing in its own fat.
| Duck Weight | Approximate Roasting Time (350-375°F / 175-190°C) | Internal Temperature Goal |
|---|---|---|
| 4-5 lbs (1.8-2.3 kg) | 2 hours 15 mins – 2 hours 45 mins | 165°F (74°C) |
| 5-6 lbs (2.3-2.7 kg) | 2 hours 30 mins – 3 hours 15 mins | 165°F (74°C) |
| 6-7 lbs (2.7-3.2 kg) | 3 hours – 3 hours 45 mins | 165°F (74°C) |
The Roasting Process: Step-by-Step
Place your prepared duck, breast-side up, on the rack in your roasting pan. Put it into the preheated electric oven. Many experts say starting at a slightly higher temperature then dropping it helps (America’s Test Kitchen).
Some recipes suggest starting at 400°F (200°C) for 15-20 minutes. This gives the skin a head start on crisping. Then, reduce the temperature to 350-375°F (175-190°C) for the remainder of the cooking time.
Draining the Fat During Cooking
During roasting, you’ll notice a lot of fat collecting in the bottom of your pan. This is exactly what we want! Every 30-45 minutes, carefully remove the pan from the oven. Pour off the rendered fat into a heatproof container.
Duck fat is liquid gold, so don’t throw it away! You can save it for roasting potatoes or vegetables later. This step is vital for crispy skin and prevents the duck from steaming.
Checking for Doneness
The best way to know if your duck is ready is to use an instant-read meat thermometer. Insert it into the thickest part of the thigh, avoiding the bone.
We found that the duck is fully cooked when it reaches an internal temperature of 165°F (74°C). The juices should also run clear when you pierce the thigh with a knife. For very crispy skin, some people even go up to 170-175°F (77-79°C).
Achieving Ultra-Crispy Skin
Crispy duck skin is often the star of the show. If your skin isn’t as crisp as you’d like, you have a few tricks up your sleeve. After draining the fat, you can increase the oven temperature to 400-425°F (200-220°C) for the last 15-20 minutes.
Keep a close eye on it during this phase to prevent burning. The higher heat helps to really brown and crisp up the skin to perfection. Just watch for any smoke signals!
The Importance of Resting Your Duck
Once your duck is cooked, resist the urge to carve it immediately. Transfer the duck to a cutting board and tent it loosely with foil. Let it rest for at least 15-20 minutes.
This resting period allows the juices to redistribute throughout the meat. The result? A much more tender and flavorful duck. It’s a small step that makes a huge difference in the final taste.
Carving Your Roasted Duck
Carving a whole duck is similar to carving a chicken or turkey. First, remove the legs by cutting through the joint where they meet the body. You can then separate the thigh from the drumstick.
Next, slice off the breast meat from each side. Make sure your knife is sharp! Arrange the carved pieces on a platter and serve immediately. Enjoy your hard work!
Troubleshooting Common Duck Roasting Issues
What if the skin isn’t crisp, or the meat is dry? Don’t worry, these are common learning curves. If your skin isn’t crisp, you might not have pricked or scored enough, or perhaps didn’t drain the fat often enough.
Dry meat often means overcooking. Always trust your meat thermometer. Every oven is a little different, so adjustments are perfectly normal. We found that a good meat thermometer is your best friend here.
Why Electric Ovens Are Great for Duck
Electric ovens typically provide a very even and consistent heat. This uniform temperature helps the duck cook through steadily, without hot spots that can burn one side while leaving another undercooked.
Many home cooks find electric ovens easier to control for long, slow roasts. You set the temperature, and the oven holds it reliably. This consistency is a big win for dishes like whole roasted duck (Good Housekeeping Institute).
Essential Checklist for Roasting a Whole Duck
- Whole duck (thawed if frozen)
- Sharp knife and fork
- Paper towels for drying
- Salt and pepper, plus desired aromatics
- Roasting pan with a rack
- Instant-read meat thermometer
- Heatproof container for rendered fat
- Foil for resting
- Cutting board and carving knife
Conclusion
Roasting a whole duck in your electric oven is a rewarding culinary adventure. By following these steps—from meticulous preparation and proper seasoning to consistent roasting temperatures and essential resting—you’ll create a dish that is both impressive and delicious.
Remember, the goal is always that perfect balance: wonderfully crispy skin paired with tender, juicy meat. Don’t be afraid to experiment with your favorite herbs and spices. Your electric oven is ready to help you achieve duck-roasting success!
What kind of duck is best for roasting?
For roasting, a Pekin duck is a popular choice, known for its mild flavor and generous amount of succulent meat. You might also find Muscovy ducks, which are leaner but still very tasty.
Can I stuff a duck before roasting it?
Yes, you can absolutely stuff a duck! Aromatics like quartered onions, garlic cloves, fresh herbs (rosemary, thyme), or citrus slices (lemon, orange) are excellent choices. They add flavor to the cavity and the meat as it roasts.
How do I prevent duck skin from getting soggy?
To prevent soggy skin, make sure to pat the duck very dry before roasting. Score and prick the skin generously to allow fat to render, and regularly drain the rendered fat from the roasting pan. Roasting on a rack is also key.
Can I use the rendered duck fat for anything?
Absolutely! Rendered duck fat is highly prized for its rich flavor. Store it in an airtight container in the refrigerator, and use it for roasting potatoes, vegetables, or even for confiting other meats. It adds an incredible depth of flavor.
What if my electric oven doesn’t have a convection setting?
No problem at all! The instructions provided are for a standard electric oven without convection. If you do have convection, you might reduce the temperature by about 25°F (15°C) and check for doneness slightly earlier, as convection cooks faster.
