
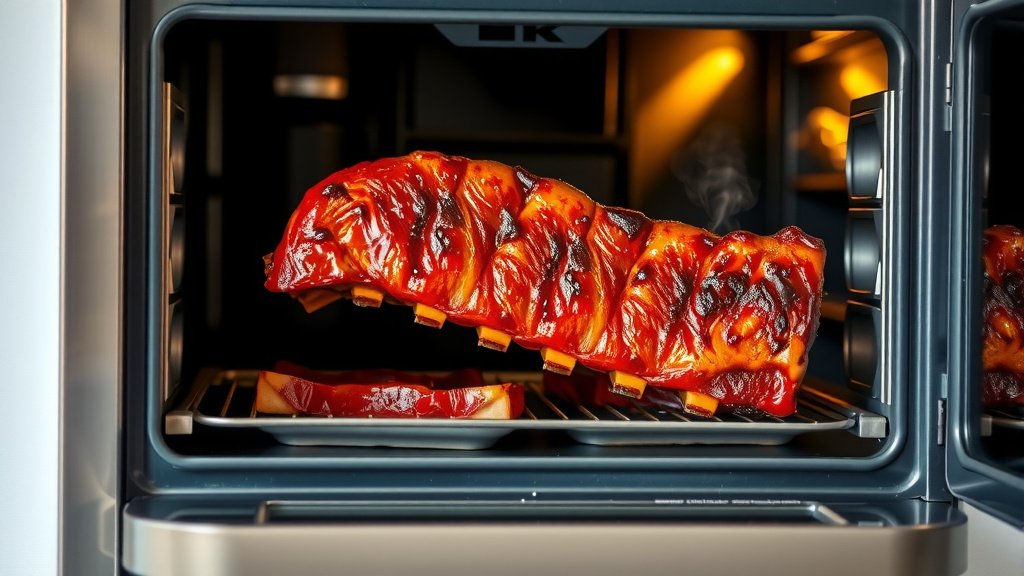
The best way to cook pork ribs in an infrared oven is to preheat your oven to a moderate temperature, around 300-325°F (150-163°C), and then cook them low and slow for 2-3 hours, finishing with a higher heat sear. This method helps achieve tender, juicy ribs with a fantastic crust.
To cook pork ribs in infrared oven, you should focus on balancing the radiant heat to tenderize the meat without drying it, often by wrapping or spritzing, before a final high-heat finish.
TL;DR:
- Infrared ovens cook ribs beautifully, offering even heat distribution.
- Start with proper rib preparation: remove membrane, season well.
- Use a two-stage cooking process: low and slow, then a quick sear.
- Maintain consistent oven temperature for best results.
- Finish with a delicious sauce for a perfect, restaurant-quality meal.
How To Cook Pork Ribs In Infrared Oven?
To cook pork ribs in an infrared oven, you will need to first prepare your ribs with seasoning, then bake them at a lower temperature for tenderness, and finally finish them with a short burst of higher infrared heat for a beautiful, crispy exterior. This combination delivers fall-off-the-bone meat and a flavorful bark.
Understanding Your Infrared Oven
Infrared ovens are a bit different from traditional convection ovens. They use radiant heat to cook food more directly. Think of it like cooking with sunlight; the heat waves penetrate the food, cooking it from the inside and outside simultaneously. This can mean faster cooking times and often a better sear.
What Makes Infrared Different?
Unlike conventional ovens that heat the air, infrared ovens heat objects directly. This creates a much more consistent cooking environment around your ribs. Many chefs observe that infrared ovens can help achieve a crispier exterior without sacrificing internal juiciness.
The intense radiant heat can be a double-edged sword. You get great browning, but you must monitor your ribs closely to avoid over-drying. It’s all about learning your oven’s unique power.
Preparing Your Pork Ribs
Great ribs begin long before they hit the heat. Proper preparation is key to achieving that tender, mouth-watering result. Do not skip these initial steps; they truly make a difference.
Choosing the Right Ribs
When selecting pork ribs, you have a few options: spare ribs, St. Louis style, or baby back ribs. Baby backs are smaller and leaner, cooking faster. Spare ribs and St. Louis style ribs are meatier and take a bit longer. We often find that St. Louis style ribs offer a good balance of meat and fat.
The Essential Membrane Removal
Beneath the bone side of your ribs, you will find a thin, tough membrane. Removing this is non-negotiable for tender ribs. If you leave it on, the ribs can taste chewy and prevent seasoning from fully penetrating the meat. Many experts suggest using a butter knife to lift an edge, then grip with a paper towel to pull it off.
Seasoning Your Ribs for Flavor
Now comes the fun part: seasoning! A good dry rub is fundamental for infrared ribs. Apply a generous layer of your favorite rub, ensuring it covers all surfaces. For best results, allow the seasoned ribs to rest in the refrigerator for at least an hour, or even overnight. This gives the flavors time to sink deep into the meat.
Infrared Oven Cooking Steps for Ribs
Let’s get those ribs cooking! The process is fairly straightforward but requires attention to detail. We want those ribs to be both tender and beautifully crusted.
Preheating for Success
Always preheat your infrared oven thoroughly. Set it to approximately 300-325°F (150-163°C). A fully preheated oven ensures even cooking from the moment the ribs enter. Some research indicates that consistent starting temperatures are vital for low and slow cooking (Cook’s Illustrated).
The Low and Slow Method
Place your seasoned ribs on a baking rack over a drip pan. For the initial cook, consider wrapping the ribs tightly in foil. This creates a steamy environment, helping to tenderize the meat. Cook for about 2 to 2.5 hours at the lower temperature. This phase is all about making them fall-off-the-bone tender.
Achieving the Perfect Sear
After the low and slow phase, remove the foil. If you plan to sauce your ribs, brush on your favorite BBQ sauce now. Increase the oven temperature to around 375-400°F (190-200°C) and continue cooking for 15-30 minutes. This higher heat will create a lovely crust and caramelize the sauce. Watch them closely; infrared heat browns quickly!
Tips for Heavenly Ribs
- Monitor internal temperature: Use a meat thermometer. Ribs are done when they reach 195-203°F (90-95°C) for optimal tenderness.
- Spritz for moisture: If not wrapped, spritz your ribs with apple cider vinegar or apple juice every 30-45 minutes. This keeps them moist.
- Rest your ribs: After cooking, let the ribs rest, loosely tented with foil, for 10-15 minutes. This allows juices to redistribute.
- Experiment with rubs and sauces: Don’t be afraid to try new flavor combinations. The infrared oven is very forgiving with different seasonings.
Common Rib Cooking Questions
People often ask about specific timings or what to do if things go wrong. Here’s a quick guide to some common dilemmas.
| Problem | Potential Cause | Infrared Solution |
|---|---|---|
| Ribs are dry | Overcooked, not enough moisture | Wrap earlier, spritz more frequently, cook at slightly lower temp. |
| Ribs are tough | Undercooked, membrane still on | Cook longer in foil, ensure membrane is removed before cooking. |
| Uneven browning | Hot spots in oven, not rotated | Rotate ribs halfway through searing phase. |
| Sauce burning | Applied too early, temp too high | Apply sauce during the final searing stage only, monitor closely. |
Essential Tools Checklist
Having the right tools makes cooking ribs in an infrared oven much easier and more enjoyable. Here are some must-haves:
- Sharp Knife: For separating ribs.
- Paper Towels: Critical for gripping and removing the membrane.
- Meat Thermometer: To check for perfect doneness.
- Baking Rack and Drip Pan: Keeps ribs elevated and catches drippings.
- Aluminum Foil: For wrapping ribs during the low-and-slow phase.
- Basting Brush: For applying sauces.
Conclusion
Cooking pork ribs in an infrared oven might seem a bit different, but it’s a rewarding experience. You can achieve incredibly tender, flavorful ribs with a beautiful crust. Remember to prepare them well, cook them low and slow for tenderness, and then finish with a higher infrared sear for that perfect exterior. With a little practice and attention to detail, you will be making restaurant-quality ribs right in your own kitchen. So, go ahead, give it a try!
Can I cook frozen ribs directly in an infrared oven?
No, it’s not recommended to cook frozen ribs directly in an infrared oven. For food safety and best cooking results, always thaw your pork ribs completely in the refrigerator first. Cooking from frozen can lead to uneven cooking and potentially unsafe internal temperatures.
What is the ideal internal temperature for cooked pork ribs?
For truly tender, fall-off-the-bone pork ribs, the ideal internal temperature is generally between 195-203°F (90-95°C). While pork is safe to eat at 145°F (63°C), reaching a higher temperature for ribs allows the connective tissues to break down, resulting in that desirable tender texture.
Should I use a dry rub or a wet marinade for infrared ribs?
A dry rub is typically preferred for infrared ribs because it creates a delicious bark and crust during the cooking process. Wet marinades can sometimes prevent proper browning and might cause burning if they contain sugar and are exposed to high infrared heat for too long.
How do I prevent ribs from drying out in an infrared oven?
To prevent ribs from drying out, wrap them tightly in aluminum foil during the initial low-and-slow cooking phase. You can also spritz them every 30-45 minutes with apple cider vinegar or apple juice. Applying sauce only towards the end of cooking helps too, as sugar in sauce can burn.
Can I cook different cuts of pork ribs simultaneously?
You can cook different cuts, like baby back and spare ribs, at the same time, but you will need to adjust cooking times. Baby back ribs typically cook faster than spare ribs. Monitor each cut with a meat thermometer and remove them from the oven as they reach their ideal doneness.
