
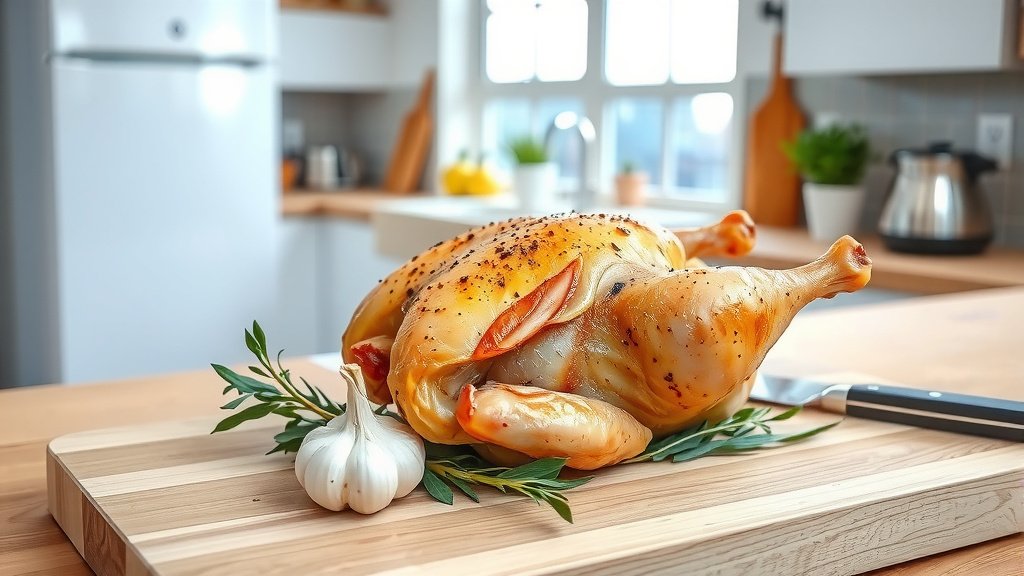
You can make a delicious rotisserie-style chicken without a spit by using your oven’s high heat and proper positioning. The key is to create an environment that mimics the constant turning, promoting even cooking and crispy skin.
The most effective method involves roasting on a rack, often elevated, in a hot oven, ensuring air circulates around the entire bird for that desirable “rotisserie” texture.
TL;DR:
- Achieve rotisserie-style chicken without a spit using high oven heat and proper trussing.
- Methods include oven roasting on a rack, air frying smaller birds, or using a Dutch oven for extra moisture.
- Brining and trussing are essential for even cooking and juicy results.
- Monitor internal temperature with a meat thermometer for food safety and perfect doneness.
- Always allow your chicken to rest after cooking to retain its delicious juices.
How To Make A Rotisserie Chicken Without Spit?
Making a rotisserie chicken without the specialized spit attachment is absolutely possible. We found that the core idea is to replicate the spit’s benefits: even cooking, crispy skin, and juicy meat.
You achieve this through careful preparation, the right cooking environment, and a bit of patience. It’s like giving your chicken a spa day in a very hot oven!
Understanding the Rotisserie Magic
What makes a rotisserie chicken so good? It’s the continuous rotation. This ensures all sides get direct heat exposure, leading to even browning and cooking. Without a spit, you become the rotator, kind of.
Our goal is to ensure heat circulates fully around the bird. This prevents one side from drying out while another stays pale. It’s all about heat management.
Method 1: The Classic High-Heat Oven Roast
This is arguably the most common and effective way. Many experts say a hot oven is your best friend here (USDA).
You’re aiming for crispy skin and tender meat. It’s a method that consistently delivers fantastic results for home cooks.
Preparing Your Chicken for Roasting
First, pat your chicken completely dry with paper towels. Dry skin leads to crispy skin, we found. Consider removing any excess fat from the cavity.
Season generously. Salt, pepper, garlic powder, paprika – whatever you love. Some chefs even suggest a light brine for extra moisture and flavor, particularly if you have the time (Cook’s Illustrated).
The All-Important Trussing Step
Trussing means tying the chicken with kitchen twine. Why do this? Research shows it helps the chicken cook more evenly. It keeps the legs and wings tucked in.
When you truss, the chicken forms a compact shape. This prevents smaller parts from overcooking before the larger breast and thigh sections are done. It makes a big difference.
Here’s a quick trussing checklist:
- Pat chicken dry.
- Tuck wings under the body.
- Cut a long piece of kitchen twine.
- Loop twine around the bird, securing wings and legs together.
- Tie snugly, but not too tight.
Setting Up Your Roasting Environment
You’ll need a roasting rack placed inside a roasting pan. If you don’t have a rack, you can create one with chopped root vegetables like carrots, celery, and onions.
This elevation is key. It lifts the chicken off the pan, allowing hot air to circulate underneath. Think of it as a mini air tunnel for your bird.
Roasting Time and Temperature
Preheat your oven to a high temperature, around 400-425°F (200-220°C). We found this initial high heat helps crisp the skin quickly.
Roast for about 1 hour to 1 hour and 30 minutes, depending on chicken size. Use a meat thermometer to check doneness; it should reach 165°F (74°C) in the thickest part of the thigh, away from the bone (FDA).
Method 2: Air Fryer for Smaller Birds
Got a smaller chicken? Your air fryer can mimic a rotisserie beautifully. It works like a super-convection oven, giving amazing crispness.
This method is fantastic for a single serving or smaller family, typically chickens up to 3-4 pounds. It’s surprisingly efficient.
Air Fryer Prep and Placement
Prepare your chicken as you would for oven roasting: pat dry, season, and truss. Ensure it fits comfortably in your air fryer basket without touching the heating element.
Place the chicken breast-side up in the basket. Make sure there’s enough space around it for air to flow. Overcrowding is the enemy of crispiness here.
Air Frying for Crispy Perfection
Set your air fryer to 350-375°F (175-190°C). Cook for about 45-60 minutes, flipping halfway through. Flipping is your manual rotation, helping both sides brown.
Again, check the internal temperature in the thigh. It should be 165°F (74°C) for safe eating. You’ll be amazed at the crispy skin!
Method 3: The Dutch Oven for Ultimate Moisture
If your goal is an incredibly moist, fall-off-the-bone chicken, a Dutch oven is a great option. It’s less about crispiness and more about tender succulence.
This method creates a steamy, enclosed environment. It’s perfect for those who prioritize juicy meat over a super-crisp skin, though you can still achieve some browning.
Setting Up Your Dutch Oven Roast
Place a bed of aromatic vegetables (onions, carrots, celery) at the bottom of your Dutch oven. This elevates the chicken slightly and infuses it with flavor. No need for a rack here!
Season your chicken well. You can even add a small amount of liquid, like chicken broth or wine, to the bottom for extra steam and flavor. Then, place your prepared chicken on the vegetable bed.
Cooking in a Dutch Oven
Roast covered at 375°F (190°C) for about 1 hour and 15 minutes. Covering traps the moisture, leading to that incredibly tender result.
For some browning, remove the lid for the final 15-20 minutes, increasing the heat to 400°F (200°C) if desired. Always check for 165°F (74°C) internal temperature.
The Crucial Resting Period
No matter which method you use, resting your chicken after cooking is non-negotiable. Many chefs agree this is a vital step for juiciness.
Remove the chicken from the oven and tent it loosely with foil. Let it rest for 10-15 minutes. This allows the juices to redistribute throughout the meat, preventing them from escaping when you cut into it.
| Method | Primary Benefit | Cook Time (approx.) | Equipment Needed |
|---|---|---|---|
| High-Heat Oven | Crispy skin, even roast | 60-90 minutes | Roasting pan, rack |
| Air Fryer | Very crispy skin, faster | 45-60 minutes | Air fryer |
| Dutch Oven | Ultra-moist, tender meat | 75-95 minutes | Dutch oven |
Conclusion
Making a delicious rotisserie-style chicken at home without a spit is entirely achievable. By understanding the principles of even cooking and choosing the right method, you can enjoy flavorful, juicy, and beautifully browned chicken.
Whether you opt for the classic high-heat oven roast, the speedy air fryer, or the moist Dutch oven approach, remember that proper preparation, careful temperature monitoring, and a crucial resting period are your allies. Get ready to enjoy a fantastic meal!
What oven temperature is best for roasting a whole chicken?
Many experts recommend roasting a whole chicken at 400-425°F (200-220°C). This high temperature helps to crisp the skin while ensuring the interior cooks thoroughly. Some recipes may suggest starting high and then reducing the temperature for a longer, slower cook.
How do I prevent my homemade rotisserie chicken from drying out?
To prevent your chicken from drying out, consider brining it before cooking. Trussing the chicken also helps it cook more evenly, reducing dry spots. Most importantly, always use a meat thermometer to cook to the correct internal temperature (165°F/74°C) and allow the chicken to rest for 10-15 minutes after cooking.
Is it necessary to truss a chicken when not using a spit?
While not strictly “necessary,” trussing a chicken is highly recommended. Research suggests that it helps the chicken cook more evenly by keeping the legs and wings tucked close to the body. This prevents these smaller parts from overcooking and drying out before the larger breast and thigh sections are done.
Can I add flavor to my chicken without injecting it?
Absolutely! You can add immense flavor by rubbing the chicken generously with herbs, spices, and even citrus zest both inside and outside. Placing aromatics like half an onion, garlic cloves, or lemon wedges inside the cavity also infuses flavor. Marinating or brining can also significantly enhance taste.
How do I get crispy skin on my oven-roasted chicken?
Achieving crispy skin involves a few key steps: thoroughly pat the chicken dry before seasoning, use a high oven temperature (400-425°F or 200-220°C), and ensure the chicken is elevated on a rack to allow air circulation all around it. Some cooks also rub a little butter or oil on the skin before roasting for extra crispness.
