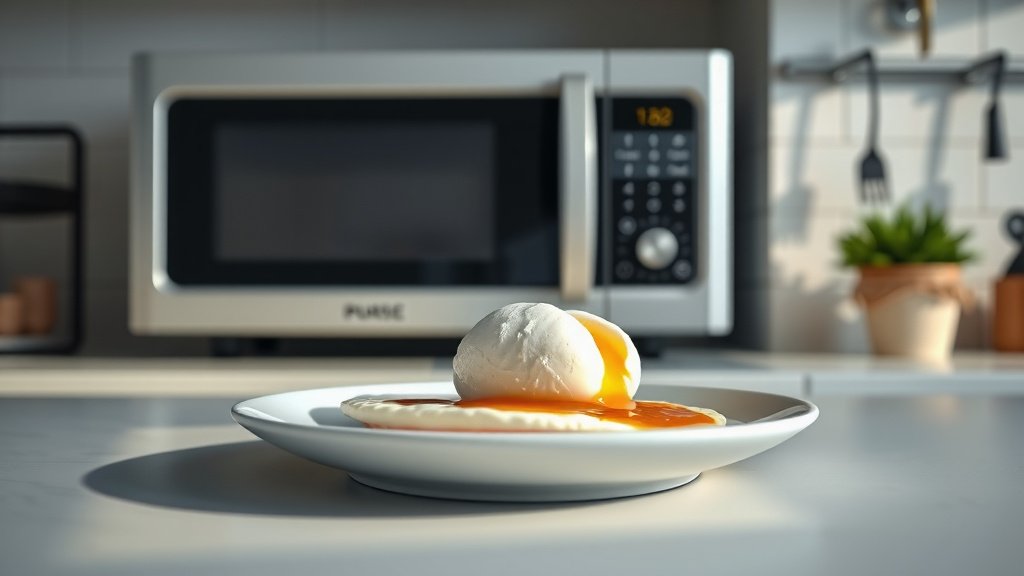
You can easily make a poached egg in your microwave oven by cracking an egg into a small, microwave-safe bowl with a bit of water, covering it, and heating it for 60-90 seconds.
This quick method allows you to enjoy perfectly poached eggs in minutes, making breakfast or a light meal super simple.
TL;DR: How to Poach an Egg in the Microwave
- Choose a microwave-safe bowl for your egg.
- Add just enough water to fully cover the egg.
- Cover the bowl loosely to prevent any splatters.
- Microwave for about 60-90 seconds at a medium power setting.
- Adjust your cooking time to achieve your preferred yolk firmness.
Ever wished for a perfectly poached egg without the fuss of a stovetop? What if I told you your microwave oven is your secret weapon? It sounds almost too easy, doesn’t it?
Many home cooks shy away from poaching, thinking it’s complicated. But preparing a poached egg in your microwave oven is surprisingly simple. You can achieve delicious results with minimal effort, saving you time and stress.
How To Make Poached Egg In Microwave Oven?
Making a poached egg in your microwave oven involves a few straightforward steps: crack an egg into a water-filled bowl, cover it, and microwave briefly. This method consistently delivers tender whites and a runny yolk, perfect for any meal.
Why Choose the Microwave for Poached Eggs?
Life moves fast, and sometimes you need breakfast even faster. The microwave offers incredible speed. We found it’s a game-changer for busy mornings, letting you enjoy a healthy meal quickly.
Plus, there’s less cleanup. No big pot of boiling water, no strainer, just one small bowl. Many experts agree that simplicity is key in the kitchen (Food Network).
Gather Your Simple Supplies
Before you begin, ensure you have a few basic items. You probably have them all already, tucked away in your kitchen. Gathering everything first makes the process smooth.
What You’ll Need:
- A fresh egg
- Small, microwave-safe bowl or ramekin
- Water (about 1/2 cup)
- A splash of vinegar (optional, but helpful)
- A plate or plastic wrap for covering
- Slotted spoon
The Step-by-Step Poaching Guide
Ready to make some magic? Follow these steps closely for the best results. You’ll be surprised how quickly you master this technique.
Step 1: Prepare Your Bowl
Grab your microwave-safe bowl. Fill it with about 1/2 cup of water. You want enough water to completely cover your egg.
Adding a small dash of white vinegar (about 1/2 teaspoon) is a trick many chefs use. We found it helps the egg white set faster, keeping your egg together (America’s Test Kitchen).
Step 2: Crack Your Egg
Carefully crack one egg into the water. Make sure the yolk stays intact. Don’t worry if it looks a little messy at first; the water will help it settle.
You can make multiple eggs, but we often find it best to do them one at a time. This ensures each egg cooks evenly and perfectly.
Step 3: Cover It Up
Loosely cover the bowl. You can use a microwave-safe plate or a piece of plastic wrap. Leave a small gap for steam to escape.
This cover prevents splatters and helps steam cook the egg gently. Think of it like a mini sauna for your egg!
Step 4: Microwave Time!
Place the covered bowl in your microwave. For most microwaves, start with 60 seconds at 70% power. This lower power setting is crucial.
Many experts say that full power can make eggs explode (USDA). Using a medium power ensures a gentle, even cook.
Step 5: Check and Adjust
After 60 seconds, carefully remove the bowl. Check the egg. The white should be set, and the yolk still runny.
If the white isn’t fully set, return it to the microwave for another 10-20 seconds. Cook in short bursts until it reaches your desired firmness.
Step 6: Serve It Up
Using a slotted spoon, gently lift your perfectly poached egg from the water. Let any excess water drain off.
Now, it’s ready for your toast, avocado, or whatever your heart desires! Season with salt and pepper.
Tips for Poaching Perfection
Even with simple steps, a few tricks can make a big difference. These tips help you get it right every time, avoiding common missteps.
| Tip | Why It Works |
|---|---|
| Use Cold Water | Helps the egg cook more gently and evenly. |
| Adjust Power | Start with 70% power to prevent explosions. |
| Fresh Eggs Matter | Fresher eggs hold their shape better during poaching. |
| Don’t Overcrowd | Cook one egg at a time for consistent results. |
| Cover Loosely | Prevents splatter and allows steam to escape safely. |
Troubleshooting Common Issues
Sometimes things don’t go exactly as planned. Don’t worry; we’ve all been there. Here are solutions for typical microwave poaching problems.
Why Did My Egg Explode?
Exploding eggs are the most common complaint. This usually happens when the yolk cooks too fast and steam builds up underneath it.
To avoid this, use a lower power setting (70% is a good starting point) and ensure your water is cold. Some people even suggest piercing the yolk gently with a toothpick, but be careful (Good Housekeeping).
My Yolk is Solid!
If your yolk turned out solid, you likely overcooked it. Every microwave is different, and cooking times can vary.
Next time, reduce the cooking time by 10-15 seconds. You can always add more time, but you can’t undo a solid yolk.
The White is Still Runny!
This means your egg needs a little more time. Return it to the microwave for short bursts, like 5-10 seconds.
Make sure the water completely covers the egg. If parts are exposed, they won’t cook as effectively.
Safety First: Microwave Oven Precautions
Working with any appliance requires attention to safety. The microwave is no exception. A few simple rules ensure a safe and successful cooking experience.
Quick Safety Checklist:
- Always use microwave-safe dishes.
- Never microwave an egg without water.
- Use a loose cover to let steam escape.
- Be careful when removing hot bowls from the microwave.
- Avoid startling eggs with extremely hot water initially.
- Clean up any splatters immediately to keep your microwave safe and hygienic.
Conclusion
Making a poached egg in your microwave oven is a truly simple way to enjoy this breakfast classic without the fuss. By following these steps – using enough water, covering the bowl, and cooking at medium power – you’ll achieve perfect results consistently.
This method saves you time, reduces cleanup, and makes healthy eating more accessible. Don’t be afraid to experiment a little with cooking times to find your ideal yolk consistency. Happy poaching!
What kind of bowl is best for poaching eggs in the microwave?
The best bowls are small, microwave-safe ceramic or glass ramekins. Their size helps the water cover the egg completely, and their material is designed to handle microwave heat safely without leaching chemicals into your food.
Can I poach more than one egg at a time in the microwave?
While you can try to poach two eggs in separate bowls side-by-side, it’s generally best to cook one egg at a time. This ensures even cooking and helps prevent any issues like exploding eggs or unevenly cooked whites and yolks. Consistency is key for perfect results.
Is it safe to pierce the egg yolk before microwaving?
Some people suggest gently piercing the yolk with a toothpick to prevent it from exploding due to steam buildup. While this can be effective, it’s not strictly necessary if you use enough water and cook at a lower power setting (around 70%), which experts often recommend for safer cooking.
How do I prevent the poached egg from sticking to the bowl?
To prevent sticking, ensure you use a clean, non-porous microwave-safe bowl. You might also lightly spray the inside of the bowl with a tiny bit of cooking oil before adding the water and egg, which can help the egg release more easily once cooked.
What’s the ideal water temperature for microwave poaching?
Start with cold or room temperature water. Adding a cold egg to hot water can cause it to cook too quickly and unevenly. Cold water allows for a more gradual, controlled cooking process, contributing to a better texture for your poached egg.