How to Use a Danish Dough Whisk
Use a Danish dough whisk to cut through dry and wet ingredients in a bowl until the dough forms. Stir with short, steady motions, then switch to folding or kneading when the dough becomes too thick.
On this page (8 sections)
- What is a Danish dough whisk?
- How do you use a Danish dough whisk?
- When should you stop mixing?
- Which Danish dough whisk helps with first-stage mixing?
- How do you mix sourdough with a Danish dough whisk?
- Can you use a Danish dough whisk for pastry and batter?
- How should you clean and store a Danish dough whisk?
- What should you choose for your baking routine?
Use a Danish dough whisk to combine wet and dry ingredients with short, steady strokes until the dough forms. The looped head cuts through flour pockets more easily than a regular spoon, but you should stop stirring once the mixture becomes too thick.
A Danish dough whisk works best during the early mixing stage. It helps with bread dough, sourdough, pizza dough, pastry, brownies, cookies, and thick batter before you switch to folding, resting, or kneading.
For rolling pastry or other dough, use a pastry mat for rolling dough.
What is a Danish dough whisk?
A Danish dough whisk is a hand whisk with an open metal loop designed for thick mixtures. The open shape moves through dough without trapping as much mixture as a balloon whisk.
The tool is also called a dough whisk, Dutch whisk, or bread whisk. It is useful when a regular whisk is too delicate and a wooden spoon takes too much effort to move through flour.
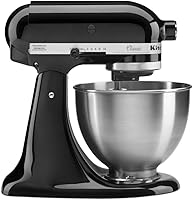
For a larger baking setup, compare this tool with a stand mixer when you want powered mixing for larger batches or repeated dough work. For a specific powered mixing workflow, see how to use a Bosch Universal Mixer.
How do you use a Danish dough whisk?
Add the ingredients to a wide bowl, hold the handle firmly, and stir in short circles until no dry flour remains. Keep the loop moving through the bottom and sides of the bowl instead of only stirring the center.
Follow these steps:
- Add the dry ingredients and wet ingredients according to your recipe.
- Place the looped head into the middle of the bowl.
- Stir in small circles while drawing the whisk through the flour.
- Scrape around the sides and bottom to find dry pockets.
- Fold the mixture from the edges toward the center.
- Stop when the ingredients are evenly combined and the dough becomes difficult to stir.
- Continue with the recipe's resting, folding, or kneading step.
Don't force the whisk through a dough that has become very stiff. A dough whisk combines ingredients, but it doesn't replace every later step in a bread recipe.
How should you hold and move the whisk?
Hold the handle near its middle and keep your wrist relaxed. Use your arm to make short circles, then pull the loop through the dough so it cuts across dry flour.
A steady rhythm works better than fast whipping. Lift the whisk occasionally to check for flour underneath, but avoid repeatedly raising it high enough to fling sticky dough around the bowl.
Keep the bowl stable on the counter. A wide bowl gives the loop more room to move and makes it easier to scrape ingredients from the edges.
When should you stop mixing?
Stop when the dough is evenly moistened and no dry flour pockets remain. The mixture may still look rough or shaggy, especially before a resting period.
Overmixing can make the dough harder to handle, depending on the recipe. Once the whisk begins dragging heavily, switch to the next instruction instead of trying to make the dough smooth with the tool.
For dough that needs time to rise, follow the recipe's rest and proofing steps. A covered container can help during the rise; see how to use a bread proofing box.
Our guide to How to Proof Dough in an Oven? explains how to create a suitable proofing setup.
Which Danish dough whisk helps with first-stage mixing?
The best choice depends on whether you want extra tools, a compact single whisk, or a longer all-steel design. We compared the available features and scored these options for the main job of combining thick dough.
Our score weighs materials, design, included pieces, cleaning details, and fit for common baking tasks.
FUANRTK Danish Dough Whisk Bread Mixer
The FUANRTK set suits bakers who want 2 whisks plus a scraper for different bowl sizes and mixing styles. One whisk has a small eye hook design, while the other has a double eye hook design.
Both whisks use oak handles and 430 stainless steel heads. The set also includes a food-grade plastic dough scraper, which can help gather sticky dough from the bowl after the whisk has combined it.
The whisks measure 12.8 in long and 3 in wide. Their longer handles can give you more reach in a deep bowl, while the choice of two whisk designs lets you use the one that feels more suitable for the mixture.
Rinse the whisks with warm soapy water and hot water. This set fits readers who want extra pieces in one purchase, but it takes more storage space than a single whisk.
TEEVEA Danish Dough Whisk
The TEEVEA whisk suits bakers who want a single 9.45 in stainless steel whisk for sourdough, bread dough, pizza dough, pastry, and thick batter. Its mixing loop is 2.75 in, and the handle width is 1.18 in.
The spiral loop is designed for even mixing, while the food-grade stainless steel construction is intended for thick, high-gluten dough. The whisk weighs 3.2 oz and includes 1 TEEVEA Danish Dough Whisk with a single loop.
TEEVEA describes this whisk as dishwasher safe, but its care information also says the wood handle should be hand washed. If you want a one-piece style with no separate scraper, this is the simplest option of the 3.
OYV 12" Dough Whisk
The OYV whisk suits bakers who prefer a longer 12 in stainless steel tool for bread, sourdough, pizza dough, cookies, pastry, cake batter, and mashed potatoes. Its width is 3 in.
The whisk uses 18/10 stainless steel and is made from a single piece. Its 12 in length gives you more reach in a deep bowl, while the 3 in width provides a broad loop for moving through a larger area of dough.
OYV describes the whisk as dishwasher safe and includes a 30-year warranty. Choose it when length and all-steel construction matter more than having multiple whisks or a scraper.
How do you mix sourdough with a Danish dough whisk?
Use the whisk to combine the starter, water, and flour until the mixture has no dry pockets. Stir from the bottom of the bowl, then scrape the sides so flour doesn't remain hidden.
Sourdough can become thick quickly. Use shorter strokes as resistance increases, and stop when the ingredients are combined enough for the recipe's rest or folding stage.
A whisk can help start the dough, but it doesn't determine the final rise. Use the recipe's timing and handling instructions, and see How To Make Pizza Dough For Pizza Oven? for a related pizza dough process.
Can you use a Danish dough whisk for pastry and batter?
Yes, a Danish dough whisk can mix pastry, pancake batter, brownies, cookies, and other thick mixtures when you want to combine ingredients without using an electric mixer. Use gentle strokes once the mixture is almost combined.
To compare powered alternatives, see hand mixers vs blenders.
For batter, scrape the sides and bottom rather than whipping aggressively. This helps you find unmixed flour without adding unnecessary air or making a mess.
Accurate measuring still matters. If you are deciding which tool to use for a recipe, compare measuring spoons vs measuring cups, especially when a small amount of liquid or a dry ingredient affects the dough texture.
How should you clean and store a Danish dough whisk?
Rinse the whisk soon after mixing, wash away dough with warm soapy water, and dry it before storage. Dried dough is harder to remove from loops and handles.
Use a soft brush or cloth around the loop if flour has settled near the connection. Don't leave a wood handle soaking, even when the metal head is easy to rinse.
If you use a dishwasher, follow the care guidance for that specific whisk. The TEEVEA and OYV data describe dishwasher-safe cleaning, while the TEEVEA care information says its wood handle should be hand washed.
Store the whisk where the loop won't catch on other utensils. A dry drawer or utensil holder keeps the head clean between baking sessions.
What should you choose for your baking routine?
Choose the FUANRTK set if you want 2 whisk designs and a food-grade plastic scraper. Choose TEEVEA if you want a single 9.45 in whisk for everyday dough and batter.
Choose OYV if you prefer a longer 12 in, 18/10 stainless steel tool.
For a smaller tool, see the guide to the best mini dough whisk. For a broader comparison of looped designs, read best Danish dough whisk.
The basic method stays the same: stir wet and dry ingredients with short strokes, scrape the bowl, stop when the dough forms, and clean the whisk promptly.
Frequently asked questions
What is a Danish dough whisk?
A Danish dough whisk is a hand tool with a looped metal mixing head and a handle. Its open loop cuts through flour and wet ingredients, helping you combine bread dough, sourdough, pizza dough, pastry, and thick batter without using a stand mixer.
How do you use a Danish dough whisk?
Add your wet and dry ingredients to a bowl, then stir with the looped head using short circles and folding motions. Scrape around the sides as needed, and stop when the mixture is evenly combined and too thick for easy stirring.
Can you use a Danish dough whisk for sourdough?
Yes. A Danish dough whisk can combine sourdough starter, flour, and water before the dough develops more strength.
Use steady strokes to remove dry pockets, then follow the recipe's rest, folding, and kneading instructions.
How do you clean a Danish dough whisk?
Rinse the whisk soon after mixing, use warm soapy water, and remove dough before it dries. Check the handle material before using a dishwasher.
Stainless steel-only designs may be dishwasher safe, while wood handles should be hand washed.