To use a pizza oven for the first time, you need to first season it properly, then preheat it thoroughly to the right temperature. This prepares your oven for perfectly cooked pizzas. Don’t worry, it’s easier than you think!
You’re about to make some incredible homemade pizza. We found that a little preparation makes a big difference. Getting familiar with your new pizza oven ensures you get that crispy crust and evenly cooked toppings every time.
- Season your new pizza oven correctly.
- Understand the ideal cooking temperatures.
- Learn about the right fuel for your oven.
- Prepare your dough and toppings ahead of time.
- Launch and turn your pizza like a pro.
Ready to fire up that oven? Let’s walk through exactly how to get started and make your first amazing pizza, step by step.
Getting Started: Preparing Your New Pizza Oven
So, you’ve got a brand new pizza oven. That’s exciting! Before you even think about dough and toppings, there are a few important steps to get your oven ready for its debut. Think of it like a chef prepping their kitchen. You want everything just right.
Seasoning Your Pizza Oven for Longevity
First things first, let’s talk about seasoning. No, we’re not talking about salt and pepper! Seasoning your pizza oven means preparing its interior surfaces for cooking. This is a vital step, especially for ovens with ceramic or cordierite stones (National Association of Home Builders). It helps prevent cracking and makes your oven more durable.
The Initial Burn-In Process
For most pizza ovens, seasoning involves an “initial burn-in.” You’ll want to read your oven’s manual very carefully here, as instructions can vary slightly. Generally, you’ll heat the oven slowly to a moderate temperature (often around 300-400°F or 150-200°C) and let it run for a period, typically 30-60 minutes. This allows any manufacturing residues to burn off and the materials to cure.
During this burn-in, you might notice some smoke or unusual smells. This is normal. Just make sure you’re doing this in a well-ventilated area. We found that doing this outdoors is always the best option. Then, let the oven cool completely before its first real use. This cooling process is just as important as the heating.
Understanding Different Pizza Oven Fuels
What powers your pizza oven? This is a key question! Different fuels offer different experiences and require different handling. Knowing your fuel helps you manage your oven effectively.
Wood-Fired Ovens: The Traditional Choice
If you have a wood-fired oven, you’re going for that classic, smoky flavor. The best wood choices are hardwoods like oak, maple, or apple. Avoid softwoods like pine, as they burn too fast, produce more creosote, and can impart an unpleasant taste to your food. Always use well-seasoned, dry wood. Wet wood creates a lot of smoke and doesn’t burn efficiently.
Gas Ovens: Convenience and Control
Gas ovens, whether propane or natural gas, offer incredible convenience. They heat up quickly and maintain a consistent temperature with ease. You’ll simply connect your gas tank (if portable) and follow the manufacturer’s lighting instructions. Gas ovens are fantastic for beginners because they remove some of the guesswork of fire management.
Electric Ovens: Indoor Performance
Electric pizza ovens are perfect for indoor use or smaller spaces. They plug right into an outlet and offer precise temperature control. While they might not reach the extreme temperatures of wood or gas ovens, many can still hit 750°F (400°C), which is more than enough for a fantastic pizza. They’re also often the easiest to clean.
Mastering the Heat: Preheating Your Pizza Oven
Proper preheating is the secret ingredient to a perfectly crispy crust. You wouldn’t put a cake in a cold oven, would you? The same principle applies here, but even more so. Your pizza oven needs to be screaming hot.
Achieving the Optimal Temperature
Most pizza ovens need to reach temperatures between 750°F and 900°F (400°C and 480°C). This extreme heat cooks a pizza in just 60-90 seconds. We found that the hotter the oven, the faster the cook, and often, the better the crust char. Your goal is to get the oven floor and dome super hot.
For wood-fired ovens, this means building a good fire and letting it burn for a while, often 30-60 minutes, until the dome of the oven turns white. This indicates the oven has absorbed enough heat. For gas or electric ovens, simply turn it on to its highest setting and allow it to preheat as instructed by the manufacturer, usually 15-30 minutes.
Using an Infrared Thermometer for Accuracy
Don’t guess your oven’s temperature. An infrared thermometer is your best friend here. Point it at the center of your cooking stone or deck. This gives you an instant, accurate reading of the surface temperature. We found this tool to be indispensable for consistent results. Aim for your target temperature on the stone, not just the air temperature inside the oven.
Your First Pizza: Launching and Baking
Now for the fun part: making your first pizza! Don’t worry if it’s not perfect right away. Every pizza is a learning experience. The key is confidence and quick movements.
Preparing Your Workstation
Before you even think about launching, have everything ready. This is crucial. Your dough should be stretched, your sauce on, your cheese and toppings ready to go. Consider it like an assembly line. When that pizza goes into the oven, you’ll be on a tight timeline.
You’ll need a pizza peel, either wood or metal, dusted with semolina flour or regular flour. This prevents the dough from sticking. Keep your turning peel handy too. Everything happens fast inside a super-hot oven.
The Launch: A Swift Movement
Once your pizza is assembled on the peel, give it a little shake to ensure it’s not sticking. Then, with a confident, swift push and pull motion, slide it off the peel onto the hot oven stone. Don’t hesitate! A slow launch can lead to a stuck pizza, which is no fun at all.
The Bake: Turning and Monitoring
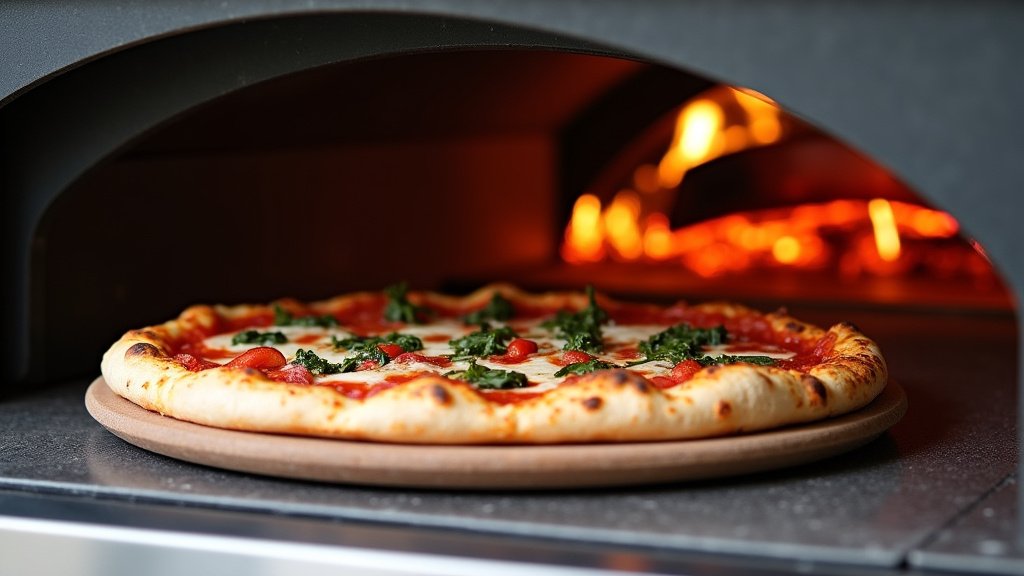
Because pizza ovens are so hot and often radiate heat from the back, your pizza will cook very quickly and unevenly if not turned. After about 20-30 seconds, use your turning peel to rotate the pizza about a quarter turn. Repeat this every 15-20 seconds until the crust is evenly browned and the cheese is bubbly and slightly charred. This usually takes 60-90 seconds total.
Don’t be afraid to pull the pizza out briefly to check the underside of the crust. You want a beautiful, leopard-spotted char, not a burnt bottom. Practice makes perfect here. Your first few might be a bit lopsided, and that’s okay!
Cool Down and Cleaning: Post-Pizza Care
You’ve enjoyed your amazing pizza, now what? Proper cool down and cleaning will ensure your oven stays in great shape for many more pizza nights.
Allowing Your Oven to Cool Naturally
Resist the urge to clean your oven while it’s still piping hot. Let it cool down gradually. For wood-fired ovens, simply let the fire die down and the oven cool naturally overnight. For gas and electric ovens, turn them off and let the heat dissipate. Rapid cooling can stress the materials and potentially cause damage (ASTM International).
Basic Cleaning and Maintenance
Once cool, cleaning is surprisingly simple. For wood-fired ovens, use a brush to sweep out any ash or debris. For all types, scrape off any burnt food bits from the stone with a stiff brush or metal scraper. Avoid harsh chemicals or soaps on your cooking stone, as they can soak in and affect the taste of future pizzas. A simple brush and sometimes a damp cloth (for non-porous surfaces) are all you need.
Essential Checklist for Your First Pizza Oven Use
To make sure you’re ready for success, here’s a quick checklist to run through:
- Read your pizza oven’s manual thoroughly.
- Complete the initial seasoning/burn-in process.
- Gather all necessary tools: peels, thermometer, fuel.
- Prepare your pizza dough and toppings in advance.
- Preheat your oven to the target temperature (750-900°F).
- Have fun and enjoy the process!
| Oven Type | Pros | Cons | Fuel Type |
|---|---|---|---|
| Wood-Fired | Authentic flavor, high heat | Long preheat, smoke, fire management | Hardwood (oak, maple, apple) |
| Gas-Powered | Fast preheat, easy temperature control | Less smoky flavor, requires gas tank/line | Propane or Natural Gas |
| Electric | Convenient, precise control, no fuel storage | Lower maximum temp, no char flavor | Electricity |
Conclusion
Using your pizza oven for the first time is an exciting adventure. By taking the time to season it correctly, understanding your fuel, and mastering the preheat, you’re setting yourself up for success. Remember, an infrared thermometer is your best friend for perfect crusts. Don’t be afraid to experiment with launching and turning techniques.
Each pizza you make will teach you something new. Soon, you’ll be a pro, consistently churning out delicious, restaurant-quality pizzas right in your backyard. So, gather your ingredients, fire up that oven, and get ready to enjoy the incredible taste of homemade pizza!
Frequently Asked Questions
How long does it take for a pizza oven to heat up for the first time?
For your initial seasoning or burn-in, most ovens will need to heat slowly for 30-60 minutes to a moderate temperature (around 300-400°F). For actual cooking, preheating to 750-900°F can take 15-60 minutes, depending on your oven type and fuel source.
Do I need to clean my pizza oven after every use?
You don’t need a deep clean every time. After each use, once the oven is cool, simply use a brush to sweep out any ash or loose debris. Scrape off any burnt food bits from the stone. Avoid harsh cleaners on the cooking surface.
Can I use any type of wood in my wood-fired pizza oven?
No, it’s best to stick to hardwoods like oak, maple, or apple. Softwoods (like pine) burn too quickly, produce more creosote, and can give your pizza an unpleasant flavor. Always use dry, seasoned wood for the best results.
What if my first pizza sticks to the peel?
This is common! Make sure your pizza peel is well-dusted with semolina flour or regular flour before placing the dough on it. Work quickly when topping and launching your pizza. A quick, confident launch is key to preventing sticking.
Is an infrared thermometer really necessary for a pizza oven?
We found that an infrared thermometer is highly recommended. It allows you to precisely measure the temperature of your cooking stone. This ensures you’re cooking at the optimal temperature for a perfectly crispy crust and consistent results every time.