
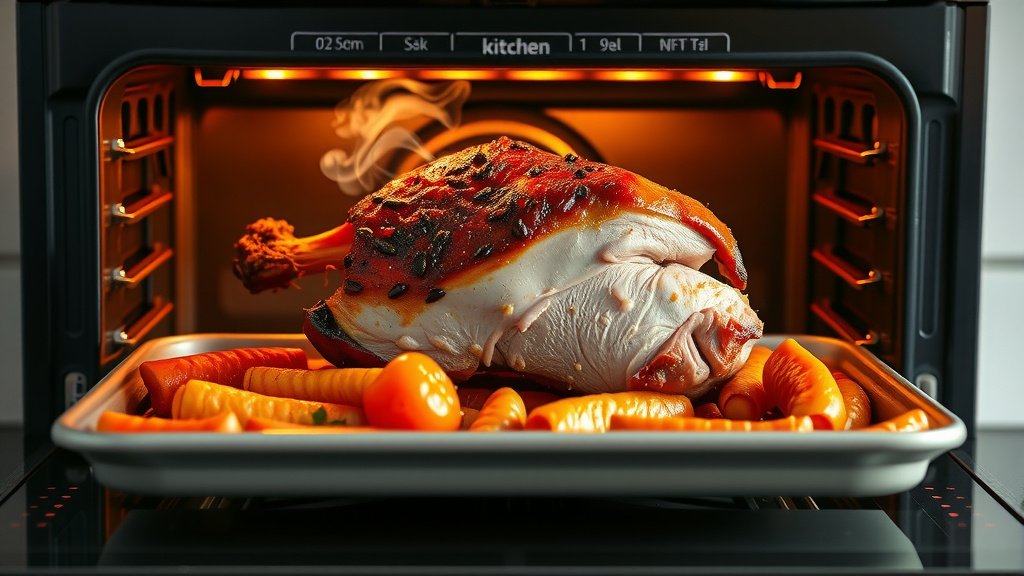
You can cook delicious pulled pork in an electric oven by first searing the pork shoulder for a golden crust, then slow-roasting it at a low temperature, typically between 275-300°F (135-150°C), until it reaches an internal temperature of 200-205°F (93-96°C) and is easily shreddable.
The key to perfect pulled pork in an electric oven involves selecting the right cut of meat, consistent low heat, and ample cooking time to break down tough fibers, resulting in incredibly tender, fall-apart meat that soaks up all the flavorful juices.
-
TL;DR: Cook pulled pork in your electric oven by choosing a pork butt or shoulder.
-
Sear the meat first for richer flavor and texture.
-
Roast it slowly at 275-300°F (135-150°C) until it’s super tender and easy to shred.
-
Look for an internal temperature of 200-205°F (93-96°C).
-
Resting the meat is a must for juiciness.
Ah, pulled pork! Just thinking about it brings up images of backyard barbecues, family gatherings, and that incredible aroma filling the air. You might associate it with smokers or grills, but what if you don’t have one? Can your trusty electric oven really deliver the same mouth-watering results? Absolutely!
Many home cooks wonder if an electric oven can produce that signature tender, juicy pulled pork. We found that with the right technique, your electric oven is perfectly capable. It’s all about low and slow cooking, a method electric ovens excel at because of their consistent, even heat (USDA).
Imagine serving up a platter of perfectly shredded pork, drenched in your favorite sauce. Your guests will never guess it came from your oven. Let’s dive into how you can make this delicious dish a reality. Ready to become a pulled pork pro?
How To Cook Pulled Pork In Electric Oven?
To cook pulled pork in an electric oven, you first prepare a pork butt or shoulder, sear it, then slow-roast it at a consistent low temperature of 275-300°F (135-150°C) until it becomes incredibly tender, typically taking 6-8 hours for a standard 4-pound cut.
Choosing Your Pork: The Star of the Show
First things first, let’s talk about the meat. You’ll want to pick the right cut for the best pulled pork experience. We found that a pork shoulder, often called a pork butt or Boston butt, is ideal. This cut has a good amount of fat and connective tissue, which breaks down during slow cooking.
This breakdown is crucial for achieving that characteristic fall-apart tenderness. When selecting, look for a cut with a nice marbling of fat. This marbling will keep your pork moist and flavorful as it cooks. Don’t be shy about asking your butcher for help if you’re unsure!
Bone-In vs. Boneless Cuts
Should you go for bone-in or boneless? Both work, but many experts say that bone-in cuts often have more flavor. The bone helps conduct heat and keeps the meat moist. If you’re looking for ease of shredding, boneless might be slightly simpler, but it’s a minor difference.
Getting Ready: Prep Work Makes Perfect Pulled Pork
Before your pork even touches the oven, a little prep can go a long way. This stage helps build a fantastic flavor profile. Think of it like stretching before a big run; it just makes things better.
The All-Important Rub
A good rub is your secret weapon. It infuses your pork with flavor right from the start. You can buy pre-made rubs, or better yet, mix your own! A basic rub often includes paprika, brown sugar, garlic powder, onion powder, salt, and black pepper. Experiment with spices you love to create your signature blend.
Don’t be shy with the rub. Many recipes suggest you generously coat the entire surface of the pork. Massage it in firmly, ensuring every nook and cranny is covered. This creates a crust that will become incredibly delicious.
To Brine or Not to Brine?
Some people swear by brining their pork shoulder beforehand. Brining can help ensure the meat stays juicy and adds another layer of flavor. However, we found that for pulled pork, it’s often not strictly necessary because the slow cooking process already provides ample moisture. If you’re short on time, skipping the brine is perfectly fine (Cook’s Illustrated).
The Searing Advantage: Building Flavor
Before it goes into the oven, give your pork a quick sear. This step is a game-changer. Searing creates a beautiful, caramelized crust on the outside of the meat, adding a depth of flavor that can’t be achieved otherwise. It’s similar to how a good steak gets its rich taste from a hot pan.
Use a heavy-bottomed, oven-safe pot or Dutch oven. Heat a little oil over medium-high heat until shimmering, then sear the pork on all sides until golden brown. This usually takes a few minutes per side. Once seared, you’re ready for the slow roast.
Low and Slow: The Oven’s Magic
This is where your electric oven truly shines. The goal is to cook the pork slowly at a low temperature for an extended period. This process allows the tough connective tissues to break down, transforming them into gelatin and making the meat incredibly tender.
Here’s a general guideline for oven temperature and time:
| Pork Weight | Oven Temperature | Approximate Cooking Time |
|---|---|---|
| 3-4 lbs (1.4-1.8 kg) | 275°F (135°C) | 5-7 hours |
| 5-7 lbs (2.3-3.2 kg) | 275°F (135°C) | 7-9 hours |
| 8-10 lbs (3.6-4.5 kg) | 275°F (135°C) | 9-12 hours |
Remember, these are estimates. The real indicator of doneness is the internal temperature and the feel of the meat. Many experts suggest a target internal temperature of 200-205°F (93-96°C) for easy shredding (Meathead Goldwyn).
Maintaining Moisture: Liquid Gold
While cooking, you’ll want to add some liquid to the pot. This creates a moist environment, preventing the pork from drying out and contributing to the rich flavor. We found that simple liquids like chicken broth, apple cider vinegar, or even a bit of beer work wonderfully. Pour about 1-2 cups around the pork, not directly over it to preserve the crust.
Keep your pot covered tightly for most of the cooking time. This traps steam and moisture, ensuring your pork stays tender. For the last hour or so, you might remove the lid if you want a slightly crispier bark.
The Patience Payoff: Resting and Shredding
You’ve waited hours, and your kitchen smells amazing. It’s tempting to dive right in, but resist! This final step is crucial for the best possible pulled pork. It’s like letting dough rest; it just works better.
The Importance of Resting
Once your pork reaches the desired internal temperature, take it out of the oven. Keep it covered loosely with foil and let it rest for at least 30 minutes, or even up to an hour. This resting period allows the juices to redistribute throughout the meat, making it incredibly moist and tender. Skipping this step can lead to dry pulled pork, and nobody wants that!
Shredding Like a Pro
After resting, the pork should be so tender that it practically falls apart. You can use two forks to pull the meat apart into shreds. Some people prefer meat claws, which make the job even easier. Discard any large pieces of fat or gristle, but keep some of the rendered fat and cooking juices to mix back in. This will keep the pulled pork moist and flavorful.
Serving Your Masterpiece: What Next?
Now for the fun part! You’ve got glorious pulled pork. What are you going to do with it? The possibilities are endless, really. Many families enjoy it simply on a bun with some extra sauce and coleslaw. It’s a classic for a reason.
Here’s a quick checklist for serving perfection:
- Warm up your favorite BBQ sauce.
- Toast some soft buns or rolls.
- Prepare a fresh batch of coleslaw.
- Consider pickles or pickled onions for tang.
- Have extra sauce on the side for guests.
Leftovers, if you have any, are fantastic for tacos, quesadillas, or even a topping for baked potatoes. Pulled pork is truly a versatile dish.
Conclusion
Cooking pulled pork in an electric oven is not only possible but can also yield incredibly delicious results. By following the “low and slow” method, selecting the right cut of meat, and paying attention to searing and resting, you can create a dish that will impress everyone at your table. Don’t underestimate the power of your oven; it’s a fantastic tool for achieving that perfectly tender, juicy pulled pork you’ve been dreaming of. Give it a try, and you might just find your new go-to recipe!
How long does it take to cook a 5-pound pork shoulder in an electric oven?
For a 5-pound pork shoulder cooked at 275°F (135°C) in an electric oven, you can typically expect the cooking time to be around 7 to 9 hours. Always aim for an internal temperature of 200-205°F (93-96°C) for optimal shreddability.
Do I need to add liquid to the pan when cooking pulled pork in the oven?
Yes, adding about 1-2 cups of liquid, such as chicken broth or apple cider vinegar, to the bottom of your pot or pan is a great idea. This helps create a moist environment, preventing the pork from drying out during the long cooking process.
What internal temperature should pulled pork reach to be ready?
For truly tender, fall-apart pulled pork, the internal temperature should reach between 200-205°F (93-96°C). While pork is safe to eat at 145°F (63°C), reaching a higher temperature for pulled pork ensures the connective tissues fully break down.
Can I use a slow cooker instead of an electric oven for pulled pork?
Absolutely! A slow cooker is another excellent method for making pulled pork, as it also utilizes the low and slow cooking technique. The main difference might be the initial searing step, which you would do on the stovetop before transferring to the slow cooker.
Is it necessary to sear the pork shoulder before putting it in the oven?
While not strictly necessary for tenderness, searing the pork shoulder before roasting is highly recommended. It creates a rich, caramelized crust that adds significant depth of flavor and improves the overall texture of your pulled pork.
