To proof yeast in a microwave oven, you can gently warm a bowl of water and sugar, then add your yeast. Place it in the microwave with the door slightly ajar for a few minutes to create a warm, draft-free environment, but do not turn on the microwave with the yeast inside for actual heating.
This method doesn’t involve cooking the yeast directly; instead, the microwave acts as a controlled, warm spot to help the yeast activate, similar to a proofer box, by warming a separate cup of water first, then letting the residual heat create the ideal conditions for activation.
- The microwave can create a perfect warm, still environment for yeast.
- You’ll first warm water in the microwave, then let the residual heat do the work.
- Avoid microwaving the yeast mixture itself, as this can kill it.
- Look for foam or bubbles to confirm your yeast is active and ready.
- This quick technique saves time and ensures your baked goods rise beautifully.
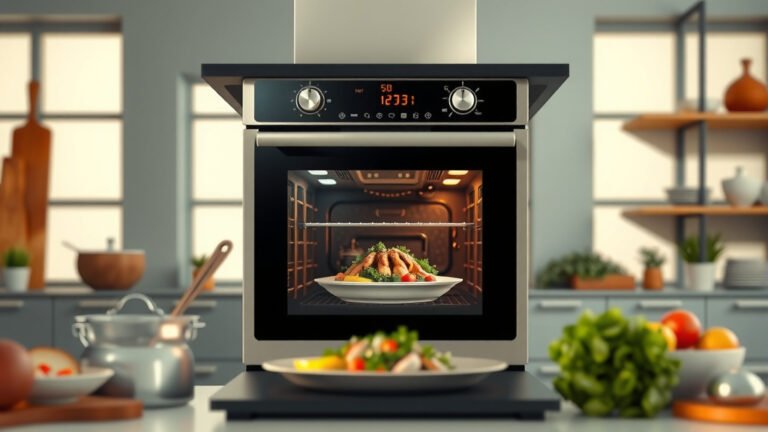
How To Proof Yeast In Microwave Oven?
Using your microwave oven to proof yeast is a clever trick for bakers. It creates the ideal warm, draft-free space for your yeast to wake up quickly. This method helps confirm your yeast is alive and ready to make your dough rise.
Why Proof Yeast Anyway?
You might wonder, “Why even bother proofing yeast?” Well, it’s like a quick health check for your yeast. When you activate yeast, you are making sure it’s still alive and ready to work for your bread and pastries. A lively yeast means successful, airy baked goods.
Many experts say skipping this step can lead to dense, flat results (King Arthur Baking Company). It gives you peace of mind before you invest time in mixing a whole batch of dough. Think of it as a small pre-test for a big success.
The Science Behind Active Yeast
Yeast is a living organism, a tiny fungus. It needs food (sugar), warmth, and moisture to become active. When these conditions are met, the yeast begins to “eat” the sugar and produce carbon dioxide gas. These gas bubbles are what make your dough rise, giving it a light and fluffy texture.
We found that temperatures between 105°F and 115°F (40°C-46°C) are often ideal. Too cold, and the yeast stays dormant; too hot, and you risk killing it. This delicate balance is why a controlled environment helps so much.
Traditional Proofing vs. Microwave Magic
Traditionally, you might proof yeast in a warm spot in your kitchen, perhaps near a sunny window or by a stovetop. This works, but it can be slow and inconsistent. Kitchen drafts or fluctuating room temperatures can slow down the process considerably.
The microwave offers a consistent, contained environment. We found it cuts down on guesswork and speeds things up. It’s particularly useful on cold days when your kitchen might not be naturally warm enough for active yeast. It truly is a shortcut to success.
When the Microwave Shines
Your microwave is a great tool for proofing when time is short or your kitchen is cool. It provides a quick burst of warmth that mimics a commercial proofing box. This method is perfect for beginners who want reliable results every time. It’s also handy for experienced bakers looking for a convenient and efficient way to get their yeast going. Consider it your baking assistant.
Preparing Your Microwave for Proofing
Before you even think about putting your yeast in the microwave, you need to prepare it. Remember, we are not cooking the yeast directly. Instead, we are creating a warm, cozy home for it. Here’s a quick checklist to make sure you are ready:
- Get a microwave-safe bowl for your yeast mixture.
- Have a separate glass measuring cup or bowl for heating water.
- Ensure your microwave is clean and free of food debris.
- Gather your yeast, warm water, and a pinch of sugar.
- Clear any distractions, focusing on the right temperature and timing.
Step-by-Step: Proofing Yeast in the Microwave
Let’s walk through the simple steps to proof your yeast using your microwave. This process is about setting up the perfect conditions, not actually microwaving the yeast itself. Follow these instructions carefully for the best results, ensuring your yeast becomes bubbly and ready.
Step 1: Warm Water is Key
Start by pouring 1 cup of water into a microwave-safe measuring cup. Microwave it on high for about 30-45 seconds. You want the water to be warm to the touch, but not scalding hot. It should feel like a warm bath, roughly 105°F to 115°F (40°C-46°C). We found this temperature range is optimal for yeast activation.
Step 2: Sugar, Yeast, and Stirring
In a separate small bowl, combine your warm water (from Step 1) with one teaspoon of sugar. Stir to dissolve the sugar completely. Then, sprinkle one packet (about 2 ¼ teaspoons) of active dry yeast over the sugared water. Do not stir it in immediately; let it sit for about 5 minutes to fully hydrate. This initial rest period is crucial for awakening the yeast.
Step 3: Microwave Power Settings
Now, here’s where your microwave helps. Take your bowl with the yeast mixture and place it inside the microwave. Crucially, do not turn the microwave on with the yeast inside! Instead, simply close the door. The microwave provides a draft-free, contained space, allowing the residual warmth from the water you microwaved earlier to gently warm the environment. We found this method creates a perfectly stable temperature.
Step 4: Observing the Magic
Let the yeast mixture sit undisturbed in the closed microwave for 5-10 minutes. Watch for foam or bubbles to appear on the surface. This bubbly activity is your sign that the yeast is alive and active. If you don’t see any activity, your yeast might be old or the water was too hot or too cold. Many experts recommend discarding inactive yeast and starting over. This visual confirmation is your assurance of active yeast.
Step 5: Ready for Baking!
Once your yeast is frothy and active, it’s ready to be added to your recipe. Proceed with your dough as usual, knowing that you have a strong, active yeast ready to make your bread rise. This simple microwave method gives you confidence in your ingredients. It’s a small step that makes a big difference in your baking.
What If Your Yeast Doesn’t Bloom?
Sometimes, despite your best efforts, the yeast doesn’t foam up. Don’t worry, it happens to every baker. Here are a few common reasons why this might occur:
- The water temperature was too hot, which can kill the yeast.
- The water was too cold, preventing the yeast from waking up.
- Your yeast might be old and no longer active.
- You didn’t add enough sugar for the yeast to feed on.
- Your bowl was too cold, absorbing the warmth from the water.
If your yeast doesn’t bloom, it’s always best to start over with fresh yeast and carefully recheck your water temperature. This saves you from wasting other ingredients. Remember, an inactive yeast batch means a flat loaf of bread. It’s better to be safe and ensure the yeast is active. This simple check prevents baking disappointments.
Common Mistakes to Avoid
Using your microwave for proofing is straightforward, but a few pitfalls can hinder success. Being aware of these common errors will help you achieve perfectly proofed yeast every time. Accuracy here means fluffier, tastier results.
Overheating is Your Foe
Never microwave your yeast mixture directly. We found that even a few seconds can kill the delicate yeast organisms. The microwave’s purpose here is to create a warm environment, not to heat the yeast. Always use the residual heat method discussed earlier. Many guidelines point to gentle warmth as the key, not intense heat (Cook’s Illustrated).
Too Cold, No Go
If your initial water isn’t warm enough, or your kitchen is particularly chilly, the microwave’s residual heat might not be sufficient. Ensure the water is truly warm to the touch. A thermometer can be your best friend here. Yeast needs that cozy warmth to start working its magic; cold temperatures will keep it dormant. It needs to be just right for optimal activity and growth.
Old Yeast, Sad Dough
Yeast has a shelf life, even if it’s unopened. Always check the expiration date on your yeast packet. Old yeast will not activate, no matter how perfect your conditions are. Keep your yeast stored in an airtight container in the refrigerator or freezer to extend its life. This simple habit ensures your yeast is always fresh and ready to perform. Fresh yeast makes all the difference.
Beyond Proofing: Other Microwave Uses for Bakers
While we focused on yeast proofing, your microwave is a versatile baking tool. You can soften butter quickly without melting it completely. It’s also great for melting chocolate or bringing cold liquids, like milk, up to temperature for recipes. Many bakers use it to warm bowls for mixing dough, creating an overall warmer environment for fermentation. It’s an appliance that offers more than just reheating food.
| Proofing Method | Pros | Cons |
|---|---|---|
| Microwave (Indirect) | Fast, consistent warmth, draft-free, energy-efficient for small batches. | Requires careful temperature control, easy to overheat if misused. |
| Oven (Warm Setting) | Good for larger batches, steady temperature, can hold multiple bowls. | Uses more energy, can take longer to preheat, oven might be needed for baking. |
| Room Temperature | No special equipment needed, very gentle. | Slow, inconsistent due to drafts, not ideal in cold climates. |
| Proofing Box | Precise temperature/humidity control, ideal for serious bakers. | Expensive, takes up counter space, single-purpose appliance. |
Conclusion
Proofing yeast in your microwave oven is a smart, efficient way to ensure your baking success. By creating a warm, draft-free environment, you give your yeast the best chance to activate. Remember, the key is to use the microwave for its gentle warmth, not for direct heating of the yeast. Follow these steps, avoid common mistakes, and you’ll consistently achieve beautifully risen dough. Happy baking!
How do I know if my yeast is still good after microwaving?
After placing your yeast mixture in the microwave (using the indirect warming method), you’ll know it’s good if it becomes foamy and bubbly on the surface within 5-10 minutes. This indicates active yeast, ready for your recipe.
Can I put the yeast packet directly into the microwave?
No, you should never place a yeast packet directly into the microwave or microwave the yeast mixture itself. The microwave is only used to create a warm, contained environment by first heating a separate cup of water or using its residual warmth.
What if my microwave oven has a proofing setting?
If your microwave oven has a dedicated proofing setting, you can absolutely use that! This feature is designed to maintain a consistent low temperature, ideal for yeast activation and dough rising, and would be even easier than the indirect method.
Does the type of yeast matter for microwave proofing?
This microwave technique works best for active dry yeast. Instant yeast often doesn’t require proofing before adding to dough, though a quick proof won’t hurt. Always check your specific recipe for the recommended yeast type and method.
How long should I leave yeast in the microwave to proof?
For proofing yeast using the indirect microwave method, leave it in the warmed, closed microwave for 5 to 10 minutes. Begin checking for foam and bubbles around the 5-minute mark to ensure it doesn’t over-proof.