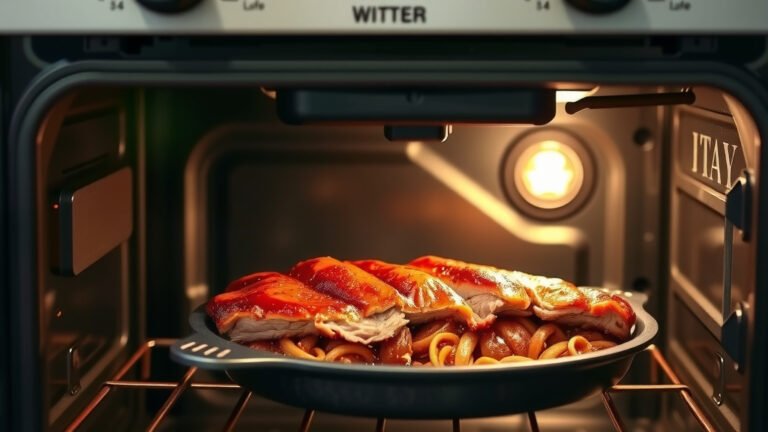
To cook whole duck crispy in a rotisserie oven, start with a high temperature (around 400°F/200°C) for the first 20-30 minutes to render fat quickly, then reduce it to 325-350°F (160-175°C) for the remaining cooking time.
Ensuring a dry duck, scoring the skin, and positioning a drip pan are key steps for achieving that wonderfully golden and crisp rotisserie duck skin you desire.
- Get your duck super dry before you start cooking.
- Score the skin in a crisscross pattern, but don’t cut into the meat.
- Use a high initial temperature, then lower it for even cooking.
- Baste the duck occasionally with its own rendered fat for flavor.
- Let your duck rest after cooking to keep it juicy and tender.
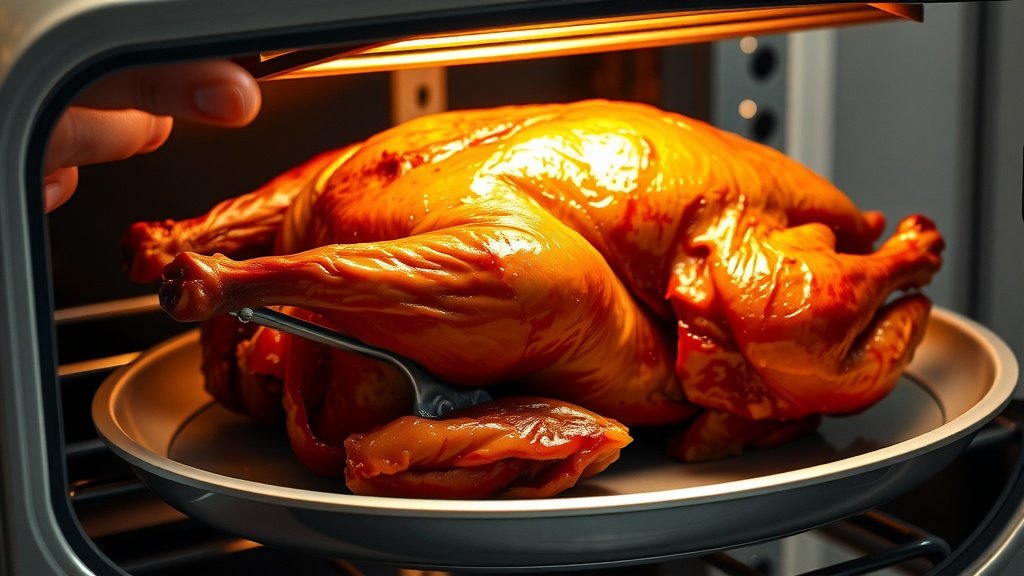
How To Cook Whole Duck Crispy In Rotisserie Oven?
Cooking a whole duck in a rotisserie oven helps create amazingly crispy skin and juicy meat. You start with a blast of high heat to make the skin render its fat, then you drop the temperature. This two-stage approach is a secret many chefs use (Food Network).
Why a Rotisserie for Duck?
Using a rotisserie for your duck is like having a constant basting machine. As the duck spins, its own fat drips down, coating the skin and helping it crisp up uniformly. This motion also helps the duck cook more evenly on all sides.
Choosing Your Perfect Duck
When picking a duck, look for a whole duck weighing between 4-6 pounds. Pekin ducks are a popular choice, known for their generous fat layer and flavorful meat. A smaller duck tends to cook more consistently in a home rotisserie.
Essential Prep for Crispy Skin
Proper preparation is half the battle for getting that perfect crispy skin. It’s not just about what happens in the oven; it starts well before. Many professional kitchens focus on these initial steps for best results.
Pat Dry and Score
First, give your duck a thorough pat-down with paper towels, inside and out. A dry surface is critical for crisping. Next, gently score the skin in a crisscross pattern, being careful not to cut into the meat. This allows the fat to render out during cooking, leading to a truly crispy exterior (America’s Test Kitchen).
- Pat the duck completely dry with paper towels.
- Use a sharp knife to score the skin in a diamond pattern.
- Make sure not to cut through to the meat.
- Prick any particularly thick areas of fat with a fork.
- Remove any excess fat from the cavity.
Seasoning Secrets
Keep your seasoning simple. Salt and freshly ground black pepper are often all you need to let the duck’s natural flavor shine. Some people like to add a little garlic powder or paprika for an extra layer of taste. Rub it all over, making sure to get into those scored lines.
Setting Up Your Rotisserie Oven
Getting your rotisserie ready is easy once you know the steps. A little foresight here will save you from messy cleanups and ensure your duck cooks beautifully. This setup helps manage the duck’s generous fat drippings.
Spitting the Duck
Carefully thread your duck onto the rotisserie spit, making sure it’s balanced. Use butcher’s twine to tie the legs together and secure the wings close to the body. This prevents them from flopping around and ensures even rotation and cooking.
Drip Pan Is Your Friend
Always place a drip pan directly beneath the duck in your oven. Duck releases a lot of fat, and this pan will catch it, preventing a smoky mess. You can even add some vegetables like carrots and onions to the pan to collect flavorful drippings for a sauce or gravy. We found that a foil-lined pan makes cleanup super simple.
The Cooking Process: Temperature and Time
This is where the magic happens for crispy skin. Think of it like a two-act play for your duck. You’ll be adjusting the temperature to get the skin just right while the inside cooks through. Many experts say this temperature change is key to rendering fat effectively.
Initial High Heat Blast
Start your rotisserie oven at a high temperature, around 400°F (200°C), for the first 20-30 minutes. This blast of heat helps to quickly render the fat beneath the skin, making it crispy. You’ll hear that wonderful sizzling sound as the fat begins to melt away. Research suggests this initial heat helps to shock the skin into crisping.
Lowering the Temperature
After the initial high heat, reduce your oven temperature to 325-350°F (160-175°C). Continue cooking until the duck reaches an internal temperature of 165°F (74°C) in the thickest part of the thigh, away from the bone. This lower temperature ensures the duck cooks through without burning the skin. We often see this method used for consistent cooking results.
| Duck Weight (Approx.) | Initial High Heat (400°F/200°C) | Reduced Heat (325-350°F/160-175°C) | Total Cooking Time (Approx.) |
|---|---|---|---|
| 4 lbs (1.8 kg) | 20 minutes | 1.5 hours | 1 hour 50 minutes |
| 5 lbs (2.3 kg) | 25 minutes | 1.75 hours | 2 hours 10 minutes |
| 6 lbs (2.7 kg) | 30 minutes | 2 hours | 2 hours 30 minutes |
Basting for Beautiful Skin
As your duck spins, its rendered fat will collect in the drip pan. You can use a basting brush to occasionally coat the duck with this hot fat. This keeps the skin moist and helps it turn a beautiful, deep golden-brown color. Some people avoid basting the last 30 minutes to ensure maximum crispiness.
The Critical Rest
Once your duck reaches the correct internal temperature, remove it from the rotisserie and let it rest, loosely tented with foil, for at least 15-20 minutes. Resting allows the juices to redistribute throughout the meat, making it tender and succulent. Cutting too early means dry duck, and nobody wants that!
Troubleshooting: Why Isn’t My Duck Crispy?
Did your duck not get as crispy as you hoped? Don’t worry, it happens! The most common reasons include not drying the duck enough, not scoring the skin, or not having the initial high heat. Make sure your oven is actually reaching the set temperature; sometimes, ovens can be a little off. An oven thermometer can be a helpful tool for accuracy.
Safety First: Duck Doneness
Always use a meat thermometer to check your duck’s internal temperature. The safest temperature for cooked duck is 165°F (74°C). Insert the thermometer into the thickest part of the thigh, avoiding the bone. Food safety guidelines point to this temperature for safe consumption (USDA).
Quick Checklist for Success
Ready to try it yourself? Here’s a brief list to help you stay on track. Following these steps will put you on the path to a fantastic rotisserie duck.
- Duck is fully thawed and very dry.
- Skin is scored, not cutting into the meat.
- Duck is seasoned well, inside and out.
- Rotisserie spit is balanced and secure.
- Drip pan is in place below the duck.
- Oven starts at high heat, then lowers.
- Duck reaches 165°F (74°C) internal temperature.
- Duck rests for 15-20 minutes after cooking.
Conclusion
Cooking a whole duck crispy in a rotisserie oven is a rewarding experience. It’s a simple process that gives you incredibly flavorful, juicy meat with that irresistible, crackling skin. By following these steps—from proper preparation and temperature control to that vital resting period—you’re set to create a meal that will truly impress. You’ll soon be a rotisserie duck expert, enjoying every savory bite!
Is it better to roast or rotisserie a whole duck?
Many home cooks find rotisserie cooking better for a whole duck because the continuous turning helps render the fat more evenly and promotes crispier skin all around. Roasting can also be effective, but often requires manual turning and basting to get similar results.
How do you keep a duck from drying out on a rotisserie?
To prevent your duck from drying out on a rotisserie, make sure not to overcook it; use a meat thermometer to cook to exactly 165°F (74°C). Also, letting the duck rest for 15-20 minutes after cooking is important. Some chefs will also baste the duck with its own rendered fat throughout the cooking process.
What internal temperature should a whole duck be cooked to?
A whole duck should be cooked to an internal temperature of 165°F (74°C) in the thickest part of the thigh, avoiding the bone. This temperature ensures the duck is safely cooked while retaining its moisture.
Can I use the rendered duck fat for anything?
Absolutely! The rendered duck fat is culinary gold. It’s fantastic for roasting potatoes, vegetables, or even making flaky pie crusts. Simply strain the cooled fat into a container and store it in your refrigerator for future use.
How do I prevent smoke when cooking duck in a rotisserie oven?
To prevent smoke, always use a drip pan underneath the duck to catch the melting fat. If fat drips directly onto the heating elements, it can cause smoke. Also, ensure your oven and drip pan are clean before starting, as old food residue can burn and smoke.