How to Clean an Oven with a Self Cleaning Function?
On this page (8 sections)
The easiest way to clean an oven with a self-cleaning function is to activate the self-clean cycle according to your owner’s manual. This cycle uses very high heat to burn away food residue. Afterwards, you simply wipe away the ash with a damp cloth.
You might dread cleaning your oven, but it doesn’t have to be a big chore. We found that most modern ovens offer this feature to make your life much easier. Learning how to properly use it helps maintain a clean kitchen and a happy home. A little preparation goes a long way for optimal results.
TL;DR:
- Remove racks and large debris before you begin.
- Don’t use oven cleaners during the self-clean cycle.
- Ventilate your kitchen well while the cycle runs.
- Wipe out all the ash once the oven cools down.
- Clean the oven door by hand if needed.
Ready to get that oven sparkling clean? Let’s walk through exactly how to do it, step-by-step.
Prepping Your Oven for Self-Cleaning
Before you start the self-clean cycle on a double oven, a little preparation goes a long way. Think of it like tidying up before a deep clean. You want to remove any large debris that could cause issues. This step prevents excessive smoke and potential burning smells.
First things first, make sure your oven is completely cool. For steps that cover both cavities, see our guide to cleaning a double oven. Then, open the door and take out any items inside. This includes oven racks, foil, and any baking sheets. These items are generally not designed to withstand the extreme heat of the self-clean cycle.
Removing Racks and Accessories
Your oven racks might look sturdy, but they can warp or discolor during self-cleaning. We found that most manufacturers recommend taking them out (Appliance Magazine). You can hand wash them separately in your sink with warm, soapy water. For stubborn grime, letting them soak for a bit can help.
Any other accessories, like a meat thermometer or an oven liner, should also be removed. Self-cleaning is all about super high heat. These accessories could be damaged or release fumes if left inside. Safety first, right?
Wiping Away Loose Debris
Now, grab a damp cloth or a silicone spatula. Gently scrape or wipe away any large, loose food particles. We’re talking about those forgotten French fry crumbs or big spills. You don’t need to scrub hard; just get rid of the easy stuff. This step will reduce the amount of ash later and help control smoke.
Avoid using harsh chemical oven cleaners at this stage. You’re just doing a quick pre-clean. Chemical residues can create toxic fumes when heated to self-clean temperatures. We found many experts agree on this point (Environmental Protection Agency).
Understanding the Self-Clean Cycle
The self-clean function is a marvel of modern appliance technology. It works by cranking up the oven’s temperature to an incredibly high level, often around 800 to 900 degrees Fahrenheit. This extreme heat turns food spills and grease into a fine ash. It’s essentially controlled pyrolysis.
The cycle typically runs for a few hours, depending on your oven’s setting and how dirty it is. During this time, your oven door will lock automatically for safety. This prevents anyone from accidentally opening it while it’s super hot. It also ensures the heat stays contained inside.
How Self-Cleaning Works Its Magic
When the oven heats up, organic matter like food particles simply combusts. They literally turn into carbon and ash. It’s like leaving something in a campfire for too long – it just becomes powdery dust. This process is highly effective for tackling baked-on grime that normal scrubbing can’t touch.
Do you need to add anything to the oven for this to work? Nope, absolutely nothing. Your oven does all the work. Just engage the cycle and let it do its thing. It’s designed to be a hands-off cleaning method.
Common Cycle Lengths and Settings
Most ovens offer different self-clean cycle durations. You might see options for “Light,” “Medium,” or “Heavy” clean. A light clean might be 2 hours, while a heavy one could be 4-6 hours. Check your specific owner’s manual to understand your oven’s options. This helps you choose the right setting for its current condition.
Generally, if your oven isn’t heavily soiled, a shorter cycle is fine. If it’s been a while since its last deep clean, a longer cycle might be more appropriate. Don’t worry, the oven will let you know when it’s done. It usually beeps and displays a completion message.
Running the Self-Clean Cycle Safely
While the self-clean cycle is super convenient, it’s really important to run it safely. Because of the high temperatures involved, there are a few things you should always do. This ensures peace of mind and protects your home.
One of the biggest considerations is ventilation. When food burns into ash, it produces smoke and odors. Not a pleasant smell, right? So, proper ventilation is key to keeping your air quality good. This makes a big difference for anyone with sensitive noses or respiratory issues.
Ensuring Proper Ventilation
Before you hit that start button, open windows in your kitchen. Turn on your range hood fan to its highest setting. If you have an exhaust fan, turn that on too. The goal is to create good airflow. We found that even a “clean” oven can produce some smoke and odors during the cycle, especially during the first few uses (Consumer Reports).
Consider running the cycle when you can open windows for an extended period. If you have pets, it’s a good idea to move them to a different room. The fumes, while not necessarily toxic, can be irritating. It’s just a thoughtful way to keep everyone comfortable.
Monitoring During the Cycle
Once you start the cycle, let your oven do its job. Avoid leaving the house while it’s heating and cooling. While incidents are rare, it’s always best to be present. You might hear some strange noises like creaking or popping; this is usually just the metal expanding and contracting due to heat. It’s perfectly normal.
If you see excessive smoke or an unusual smell, and your kitchen is well-ventilated, you can pause or stop the cycle. However, this is quite uncommon if you’ve done a good job of wiping up loose debris beforehand. Trust your senses, but don’t panic over normal operational sounds.
After the Cycle: Cleaning Up the Ash
Once the self-clean cycle is complete, your oven will typically lock until it has cooled down sufficiently. This usually takes a few hours. Don’t try to force the door open. It’s a safety mechanism. Impatience here could lead to injury or damage.
When the oven cools and the door unlocks, you’ll find a fine layer of ash at the bottom. This is exactly what you want to see! It means the cycle did its job. Now comes the satisfying part: wiping it all away. You’ll be amazed at how much cleaner your oven looks by doing this simple step.
Wiping Away the Ash
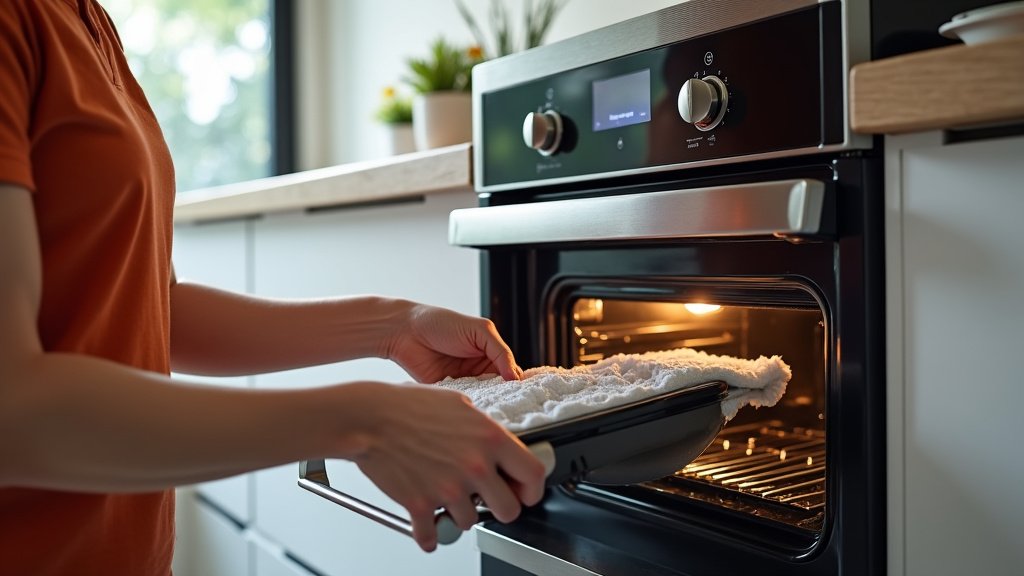
Grab a damp cloth or sponge. A microfiber cloth works wonderfully for this. Simply wipe up all the ash from the bottom and sides of the oven. It should come up very easily, like dust. You might need to rinse your cloth a few times if there’s a lot of ash. No need for scrubbing or harsh cleaners here. This is purely a light clean-up job.
A vacuum cleaner with a brush attachment can also be used for the bulk of the ash. But be careful; make sure the oven is completely cold. You don’t want to melt any plastic parts of your vacuum. After vacuuming, a quick wipe with a damp cloth will take care of any residue.
Dealing with Stubborn Spots
What if there are a few stubborn spots left? Sometimes, extremely baked-on food might not completely turn to ash. Or perhaps a spill was missed during the pre-clean. For these areas, a paste of baking soda and water can be very effective. Apply it, let it sit for 20-30 minutes, then scrub gently with a non-abrasive sponge. This paste is a natural and safe cleaner.
Avoid using steel wool or abrasive scrubbers on the oven’s interior. Your oven has a special enamel coating, and you don’t want to scratch it. Scratched surfaces can actually make it easier for food to stick in the future. Always opt for gentle cleaning tools.
Maintaining Your Oven Between Cycles
While the self-clean function is fantastic, you don’t want to rely on it exclusively for every crumb. A little regular maintenance keeps your oven in top shape. It also means less work for the self-clean cycle when you do run it. Think of it as preventative care for your oven.
A quick wipe after a messy bake can save you a lot of effort later. We found that consistently taking a few minutes to clean up small spills immediately prevents them from baking on (Good Housekeeping).
Quick Spillage Cleanup
If something spills while you’re baking, try to wipe it up as soon as the oven cools down. Don’t wait for it to bake on further. A damp cloth with a little dish soap usually does the trick. Catching spills early prevents them from becoming hardened, crusty messes. This really makes a big difference.
For oven doors, a simple glass cleaner can make them sparkle. Just spray onto a cloth, then wipe the door. Avoid spraying directly onto the oven, as cleaner can seep into crevices. Always focus on the glass surface. A little trick: use newspaper for a streak-free shine on the glass.
Frequency of Self-Cleaning
How often should you use the self-clean function? This really depends on how much you cook and how messy you are. For most households, running it every 3 to 6 months is usually sufficient. If you cook holiday meals or often have spills, you might do it more frequently, say every 2-3 months.
However, avoid overdoing it. Some appliance repair technicians suggest that frequent high-heat cycles can put stress on oven components. While helpful, it’s a powerful tool. Use it when your oven needs a thorough cleaning, not every week. A good rule of thumb: when you notice visible grime that a quick wipe won’t remove, it’s probably time. This makes sure your oven lasts a long time.
A Quick Oven Cleaning Checklist
Ready to get your oven gleaming again? Here’s a handy checklist to guide you through the process:
- Remove items: Take out all racks, foil, and accessories.
- Wipe large debris: Scrape away any big food particles.
- Ventilate: Open windows and turn on your range hood.
- Engage cycle: Set your oven to self-clean and let it run.
- Wait for cool-down: Allow the oven to fully cool and unlock.
- Wipe ash: Use a damp cloth to remove all the residue.
| Step | Action | Why It Matters |
|---|---|---|
| Pre-clean | Remove racks & loose food. | Prevents warping & excess smoke. |
| Ventilation | Open windows, turn on fan. | Minimizes odors & fumes. |
| Cycle Run | Start self-clean, stay home. | Safety and monitoring during high heat. |
| Post-Cycle | Wait for cool-down & unlock. | Door safety and proper cleaning. |
| Ash Cleanup | Wipe with damp cloth. | Removes burned residue effectively. |
Conclusion
You’ve seen how simple it is to get your oven sparkling clean using its self-cleaning function. By following these easy steps—from proper preparation to a final wipe-down—you can ensure a clean oven without the harsh chemicals or heavy scrubbing. We found that a little ventilation and patience makes all the difference for a stress-free outcome. Take pride in your clean kitchen and enjoy cooking in a fresh, inviting space. Go ahead, reclaim your weekend and let your oven do the hard work!
Frequently Asked Questions
Is it safe to be in the house while the oven is self-cleaning?
Yes, it’s generally safe to be in the house, but we highly recommend good ventilation. Open windows and run your range hood fan to clear any odors or smoke. If you have sensitive individuals or pets, they might be more comfortable in another area of the house.
How long does a self-cleaning cycle usually take?
The duration varies, typically ranging from 2 to 6 hours. This depends on your oven model and the chosen cleaning intensity (light, medium, or heavy). Always refer to your owner’s manual for specific timing options.
Can I stop the self-cleaning cycle once it starts?
Most ovens allow you to stop or pause the cycle if necessary. However, the oven door will likely remain locked until it cools to a safe temperature. Avoid opening the door prematurely, as the internal temperatures are extremely high.
Why does my oven smell bad after a self-cleaning cycle?
A slight smell can linger after the cycle if any residue wasn’t completely burned off. Run your ventilation fans for a bit longer, or even run the oven at a low temperature (like 300°F) for 15-20 minutes with the window open. This helps to burn off any remaining faint odors.
Should I use commercial oven cleaner after a self-clean cycle?
No, there is rarely a need for commercial oven cleaner if the self-clean cycle was properly run. The high heat turns everything into ash, which you simply wipe away. Chemical cleaners can damage your oven’s enamel or create toxic fumes during subsequent use.