
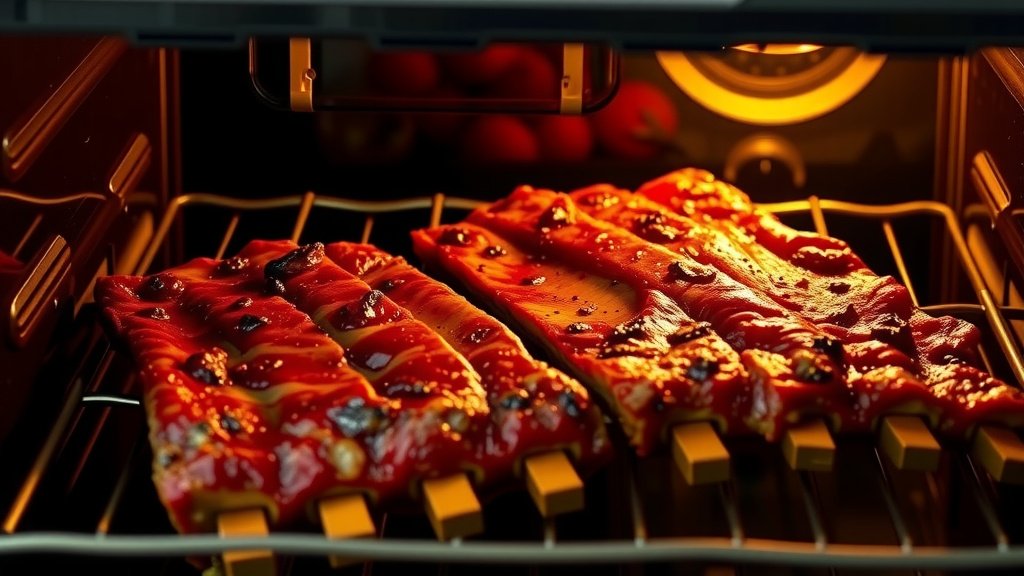
To cook ribs in an electric oven, you will generally bake them at a low temperature, around 250-275°F (120-135°C), for several hours until tender. This method gently breaks down the tough connective tissues, giving you fall-off-the-bone results right from your electric oven.
Start by preparing your ribs—removing the membrane is key—seasoning them generously, and then wrapping them tightly in foil before baking to lock in moisture. Finishing them with a glaze under the broiler adds a delicious caramelized crust.
Here’s the quick rundown to perfectly cook ribs in your electric oven:
- Choose your favorite ribs, like baby back or spare ribs.
- Remove the membrane from the back of the ribs for tenderness.
- Season them well with a dry rub or your chosen spices.
- Bake low and slow, typically around 275°F (135°C), wrapped in foil.
- Finish with sauce, uncovered, at a higher heat or under the broiler for a sticky glaze.
How To Cook Ribs In An Electric Oven?
Cooking ribs in an electric oven is simpler than you might think, producing wonderfully tender and juicy results. The key is using a low and slow baking approach to achieve that perfect texture.
Gathering Your Supplies: What You’ll Need
Before you begin, ensure you have everything ready. Think of it like a chef preparing their station, making cooking smooth and enjoyable.
- Rack of ribs (baby back, spare, or St. Louis style)
- Your favorite dry rub or seasoning blend
- Aluminum foil (heavy-duty is best)
- Baking sheet or roasting pan
- Basting brush (for sauce, optional)
- Meat thermometer (useful for peace of mind)
Choosing Your Ribs: What Type Works Best?
Do you know there are different types of ribs? Each offers a slightly different experience. Baby back ribs are smaller and leaner, while spare ribs, including St. Louis style, are meatier and more flavorful due to their fat content.
We found that both types work beautifully in an electric oven. It really comes down to your personal preference for meatiness and size.
Prepping Your Ribs: The Membrane Secret
This step is often overlooked, but it makes a huge difference. On the bone side of the ribs, there’s a thin, papery membrane.
Removing this membrane helps the ribs become incredibly tender, as it otherwise creates a chewy barrier. Many experts say this is key for rib tenderness.
Here’s a quick checklist to prep your ribs:
- Pat the ribs dry with paper towels.
- Locate the membrane on the underside (bone side).
- Use a knife or spoon to lift a corner of the membrane.
- Grab the membrane with a paper towel for a firm grip.
- Slowly pull the membrane away from the bones until removed.
- Trim any excess fat, but leave some for flavor.
Seasoning Your Ribs: Flavor from the Start
Now comes the flavor! A good dry rub creates a fantastic crust and infuses the meat with taste. Don’t be shy; rub it on all sides.
You can use a store-bought rub or create your own blend. Many enjoy a mix of paprika, garlic powder, onion powder, brown sugar, salt, and pepper.
The Low and Slow Method: Oven Temperature and Time
This is the heart of oven-cooked ribs: low temperature for a long time. Why low and slow? Research often connects this method with optimal collagen breakdown, leading to tender, juicy meat (Cook’s Illustrated).
High heat just dries them out. Patience is your secret ingredient here.
Wrapping Your Ribs: Foil for Tenderness
Once seasoned, place your ribs on a baking sheet or in a roasting pan. Then, wrap them tightly in heavy-duty aluminum foil. This creates a steamy environment, locking in moisture.
Think of the foil as a tiny sauna for your ribs. It helps them become incredibly tender without drying out.
Baking Time and Temperature Guide
Here’s a general guide. Keep in mind that exact times can vary slightly based on your oven and the thickness of the ribs. Always aim for tenderness.
| Rib Type | Oven Temperature | Approximate Baking Time (Foil-Wrapped) |
|---|---|---|
| Baby Back Ribs | 250-275°F (120-135°C) | 2.5 – 3.5 hours |
| Spare Ribs (St. Louis Style) | 250-275°F (120-135°C) | 3.5 – 4.5 hours |
Checking for Doneness: The Bend Test
How do you know when your ribs are ready? You want them tender, but not falling apart entirely. A great way is the “bend test.”
Carefully pick up a rack of ribs with tongs in the middle. If they bend easily and the meat almost separates, they’re likely done. They shouldn’t be stiff.
The Grand Finale: Adding Sauce and Finishing
This is where you can add that beautiful, sticky glaze. After the ribs are tender, unwrap them from the foil.
Brush your favorite BBQ sauce generously over both sides of the ribs. Do you like a sweet, tangy, or spicy sauce? The choice is yours!
Broiling or Baking for the Finish
Place the sauced ribs back into the oven, uncovered. You have a couple of options here:
- Broil: For a faster, slightly charred finish, place them under the broiler for 5-10 minutes. Watch them closely to prevent burning!
- Bake: For a more even glaze, bake at a higher temperature, around 375-400°F (190-200°C), for 15-20 minutes.
Resting Your Ribs: A Crucial Step
Just like any good piece of meat, ribs need to rest after cooking. Loosely tent them with foil for 10-15 minutes.
This resting period allows the juices to redistribute throughout the meat, resulting in a more flavorful and moist bite. Don’t skip this!
Troubleshooting Common Rib Issues
Sometimes things don’t go perfectly, right? What if your ribs are dry or tough? If they’re dry, they might have been cooked too long or not wrapped tightly enough. For tough ribs, they likely need more time at a low temperature to break down the connective tissue.
Adjusting the cooking time and ensuring a good seal with foil can often fix these problems.
Conclusion
Cooking ribs in an electric oven is a fantastic way to achieve tender, flavorful results with minimal fuss. By following the low and slow method, carefully prepping your ribs, and finishing them with a delicious sauce, you’ll be serving up impressive meals.
Remember, practice makes perfect. So, grab your favorite rack of ribs and enjoy the process of creating a truly satisfying dish right in your own kitchen!
FAQs About Cooking Ribs in an Electric Oven
Do I need to parboil ribs before baking in the oven?
No, parboiling ribs is generally not necessary when using the low and slow oven method. While some recipes suggest it, we found that proper wrapping and long baking times achieve excellent tenderness without boiling away flavor.
Can I cook frozen ribs directly in an electric oven?
It’s best to thaw ribs completely before cooking them. Starting with thawed ribs ensures even cooking and allows your seasonings to properly adhere. If you try to cook them from frozen, the cooking time will be significantly longer and results may be inconsistent.
What is the ideal internal temperature for cooked ribs?
While tenderness is the main goal, many sources suggest an internal temperature of around 190-205°F (88-96°C) for ribs. At this range, the connective tissues have broken down enough to make the meat tender. Use a meat thermometer inserted away from the bone.
Can I use a convection setting for cooking ribs in an electric oven?
You can use a convection setting, but you’ll need to adjust the temperature and time. Convection ovens cook faster and often at a lower temperature. We found that reducing the temperature by about 25°F (15°C) and checking for doneness earlier works well. Ensure the ribs are still tightly wrapped to prevent drying.
How do I prevent my ribs from drying out in the oven?
The best way to prevent dry ribs is to wrap them tightly in heavy-duty aluminum foil for the majority of their cooking time. This traps moisture and creates a steamy environment. You can also add a small amount of liquid, like apple cider vinegar or broth, inside the foil packet for extra moisture, as many culinary experts suggest.
