

To make no-knead bread in a Dutch oven, you combine flour, water, salt, and yeast, let it rise for 12-18 hours, and then bake it in a preheated Dutch oven. This method creates a loaf with a crispy crust and a soft, airy inside. It’s surprisingly simple, even for new bakers.
You can achieve bakery-quality bread right in your own kitchen without any special skills or equipment beyond a reliable Dutch oven. Many home bakers find this method takes away the fuss of traditional bread making. It’s perfect for a delicious, homemade loaf with minimal effort.
TL;DR:
- Mix ingredients quickly.
- Let dough rise for a long time.
- Preheat your Dutch oven well.
- Bake for a crusty, delicious loaf.
- Enjoy fresh bread with ease.
Ready to bake some amazing bread? Let’s walk through exactly how to make no-knead bread in a Dutch oven, step by step.
Crafting No-Knead Bread: Your Step-by-Step Guide
You’re ready to make delicious, crusty bread with very little effort. Let’s break down the process into simple, manageable steps. We’ll start with the ingredients you’ll need.
Gathering Your Simple Ingredients
One of the best things about no-knead bread is how few ingredients it requires. You likely already have most of these in your pantry. We’re looking for quality, but nothing fancy is needed here. You just need four basic items.
The Core Four: Flour, Water, Salt, and Yeast
For your no-knead masterpiece, you’ll need all-purpose flour, water, salt, and yeast. That’s it! No eggs, no butter, no sugar, no milk. Just these fundamental building blocks for bread.
- Flour: Most recipes call for basic all-purpose flour. Don’t worry about expensive bread flour unless you really want to experiment later.
- Water: Use lukewarm water. This helps the yeast activate properly. About 100-110°F (38-43°C) is ideal. If it’s too hot, it can kill the yeast; too cold, and it won’t activate.
- Salt: Fine sea salt or table salt works great. Salt is essential for flavor and also helps control the yeast activity.
- Yeast: Active dry yeast or instant yeast will do. Instant yeast is a bit more forgiving as you don’t need to “proof” it first.
We found that using a kitchen scale for flour and water can give you more consistent results than measuring cups (King Arthur Baking Company). This is because flour can pack down differently.
Mixing Your Dough: The Easiest Part
This is where the “no-knead” magic begins. You’re simply combining the ingredients. There’s no strenuous work involved, just a quick stir. You’ll be surprised how fast this part goes.
Combining Dry and Wet Ingredients
First, grab a large bowl. Seriously, make sure it’s big enough, as the dough will expand quite a bit during the rise. In this bowl, you’ll whisk together your dry ingredients before adding the water.
Add your flour, salt, and yeast to the bowl. Give them a good whisk to make sure they’re evenly distributed. This prevents pockets of unmixed salt or yeast later on. Then, pour in your lukewarm water.
Using a wooden spoon or a spatula, mix everything until it just comes together. Don’t overmix. You’re looking for a shaggy, wet dough. It will look rough and sticky, and that’s perfectly normal. Some dry bits might remain, but don’t worry. This sticky texture is what gives the bread its open, airy crumb.
The Long Rise: Letting Time Do the Work
This is the most important step for developing flavor and texture in no-knead bread. It’s also the longest part, but you don’t have to do anything! Just walk away and let the yeast work its wonders.
Optimal Rising Time and Conditions
Cover your bowl with plastic wrap or a clean kitchen towel. Place it in a warm, draft-free spot in your kitchen. A slightly warmer environment, around 70-75°F (21-24°C), encourages faster rising (Cook’s Illustrated).
You’ll want to let your dough rise for 12 to 18 hours. Yes, you read that right – 12 to 18 hours! This long, slow fermentation is what creates the complex flavors and develops the gluten structure without any kneading. During this time, the dough will double or even triple in size, and you’ll see tiny bubbles on the surface.
What happens if you go over 18 hours? The dough might become too acidic or lose some of its rise power. What if it’s less than 12? You might not get the full flavor development. Aim for that sweet spot within the 12-18 hour window.
Shaping Your Dough: A Quick Prep
After its long rest, your dough will be bubbly and relaxed. This next step is quick and easy. It’s less about traditional shaping and more about bringing it together for baking.
Folding and Resting
Lightly flour your work surface. Gently scrape your dough out of the bowl onto the floured surface. Avoid deflating it too much. Use a bit of flour on your hands if it’s super sticky.
Now, gently fold the edges of the dough towards the center to create a rough ball shape. Think of it like bringing the corners of a square into the middle. Turn the dough seam-side down. This creates some surface tension, which helps with oven spring.
You can let it rest for another 15-30 minutes, covered, while your Dutch oven preheats. This allows the gluten to relax slightly, making for a better final shape. You’re almost ready for the oven!
Preheating Your Dutch Oven: The Key to a Great Crust
This step is absolutely critical for achieving that beautiful, crackly crust and airy interior that no-knead bread is famous for. Don’t skip or rush this part.
Getting Your Oven and Pot Super Hot
Place your empty Dutch oven (with its lid) into your cold oven. Then, preheat your oven to 450°F (232°C). Let the Dutch oven preheat along with the oven for at least 30 minutes, or even an hour. The goal is to get that pot screaming hot.
Why so hot? The super-hot Dutch oven creates a steamy environment around the dough when it first goes in. This steam keeps the crust soft initially, allowing the bread to expand rapidly (often called “oven spring”) before the crust hardens. This gives you a lighter, airier loaf (America’s Test Kitchen).
Think of it like a mini steam oven for your bread. If the pot isn’t hot enough, the crust will set too quickly, restricting the loaf’s rise and resulting in a denser bread.
When the Dutch oven is fully preheated, carefully remove it from the oven. Be extremely careful; it will be very, very hot. Use thick oven mitts.
Baking Your No-Knead Masterpiece
Now for the grand finale! You’ll bake your bread in two stages: covered and uncovered. This ensures a perfect balance of steam for rise and dry heat for crust development.
The Two-Stage Baking Process
Gently transfer your dough into the hot Dutch oven. You can carefully lift it with floured hands or use parchment paper. If using parchment, you can lower the dough, still on the parchment, directly into the pot. This makes removal easier too.
Cover the Dutch oven with its lid and return it to the hot oven. Bake for 30 minutes with the lid on. During this time, the steam trapped inside the pot will work its magic, helping the bread achieve maximum rise.
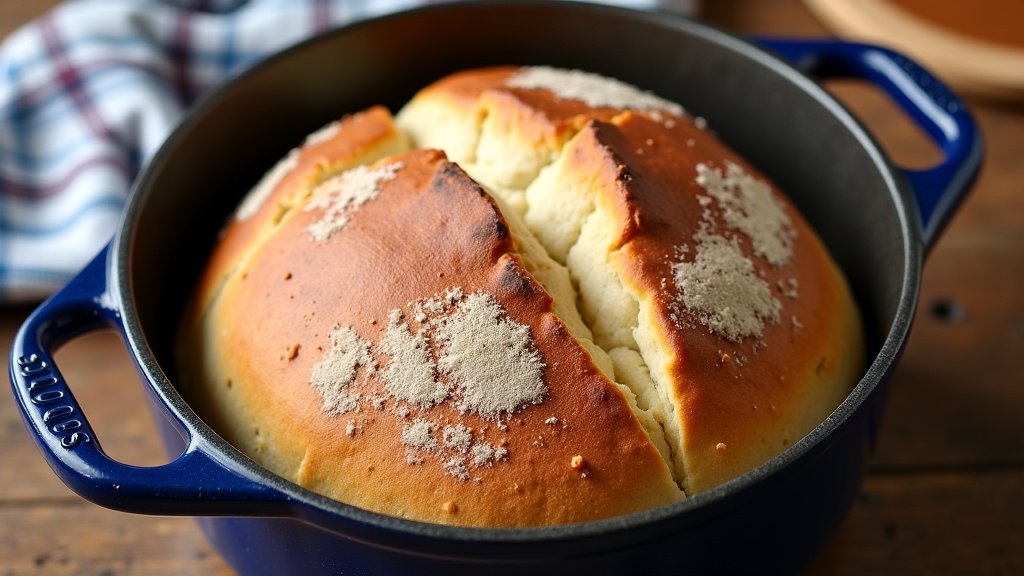
After 30 minutes, carefully remove the lid. The bread will look pale but puffed up. Now, continue to bake uncovered for another 15-25 minutes, or until the crust is a deep golden brown and sounds hollow when tapped on the bottom. We found that a deeper color often means more flavor and a crunchier crust.
You did it! Once baked, carefully remove the bread from the Dutch oven and place it on a wire rack to cool completely. Resist the urge to slice into it immediately! Cooling allows the internal structure to set and the flavors to fully develop. Cutting it too soon can result in a gummy texture. Give it at least an hour.
No-Knead Bread Checklist
Here’s a quick recap of the essential steps to make your no-knead bread a success:
- Measure ingredients precisely, ideally by weight.
- Ensure water temperature is just right for yeast.
- Mix until shaggy; don’t overwork the dough.
- Allow a full 12-18 hour rise for flavor development.
- Preheat Dutch oven for at least 30 minutes at 450°F.
- Bake covered first, then uncovered for a perfect crust.
- Cool completely on a rack before slicing.
Conclusion
You’ve seen how simple it is to create beautiful, delicious no-knead bread. With just a few ingredients and a little patience, you can achieve a bakery-quality loaf at home. Your Dutch oven becomes the secret to that perfect crispy crust and airy interior. This method truly simplifies bread making, making it accessible for everyone.
So, gather your ingredients, set aside some time for the magic of fermentation, and get ready to enjoy the incredible aroma and taste of fresh, homemade bread. Your kitchen (and your taste buds) will thank you!
Frequently Asked Questions
Can I use different types of flour for no-knead bread?
Yes, you absolutely can! While all-purpose flour is standard, you can experiment with bread flour for a chewier texture or whole wheat flour for a denser, more rustic loaf. Just be aware that different flours absorb water differently, so you might need to adjust the water slightly.
What if my dough doesn’t rise enough?
A few factors can impact your dough’s rise. Check that your yeast isn’t expired, and that your water temperature was lukewarm (not too hot or cold). Also, ensure your rising environment is warm enough, around 70-75°F (21-24°C), and allow the full 12-18 hours.
My crust isn’t as crispy as I’d like. What went wrong?
The key to a crispy crust is a super hot Dutch oven and baking uncovered for long enough. Make sure you preheat your Dutch oven for at least 30 minutes at 450°F (232°C). Also, don’t be afraid to let it bake a bit longer in the uncovered stage until it reaches a deep golden-brown color.
Can I add seeds or herbs to my no-knead bread?
Definitely! You can fold in seeds like sesame, poppy, or sunflower, or dried herbs like rosemary or thyme, during the initial mixing stage with your dry ingredients. This adds extra flavor and texture to your loaf. Try about 1/4 to 1/2 cup of additions.
How do I store leftover no-knead bread to keep it fresh?
Once your bread is completely cool, store it at room temperature. For short-term storage (1-2 days), a bread box or simply wrapping it in a clean kitchen towel works well. For longer storage, you can freeze slices or the entire loaf in an airtight bag.
