How to Cook a Whole Chicken in a Rotisserie Oven?
On this page (10 sections)
- Roasting a Whole Chicken on the Rotisserie
- Gathering Your Ingredients and Tools
- Preparing Your Chicken for the Rotisserie
- Assembling the Chicken on the Rotisserie Spit
- Cooking Your Rotisserie Chicken
- The Resting Period: Don’t Skip This!
- Carving and Serving Your Masterpiece
- Quick Checklist for Rotisserie Chicken Success
- Conclusion
- Frequently Asked Questions
Cooking a whole chicken in a rotisserie oven is surprisingly easy and produces incredibly tender, juicy meat. You can achieve a perfectly cooked, golden-brown bird with minimal effort. This method is ideal for a delicious weeknight dinner or impressing guests with a restaurant-quality meal right in your own kitchen.
Rotisserie cooking uses even heat and constant rotation. This ensures the chicken cooks thoroughly while its own juices baste it. We found that this technique makes it much harder to end up with dry chicken. It’s a favorite for a reason, offering a foolproof way to get delicious results every time.
- Rotisserie ovens make cooking a whole chicken easy.
- They ensure even cooking and juicy results.
- It’s a great method for busy nights or special occasions.
- Expect a tender, flavorful bird with a crispy skin.
Ready to get that chicken spinning? Let’s walk through exactly how to cook a whole chicken in your rotisserie oven, step by step.
Roasting a Whole Chicken on the Rotisserie
Cooking a whole chicken in a rotisserie oven is a simple yet impressive way to achieve perfectly cooked, moist, and flavorful meat. The constant turning ensures even cooking and self-basting. This method minimizes the risk of dry chicken, a common pitfall for many home cooks. You’ll end up with a bird that’s tender on the inside and boasts a wonderfully crispy, golden-brown skin. It’s a hands-off approach that frees you up to prepare side dishes or simply relax. Let’s get that chicken ready to spin and become the star of your meal.
Gathering Your Ingredients and Tools
Before you get started, make sure you have everything you need. This will make the cooking process smooth and enjoyable. We’ve found that being prepared is key to a successful rotisserie roast.
Essential Ingredients
- One whole chicken (about 3-5 pounds is ideal for most rotisserie ovens)
- Salt and freshly ground black pepper
- Olive oil or melted butter
- Optional: Your favorite poultry seasoning, herbs, or spices
Necessary Equipment
- Your rotisserie oven
- The rotisserie spit, forks, and handle
- Kitchen twine (if you plan to truss the chicken)
- A meat thermometer
- A carving board and knife
Preparing Your Chicken for the Rotisserie
Proper preparation is vital for a delicious result. You want your chicken to be clean, dry, and ready to cook evenly. Taking these steps ensures the best texture and flavor.
Cleaning and Patting Dry
First, remove the chicken from its packaging. Take out any giblets or the neck from inside the cavity. Rinse the chicken inside and out with cool water. This is a good practice to remove any residual juices. Next, and this is very important, pat the chicken completely dry with paper towels. A dry surface helps the skin crisp up beautifully during cooking. Many culinary resources emphasize this step for achieving that desirable crunch (National Chicken Council).
Seasoning for Flavor
Now comes the fun part: seasoning! You can keep it simple with just salt and pepper, or get creative. Rub the entire chicken, inside and out, with a generous amount of salt and pepper. Then, coat the skin with olive oil or melted butter. This helps the seasonings adhere and promotes browning. If you like, you can add a favorite spice blend or fresh herbs like rosemary and thyme. Some people like to tuck herbs inside the cavity for added aroma.
Trussing the Chicken (Optional but Recommended)
Trussing means tying the chicken’s legs and wings close to its body. This helps the chicken cook more evenly and prevents the wings and legs from burning. You can use kitchen twine for this. Simply tie the legs together and tuck the wing tips under the body. This keeps the chicken compact and helps it rotate smoothly on the spit. If you don’t have twine, you can sometimes secure the legs with skewers.
Assembling the Chicken on the Rotisserie Spit
Getting the chicken secured properly on the spit is crucial for safe and even cooking. A wobbly chicken can lead to uneven rotation and potential mishaps.
Securing the Chicken to the Spit
Carefully push the rotisserie spit through the center of the chicken. You’ll want to go from the cavity opening, through the body, and out the other side. Aim for the center of the chicken for balance. Once the spit is through, use the spit forks to secure the chicken in place. Push the forks firmly into the meat on both sides of the chicken. Make sure they are tight and the chicken doesn’t move freely. Tighten the screws on the forks to lock the chicken onto the spit. The goal is a snug fit so the chicken rotates as one unit.
Balancing is Key
A well-balanced chicken will rotate smoothly without wobbling excessively. If the chicken feels unbalanced, try repositioning the forks or adjusting the chicken’s placement on the spit. Many rotisserie ovens have a counterweight system to help with balance. Check your oven’s manual for specific guidance on achieving good balance. This ensures even heat distribution and prevents strain on the motor.
Cooking Your Rotisserie Chicken
Now that your chicken is prepped and on the spit, it’s time to let the rotisserie do its magic. This part is mostly hands-off.
Preheating Your Rotisserie Oven
Most rotisserie ovens perform best when preheated. Refer to your oven’s manual for the recommended temperature. Often, a temperature between 350°F and 400°F (175°C to 200°C) is ideal for whole chickens. Preheating ensures the chicken starts cooking immediately upon placement, leading to a better sear and more even cooking.
Setting Up the Rotisserie and Cooking Time
Place the assembled spit into the rotisserie oven’s support system. Make sure it’s securely locked in place. Close the oven door and set the cooking time. The general rule of thumb for cooking a whole chicken is about 20-25 minutes per pound. For a 4-pound chicken, this means cooking for approximately 80 to 100 minutes. However, this is just a guideline. The best way to know if it’s done is by using a meat thermometer.
Checking for Doneness with a Meat Thermometer
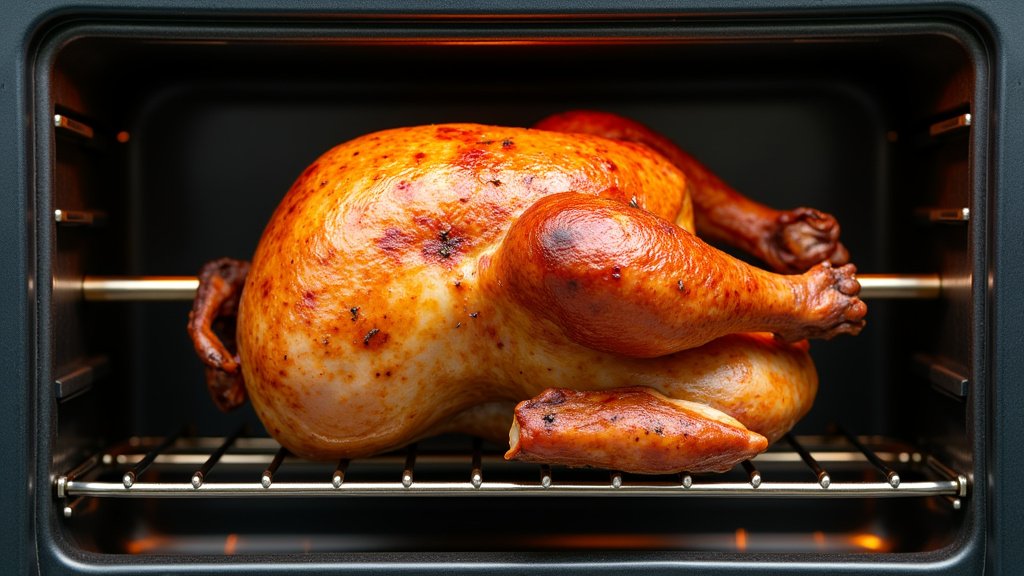
This is the most reliable way to ensure your chicken is cooked safely and perfectly. Insert a meat thermometer into the thickest part of the thigh, avoiding the bone. You’re looking for an internal temperature of 165°F (74°C). The juices should also run clear when you pierce the thigh with a fork or knife. Many experts, including the USDA, recommend this safe internal temperature for poultry.
The Resting Period: Don’t Skip This!
Once your chicken reaches the perfect temperature, resist the urge to carve it immediately. Resting is a critical step that makes a big difference in juiciness.
Why Resting Matters
When chicken cooks, the juices are pushed to the center. If you cut into it right away, those juices will spill out onto the carving board, leaving you with drier meat. Allowing the chicken to rest lets those juices redistribute throughout the meat. This results in a much more tender and moist chicken. Research shows that resting allows the internal temperature to rise slightly as well, helping to finish cooking evenly (FoodSafety.gov).
How to Rest Your Chicken
Carefully remove the spit from the rotisserie oven. You can either let the chicken rest on the spit, or carefully remove it from the spit and place it on a clean carving board. Tent it loosely with aluminum foil. Let it rest for at least 10-15 minutes. For larger chickens, you might want to rest them for up to 20 minutes. This brief wait is truly worth the reward of a juicier bird.
Carving and Serving Your Masterpiece
After the rest, your beautifully cooked rotisserie chicken is ready to be carved and served. Present it proudly!
Carving Techniques
Start by removing the legs and thighs. Make a cut down the side of the breast, then use your knife to loosen the leg and thigh from the carcass. Separate them into drumsticks and thighs. Next, carve the breast meat. Slice down the breastbone and then cut slices away from the bone. You can also remove the wings. A sharp carving knife will make this process much easier.
Serving Suggestions
Serve your rotisserie chicken hot. It pairs wonderfully with classic sides like mashed potatoes, roasted vegetables, a fresh salad, or crusty bread. The juices that collected during resting can be spooned over the carved meat for extra flavor. Enjoy the fruits of your labor!
Quick Checklist for Rotisserie Chicken Success
Here’s a handy checklist to ensure your rotisserie chicken turns out perfectly every time:
- Ensure chicken is clean and thoroughly patted dry.
- Season generously inside and out, and coat with oil/butter.
- Truss the chicken for even cooking and compact shape.
- Secure chicken tightly to the spit with forks, ensuring good balance.
- Cook to an internal temperature of 165°F (74°C) in the thigh.
- Let the chicken rest for 10-15 minutes before carving.
Conclusion
You’ve successfully learned how to transform a whole chicken into a juicy, golden masterpiece using your rotisserie oven. We’ve covered everything from prepping and seasoning to ensuring it’s perfectly cooked and rested. Remember, the key steps are a dry bird, proper securing on the spit, cooking to that 165°F internal temperature, and the all-important rest. Now, you’re ready to create restaurant-quality chicken right in your own kitchen. Go ahead and try it for your next family meal or gathering!
Frequently Asked Questions
Can I cook a frozen chicken on the rotisserie?
We do not recommend cooking a frozen chicken on the rotisserie. Frozen meat cooks unevenly, and the outside can burn before the inside is safe to eat. Always thaw your chicken completely before placing it on the spit for the best results and food safety.
How do I prevent my chicken from falling apart on the spit?
Securing the chicken tightly with the rotisserie forks is key. Make sure the forks are dug firmly into the meat on both sides and that the screws are tightened. Trussing the legs and tucking the wings close to the body also helps keep everything compact and stable during rotation.
What if my rotisserie oven doesn’t have a temperature setting?
Some rotisserie ovens rely on cooking time rather than specific temperature settings. In these cases, use the general guideline of 20-25 minutes per pound and always use a meat thermometer to confirm doneness. Your oven’s manual should provide guidance on typical cooking times for a whole chicken.
My chicken skin isn’t crispy. What did I miss?
For crispy skin, ensure you’ve patted the chicken very dry with paper towels before seasoning. Also, make sure your oven is preheated to the correct temperature, usually around 350-400°F (175-200°C). A final blast of high heat at the end can also help crisp up the skin.
How long should I rest the chicken after cooking?
We’ve found that a resting period of 10 to 15 minutes is ideal for most chickens. For larger birds, you might extend this to 20 minutes. Tent it loosely with foil to keep it warm while the juices redistribute, ensuring a more succulent final product.