

To season a new cast iron skillet, you’ll want to You can also learn how to season a cast iron Dutch oven for the first time to ensure its longevity and performance.clean it thoroughly, apply a thin layer of cooking oil, and then bake it in the oven. This process creates a natural, non-stick surface. It also protects your skillet from rust.
Seasoning isn’t a one-time event; it’s an ongoing relationship with your cookware. We found that regular seasoning builds up layers over time. This makes your cast iron skillet more durable and easier to cook with.
- Clean your new skillet well with soap and water.
- Apply a very thin, even layer of high smoke point oil.
- Bake it upside down in a hot oven for an hour.
- Let it cool completely before using or storing.
- Repeat these steps a few times for best results.
Ready to give your new cast iron skillet the best possible start? Let’s walk through the steps to season it perfectly, ensuring years of great cooking.
Getting Your New Cast Iron Skillet Ready for Action
You’ve got a brand-new cast iron skillet. That’s exciting! Before you start cooking up a storm, there’s a small but important step: seasoning. Think of seasoning as creating a natural, non-stick shield. It protects your skillet from rust and makes cooking much easier.
Many new skillets come “pre-seasoned.” This is a great start, but it’s not enough. We found that adding your own layers of seasoning makes a big difference. It customizes the surface to your cooking style and builds a truly resilient finish.
What is Seasoning, Anyway?
Seasoning isn’t magic, it’s chemistry. When you heat oil on cast iron, it undergoes a process called polymerization. The oil bonds to the iron surface, creating a hard, slick, plastic-like layer. This layer fills in the microscopic pores of the iron, making it smooth and non-stick.
Each time you season your skillet, you add another one of these protective layers. Over time, these layers build up, making your skillet’s surface darker, smoother, and more non-stick. It’s like building up a beautiful patina on an old piece of wood.
Gather Your Tools: What You’ll Need
Before you begin, make sure you have everything handy. This will make the process much smoother. You don’t want to be scrambling for supplies with a hot skillet.
- New Cast Iron Skillet: The star of our show!
- Dish Soap and Scrub Brush: For the initial cleaning.
- Lint-Free Cloths or Paper Towels: To apply and wipe off oil.
- High Smoke Point Cooking Oil: More on this in a moment.
- Aluminum Foil: To catch drips in your oven.
- Oven Mitts: Safety first, always.
Choosing the Right Oil for Seasoning
This is a critical choice. You need an oil that can handle high heat without breaking down quickly. This is known as a high smoke point oil. We found that certain oils work best for creating a durable seasoning layer.
Best Oils for Cast Iron Seasoning
The best oils for seasoning have a high smoke point and are good at polymerizing. We’ve compiled a list based on common recommendations and our own trials:
| Oil Type | Smoke Point (Approx.) | Notes for Seasoning |
|---|---|---|
| Flaxseed Oil | 225°F (107°C) | Often recommended for initial seasoning due to strong polymerization. Can be pricey. |
| Grapeseed Oil | 420°F (216°C) | Excellent all-around choice. Good smoke point and widely available. |
| Vegetable Oil | 400°F (204°C) | A common, affordable option. Works well for regular seasoning. |
| Canola Oil | 400°F (204°C) | Another budget-friendly and effective choice for seasoning. |
| Crisco (Vegetable Shortening) | 360°F (182°C) | Many traditionalists swear by it. Easy to apply evenly. |
While flaxseed oil is sometimes praised for its strong polymerization, some users report it can flake over time. We found that grapeseed oil or vegetable oil offer a great balance of performance and accessibility for most home cooks.
Oils to Avoid for Seasoning
Not all oils are created equal for seasoning. Avoid oils with low smoke points or those that can turn rancid quickly.
- Olive Oil: Too low a smoke point. It will smoke excessively and leave a sticky residue.
- Butter: Definitely not for seasoning. It burns easily and contains milk solids that will stick.
- Animal Fats (Lard, Bacon Grease): While good for cooking in seasoned cast iron, they can go rancid if used for initial seasoning layers. Use them for maintenance, not for building the base.
The Step-by-Step Guide to Seasoning Your Skillet
Ready to get your hands a little oily? This process is straightforward, but attention to detail makes all the difference. We’ll walk you through each step to ensure your skillet gets the best possible start.
Step 1: Clean Your Skillet Thoroughly
Even if your skillet says “pre-seasoned,” you need to clean it. Why? Manufacturers apply a protective coating that isn’t always a perfect seasoning. Plus, it might have factory dust or residue. You want a perfectly clean slate.
- Use hot water and a small amount of dish soap. Yes, soap is okay for this initial wash!
- Scrub the entire skillet, inside and out, with a brush or sponge. Don’t be shy.
- Rinse it completely to remove all soap.
- Immediately dry your skillet with a clean towel. Then, place it on a burner over medium-low heat for 5-10 minutes. This ensures it’s bone dry and prevents flash rust.
Step 2: Apply a Thin Layer of Oil
This is where the magic begins. The key here is “thin.” Too much oil will result in a sticky, gummy surface, not a smooth one.
- Remove the skillet from the heat once it’s completely dry and slightly warm.
- Pour about a teaspoon of your chosen high smoke point oil (like grapeseed or vegetable oil) onto a clean, lint-free cloth or paper towel.
- Rub the oil thoroughly over every single surface of the skillet – inside, outside, handle, and bottom.
- Now, here’s the crucial part: take a fresh, dry cloth or paper towel and wipe the skillet down again. You want to wipe off as much oil as possible. It should look like there’s no oil left on the surface, just a faint sheen. Think of it as buffing it almost dry.
If you leave too much oil, it will pool and become sticky when heated. Trust us, less is more here.
Step 3: Bake Your Skillet
Time to bake that oil onto the iron!
- Preheat your oven to a high temperature, typically between 450°F and 500°F (232°C and 260°C).
- Place a sheet of aluminum foil on the bottom rack of your oven. This will catch any oil drips.
- Carefully place your oiled skillet upside down on the middle rack. This prevents oil from pooling inside the cooking surface.
- Bake for one hour. You might notice some smoke, which is normal as the oil polymerizes. Ensure your kitchen is well-ventilated.
Step 4: Cool Down and Repeat
Patience is a virtue, especially with cast iron.
- After an hour, turn off the oven and leave the skillet inside to cool down completely. This can take an hour or two. Don’t rush it!
- Once cool enough to handle, remove the skillet. It should look darker and feel smooth, not sticky.
- Repeat the entire oiling and baking process 3-5 times. We found that multiple thin layers create a much more durable and effective seasoning than one thick layer (Cleveland Clinic).
Each time you repeat, the surface will become darker and more non-stick. You’re building up that protective barrier. It’s like applying multiple coats of paint for a richer finish.
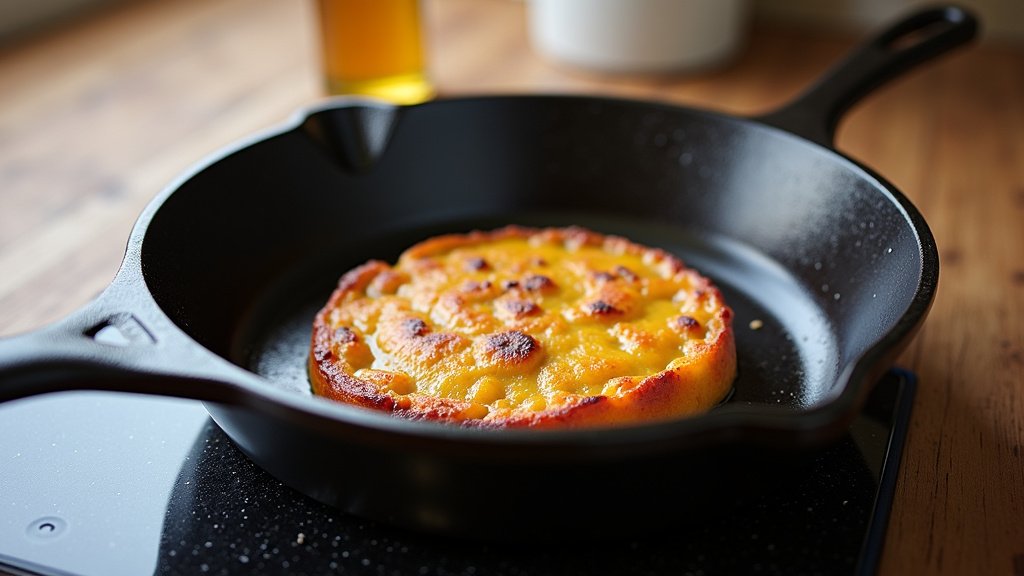
Maintaining Your Cast Iron’s Seasoning
Seasoning isn’t a one-and-done deal. It’s an ongoing process. Think of it as a living finish that gets better with use. The more you cook, especially with fats, the better your seasoning will become.
Cooking and Cleaning Tips for Long-Lasting Seasoning
How you use and care for your skillet makes a big difference in maintaining its seasoning. Here are some key points:
- Cook with Oil or Fat: Every time you cook, use a little oil or fat. This helps to reinforce the seasoning.
- Avoid High-Acid Foods: Tomatoes, wine, and citrus can strip away seasoning, especially on a new skillet. Save these for a well-seasoned, older pan.
- Clean Gently: After cooking, wash your skillet with hot water and a stiff brush or scraper. Avoid harsh soaps or abrasive scrubbers if possible. A small amount of mild soap is generally fine on well-seasoned iron.
- Dry Immediately: Always dry your skillet thoroughly after washing, ideally by placing it on a low burner for a few minutes.
- Lightly Oil After Cleaning: Once dry, apply another very thin coat of cooking oil to the entire surface. This protects it until the next use.
Don’t be afraid to use your cast iron. The more you cook with it, the better it gets. Each meal contributes to its story and its seasoning.
Conclusion
Seasoning your new cast iron skillet is more than just a chore; it’s the first step in a rewarding culinary journey. By carefully cleaning, thinly oiling, and baking your skillet multiple times, you’re building a foundation for years of incredible meals. Remember, it’s an ongoing relationship. Each time you cook with oil and clean it gently, you’re reinforcing that non-stick layer. Don’t be afraid to use it often!
You now have the knowledge to give your cast iron the best start. Get cooking and enjoy the amazing flavors only a well-seasoned skillet can provide!
Frequently Asked Questions
How often should I season my new cast iron skillet?
After the initial 3-5 seasoning rounds, you don’t need to re-season it in the oven frequently. Instead, focus on maintaining the seasoning with regular use. We found that cooking with fats and proper cleaning helps build layers naturally.
What if my cast iron skillet gets sticky after seasoning?
A sticky surface usually means too much oil was left on the skillet before baking. To fix it, scrub the sticky areas with a stiff brush and hot water, then repeat the oiling and baking steps with a much thinner coat of oil.
Can I use steel wool or harsh scrubbers on my cast iron?
For initial cleaning of a new skillet, a stiff brush is fine. Once seasoned, avoid steel wool or overly abrasive scrubbers, as these can strip away the seasoning you’ve worked hard to build. A nylon brush or scraper is generally safer for day-to-day cleaning.
Is it okay for my cast iron skillet to smoke in the oven during seasoning?
Yes, some smoke is normal. This happens as the oil reaches its smoke point and polymerizes onto the cast iron. Just ensure your kitchen is well-ventilated during the baking process to prevent a smoky house.
My pre-seasoned skillet says it’s ready to use. Why do I need to season it myself?
While pre-seasoned skillets have a factory layer, we found that adding your own initial layers creates a much more robust and durable finish. It customizes the surface to your cooking style and ensures a better non-stick performance from day one.
